How to Weave in Ends Securely

One of the most important parts of crochet—yet the most overlooked part—is finishing off, or rather learning to weave in the ends. When my Nonna taught me to crochet way back in 1974, there were two things she told me that continue to reverberate in my head: 1) The back of the piece must look as good as the front, even if no one else is going to see it. 2) Finishing is what makes your piece shine. She also taught me a foolproof way to weave in ends without the possibility of having them pull out with wear and washing. I have a ripple blanket typical of the 1970s I made when I was 12, and with all the use and washing, the ends are still hidden. They have lasted 40+ years so far.

How I weave in ends

To weave in ends like Nonna taught me, follow these steps: 1) Always end off at the end of a row, no matter how much yarn you have left to complete a portion of the next row. In the round, still, end off at the end of the round. Be sure you have 6 to 8 inches of a tail to use for weaving—no less. 2) Always work up and down through the rows, never across the rows. Working across the rows can cause the fabric to ripple, and the weaving will be very noticeable. 3) Always work on the wrong side of your project. 
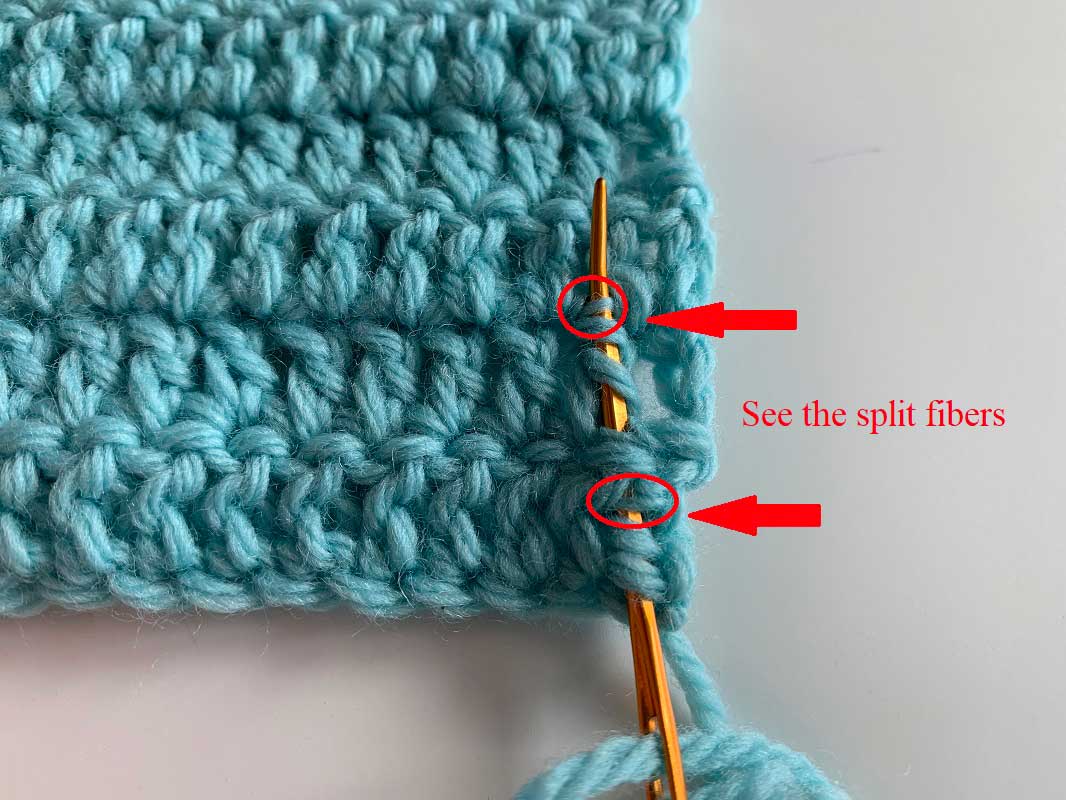
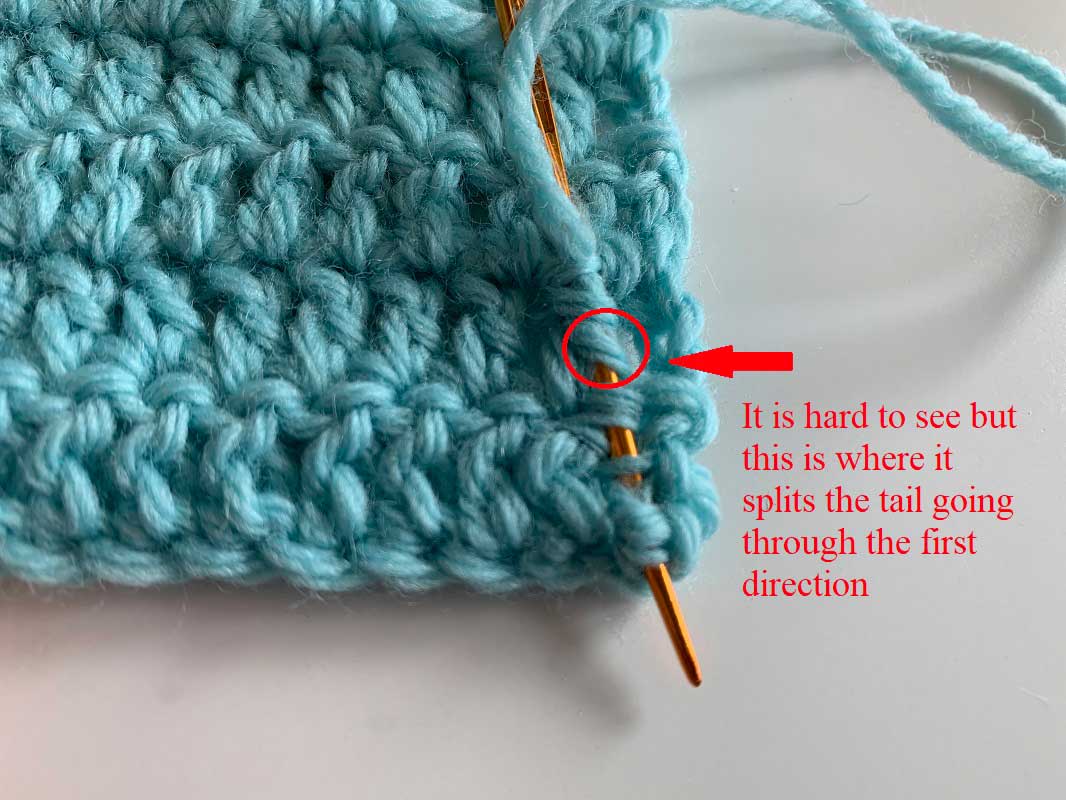
4) Using a steel needle that is the correct size for your yarn, slip the needle under two strands of yarn; when you get to the third, split the strand. (Yes, you read that right.) Then again, slip under two strands, split the third. Repeat this until you have woven through 1 to 2 inches. (If your yarn has silk or some other slippery fiber, you may want to go farther; 3 to 4 inches is not uncommon.) 5) Pull the tail through tightly, but not so tight to ripple the fabric. Pull the fabric when you are done to smooth out any bumps and further hide the woven tail. 6) Now go back the same way you came using the same slip two, split one technique. When splitting, if you can find it, split the yarn you wove through in step 5 at least twice. 7) Ending at the same place you began with a split, pull the tail through tightly, being sure not to ripple the fabric. Pull the fabric to smooth out and remove bumps and further hide the tail. Give just a gentle tug before you clip the remaining tail off and smooth again to hide the end in the fabric. 
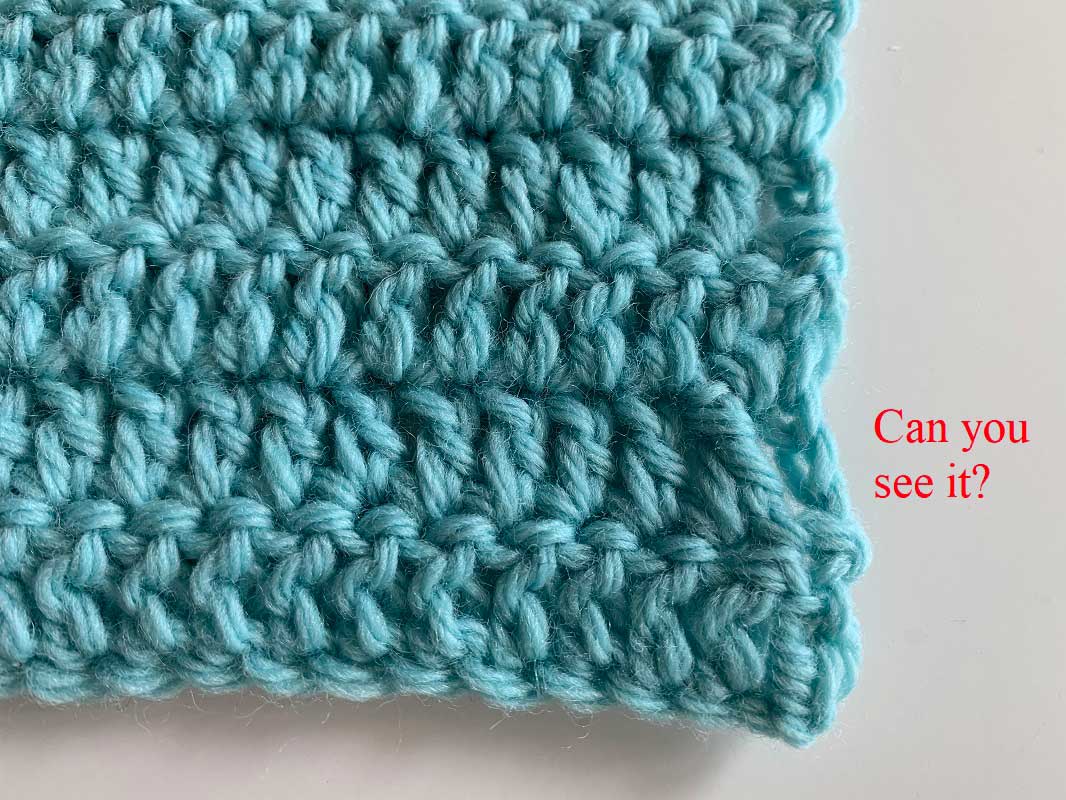
Be patient: it takes practice. But when it’s done right, not only will the tail not come out, but you won’t have a huge noticeable bump in your fabric. In fact, no one will know it is there.
Make a comment
  • (will not be published)

29 Responses to “How to Weave in Ends Securely”

  1. D Johnstone

    Have you read your instructions? In step 5, at the end, it states to go through the tail you made in Step 5. Do you mean in Step 4? Also, have you noticed there is no Step 6??

    Reply
  2. Sandy Desy

    I always wondered if I was doing it right. Thank you. Much appreciated. Apparently I wasn’t.

    Reply
  3. Krishna Sethi

    Never tried before, certainly sounds feasible and good ideas, will definitely give it a go

    Reply
  4. Deb McNeil

    Great hint – thank you so much. I have been doing similar, along the rows but seeing that across the rows and the splitting is amazing 👏🤗

    Reply
  5. Shelly

    i have always used the magic knot or russian join when changing colors for a smooth transition and ive heard to lock the stitches by snaking the tail back and forth through the work so that it is less likely to pull out. i can see the area that was weaved in and its very obvious where the yarn was weaved in at.

    Reply
    • Linda

      If the project has color changes, won’t the weaving be visible going up and down the rows? This is a great idea for a project all the same color. Otherwise, it doesn’t seem feasible.

      Reply
      • Customer Service

        There really is no one size fits all way to weave in ends – this article shows one way and it is very useful, but not the only possible way. I always consider weaving in ends more of an art than a science.

        So what I would say in that case is when I know I will not have too much room in which to weave in ends, I crochet over the tails whenever possible, then weave back a little bit – crocheting over the tails along is usually not super secure.

        Try to weave your tails into stitches of the same color, so they are less likely to show, and if even that is not an option, I crochet over the tails holding them closer to the wrong side of the work than the right side to try to prevent them peeking through, the again, leave a small amount of tail out that I did not crochet over to weave in the wrong side of any same color stitches.

        Mary Beth Temple

        Reply
  6. Sharon Kiellach

    My issue is where I’ve had to change colors at multiple stitches (graphghan) and then I have to hide those ends. Hard to find an area to adequately weave.

    Reply
    • Customer Service

      There really is no one size fits all way to weave in ends – this article shows one way and it is very useful, but not the only possible way. I always consider weaving in ends more of an art than a science.

      So what I would say in that case is when I know I will not have too much room in which to weave in ends, I crochet over the tails whenever possible, then weave back a little bit – crocheting over the tails along is usually not super secure.

      Try to weave your tails into stitches of the same color, so they are less likely to show, and if even that is not an option, I crochet over the tails holding them closer to the wrong side of the work than the right side to try to prevent them peeking through, the again, leave a small amount of tail out that I did not crochet over to weave in the wrong side of any same color stitches.

      Mary Beth Temple

      Reply
  7. Tina Warren

    Thank you for you tips! I’ve taught myself by looking at a pair of slippers my grandmother made. She passed away when I was 11, so I didn’t get these wonderful tips.

    Reply
  8. Dawn

    I hate to say anything negative. I was really excited to learn this technique. But I can definitely see where it was woven in on the fabric in the picture and it looks very obvious to me. I guess I’ll give it a try and hope that mine might be a bit less visible. Thank you for sharing this tip with us, though!

    Reply
  9. Carol

    Excellent! My ends sometimes are good and sometimes they show after a few washes. Thank you so much for this. I’m going to try it out on my current project

    Reply
  10. Luanne Stevens

    How do you do that when each row is a different color? That would really be noticeable

    Reply
  11. Rosie Knowles

    Wow!! thanks for the information, its something I learned, for sure this is how I will be doing my pieces from now on.

    Reply
  12. Sharon Fagan

    I nevr knew that suggestion but will try it. I like to crochet and will look forward to other ideas that will help me become a better crocheter. thanks.

    Reply
      • Victoria Steel

        This is great, but what do you so when you’re on a 2 row strip repeat?

        Reply
        • Customer Service

          Hello Victoria, if you are working in a two-row stripe pattern, I would recommend not cutting the yarn, but letting it hang on the edge of your work until you need it again. You will have floats along the edge of your work, so if you are making something (like a blanket) where the edges will show, these floats can be covered up with a simple edging of single crochet (just crochet over the floats to encase them). Leaving the floats along the edges will eliminate many ends that you would otherwise need to weave in.

          Reply