The magic loop in crochet goes by many names. You may have heard it called magic ring, magic circle, disappearing loop, and more. Learn how to make the crochet magic loop.
The magic loop is actually quite magical. It’s easy once you get the hang of it, and it’s much neater and tidier than the standard chain-4 loop that many crochet patterns start with. The biggest advantage of the magic loop is that you can cinch it tight to make the center of your ring or project close to invisible.
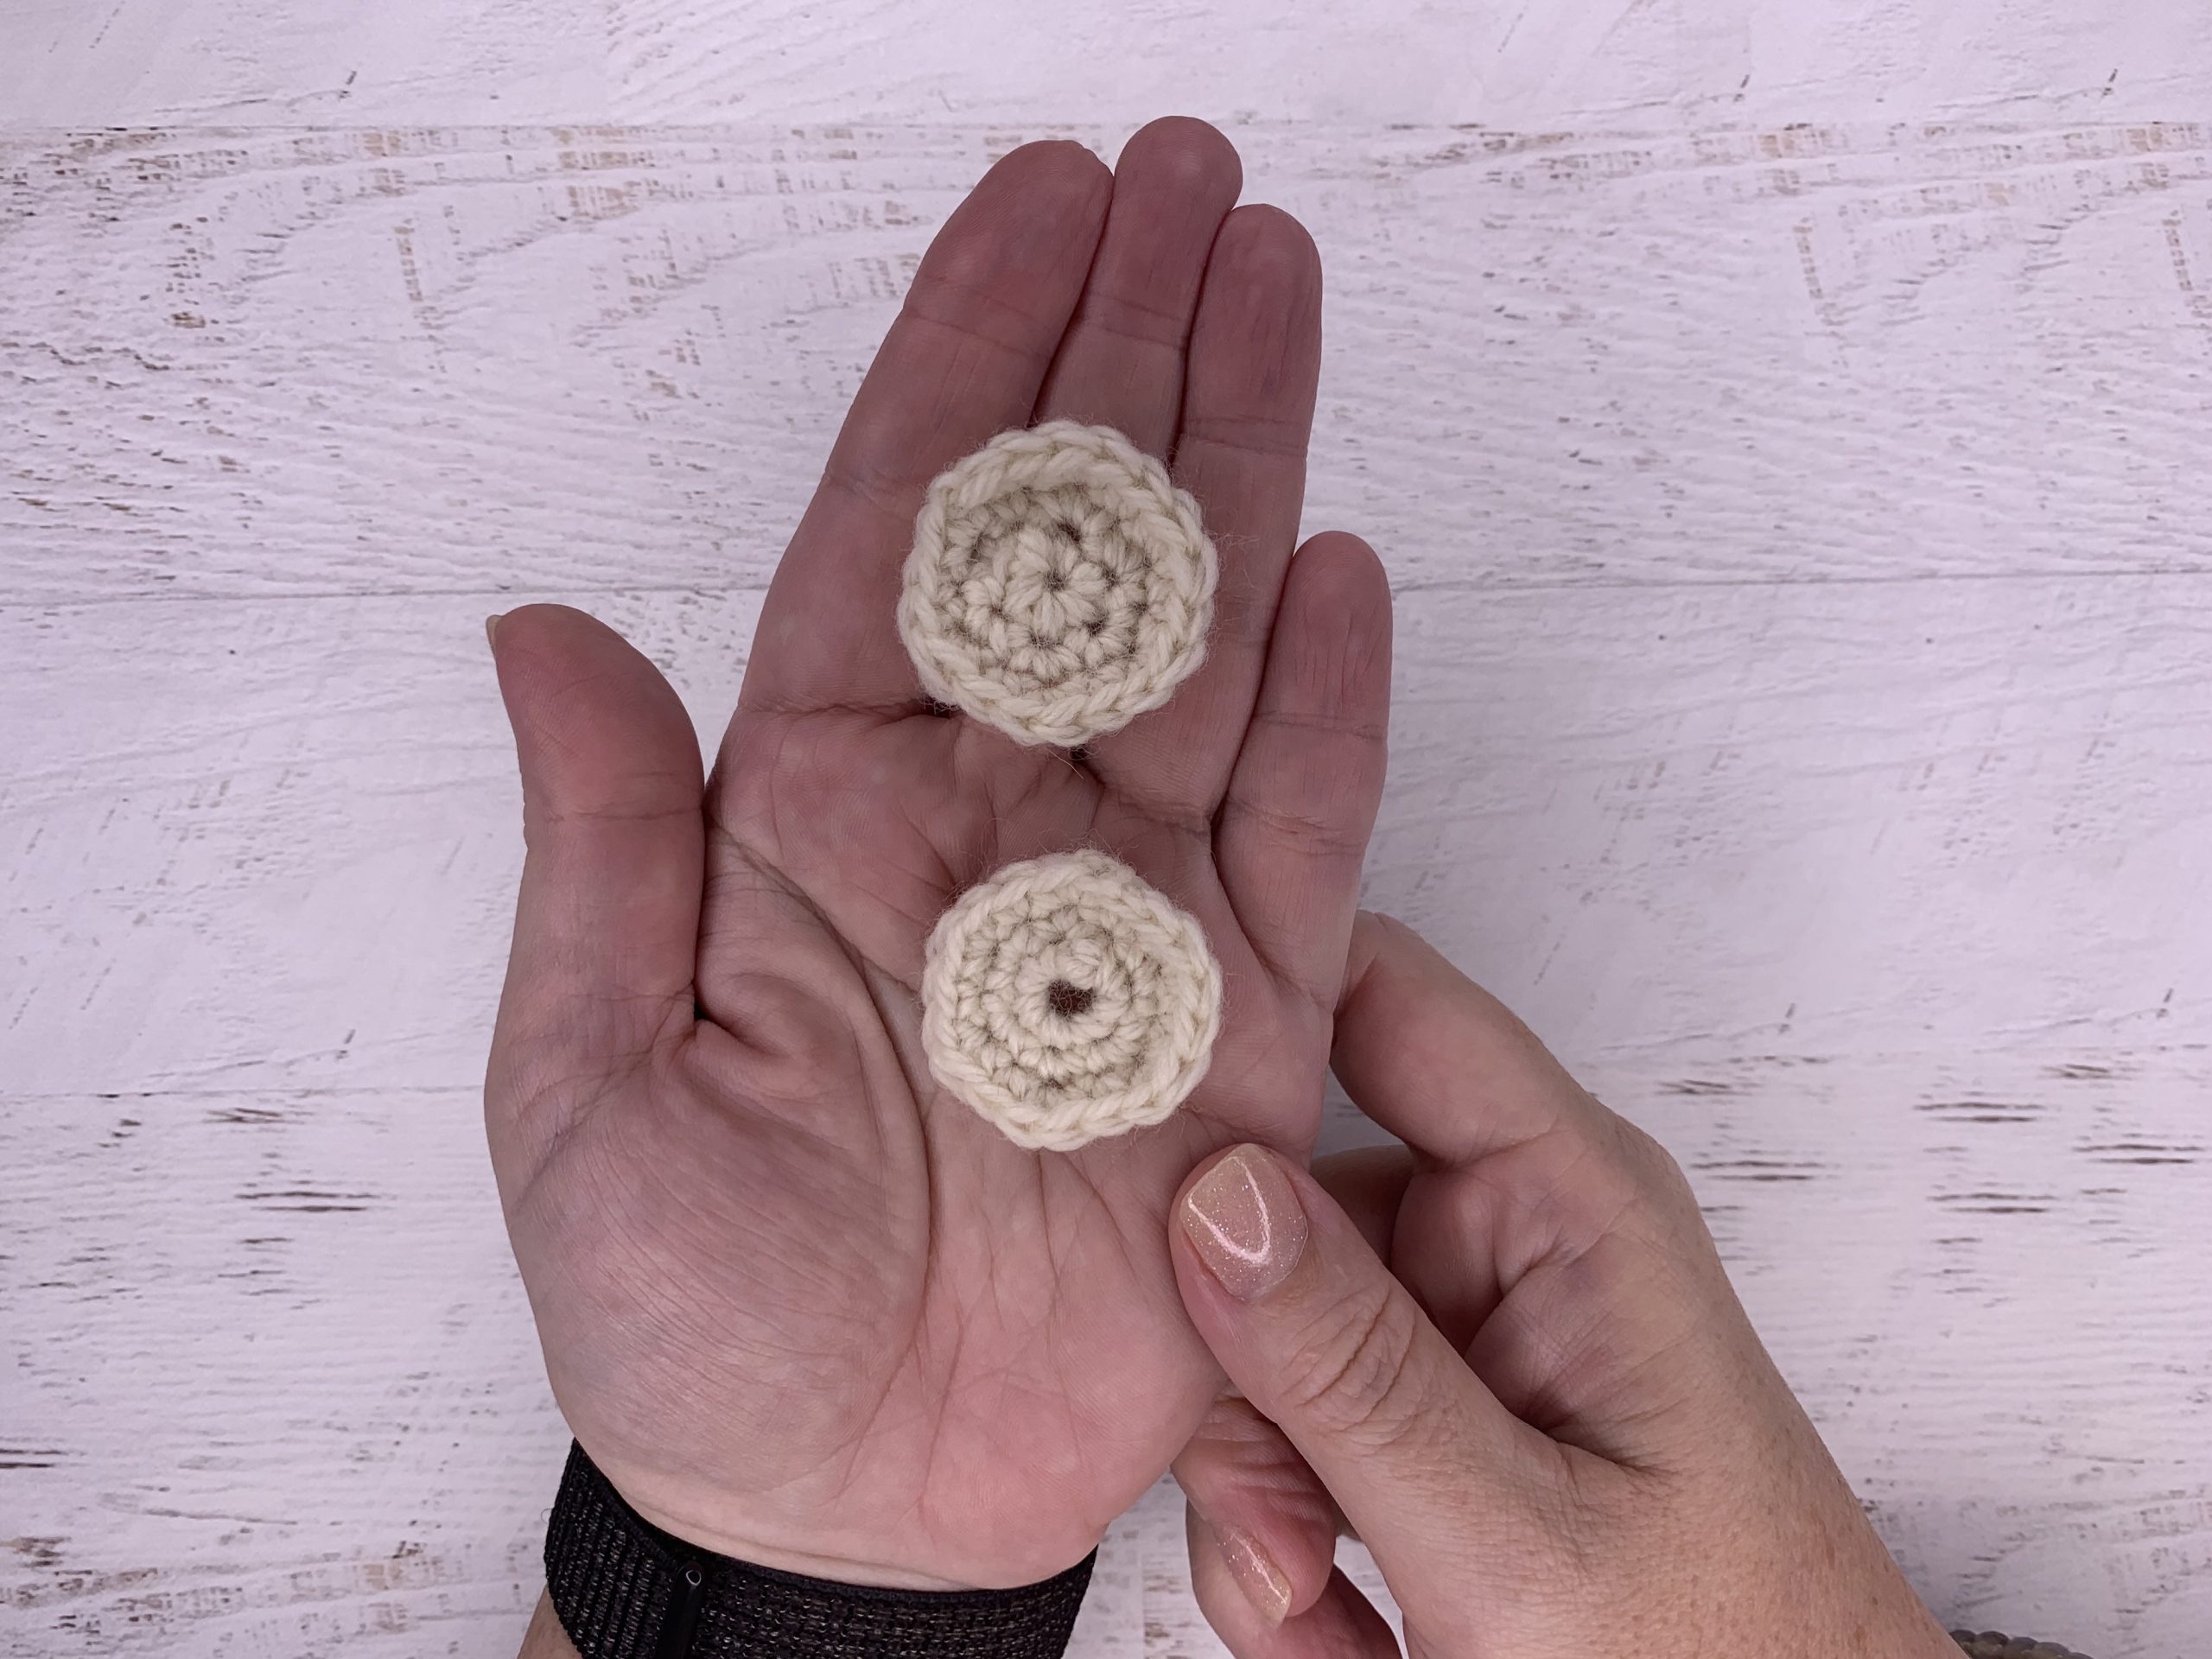
As you can see above there is a marked difference between the circles started with a magic loop (on the top) versus a chain 4 loop (on the bottom). You can use the tail end of the magic loop to cinch up the circle to make the tiniest hole that works for the yarn. The smaller the yarn the smaller the final hole will be. You can use a magic loop to begin any project that starts in the round. The only time I would advise against a magic loop is if you need that larger opening for decorative or useful purposes. So let’s learn how to work a magic loop step by step.
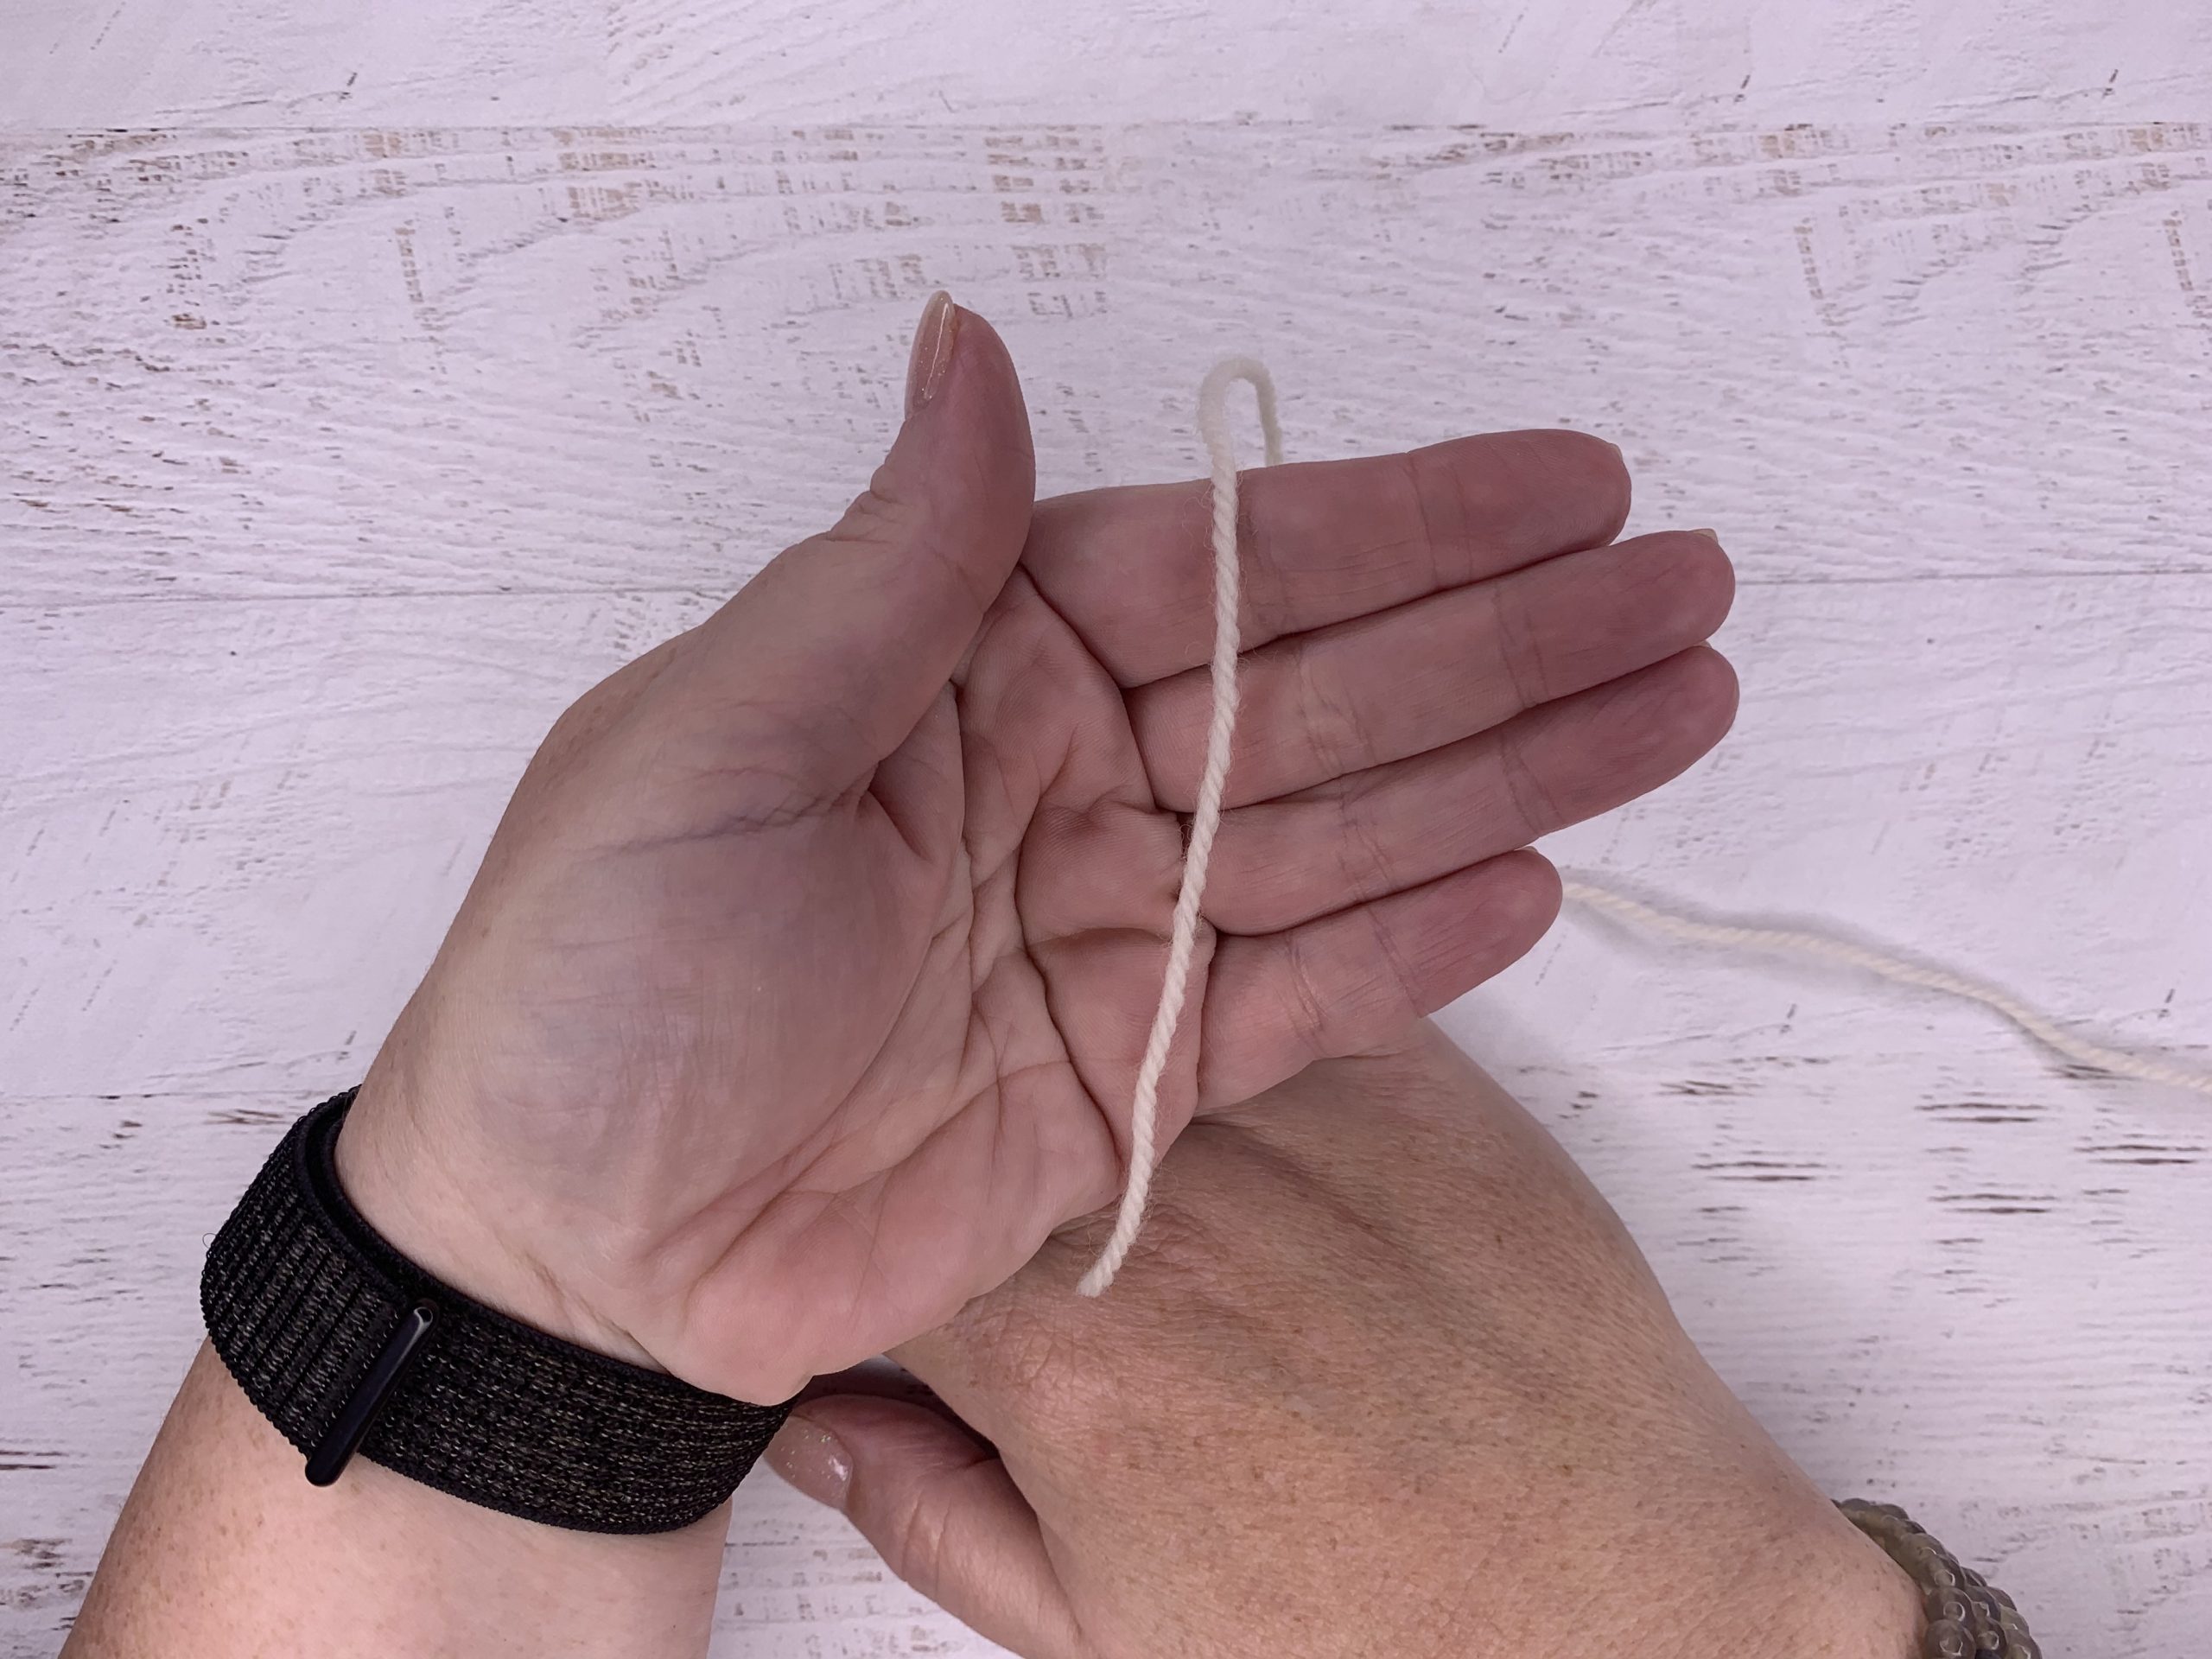
STEP ONE
Place the tail of the yarn in your palm with the end hanging off the bottom edge of your palm as shown. The working yarn should be draped over the top edge of your hand as shown with the yarn hanging down over the back of your hand.
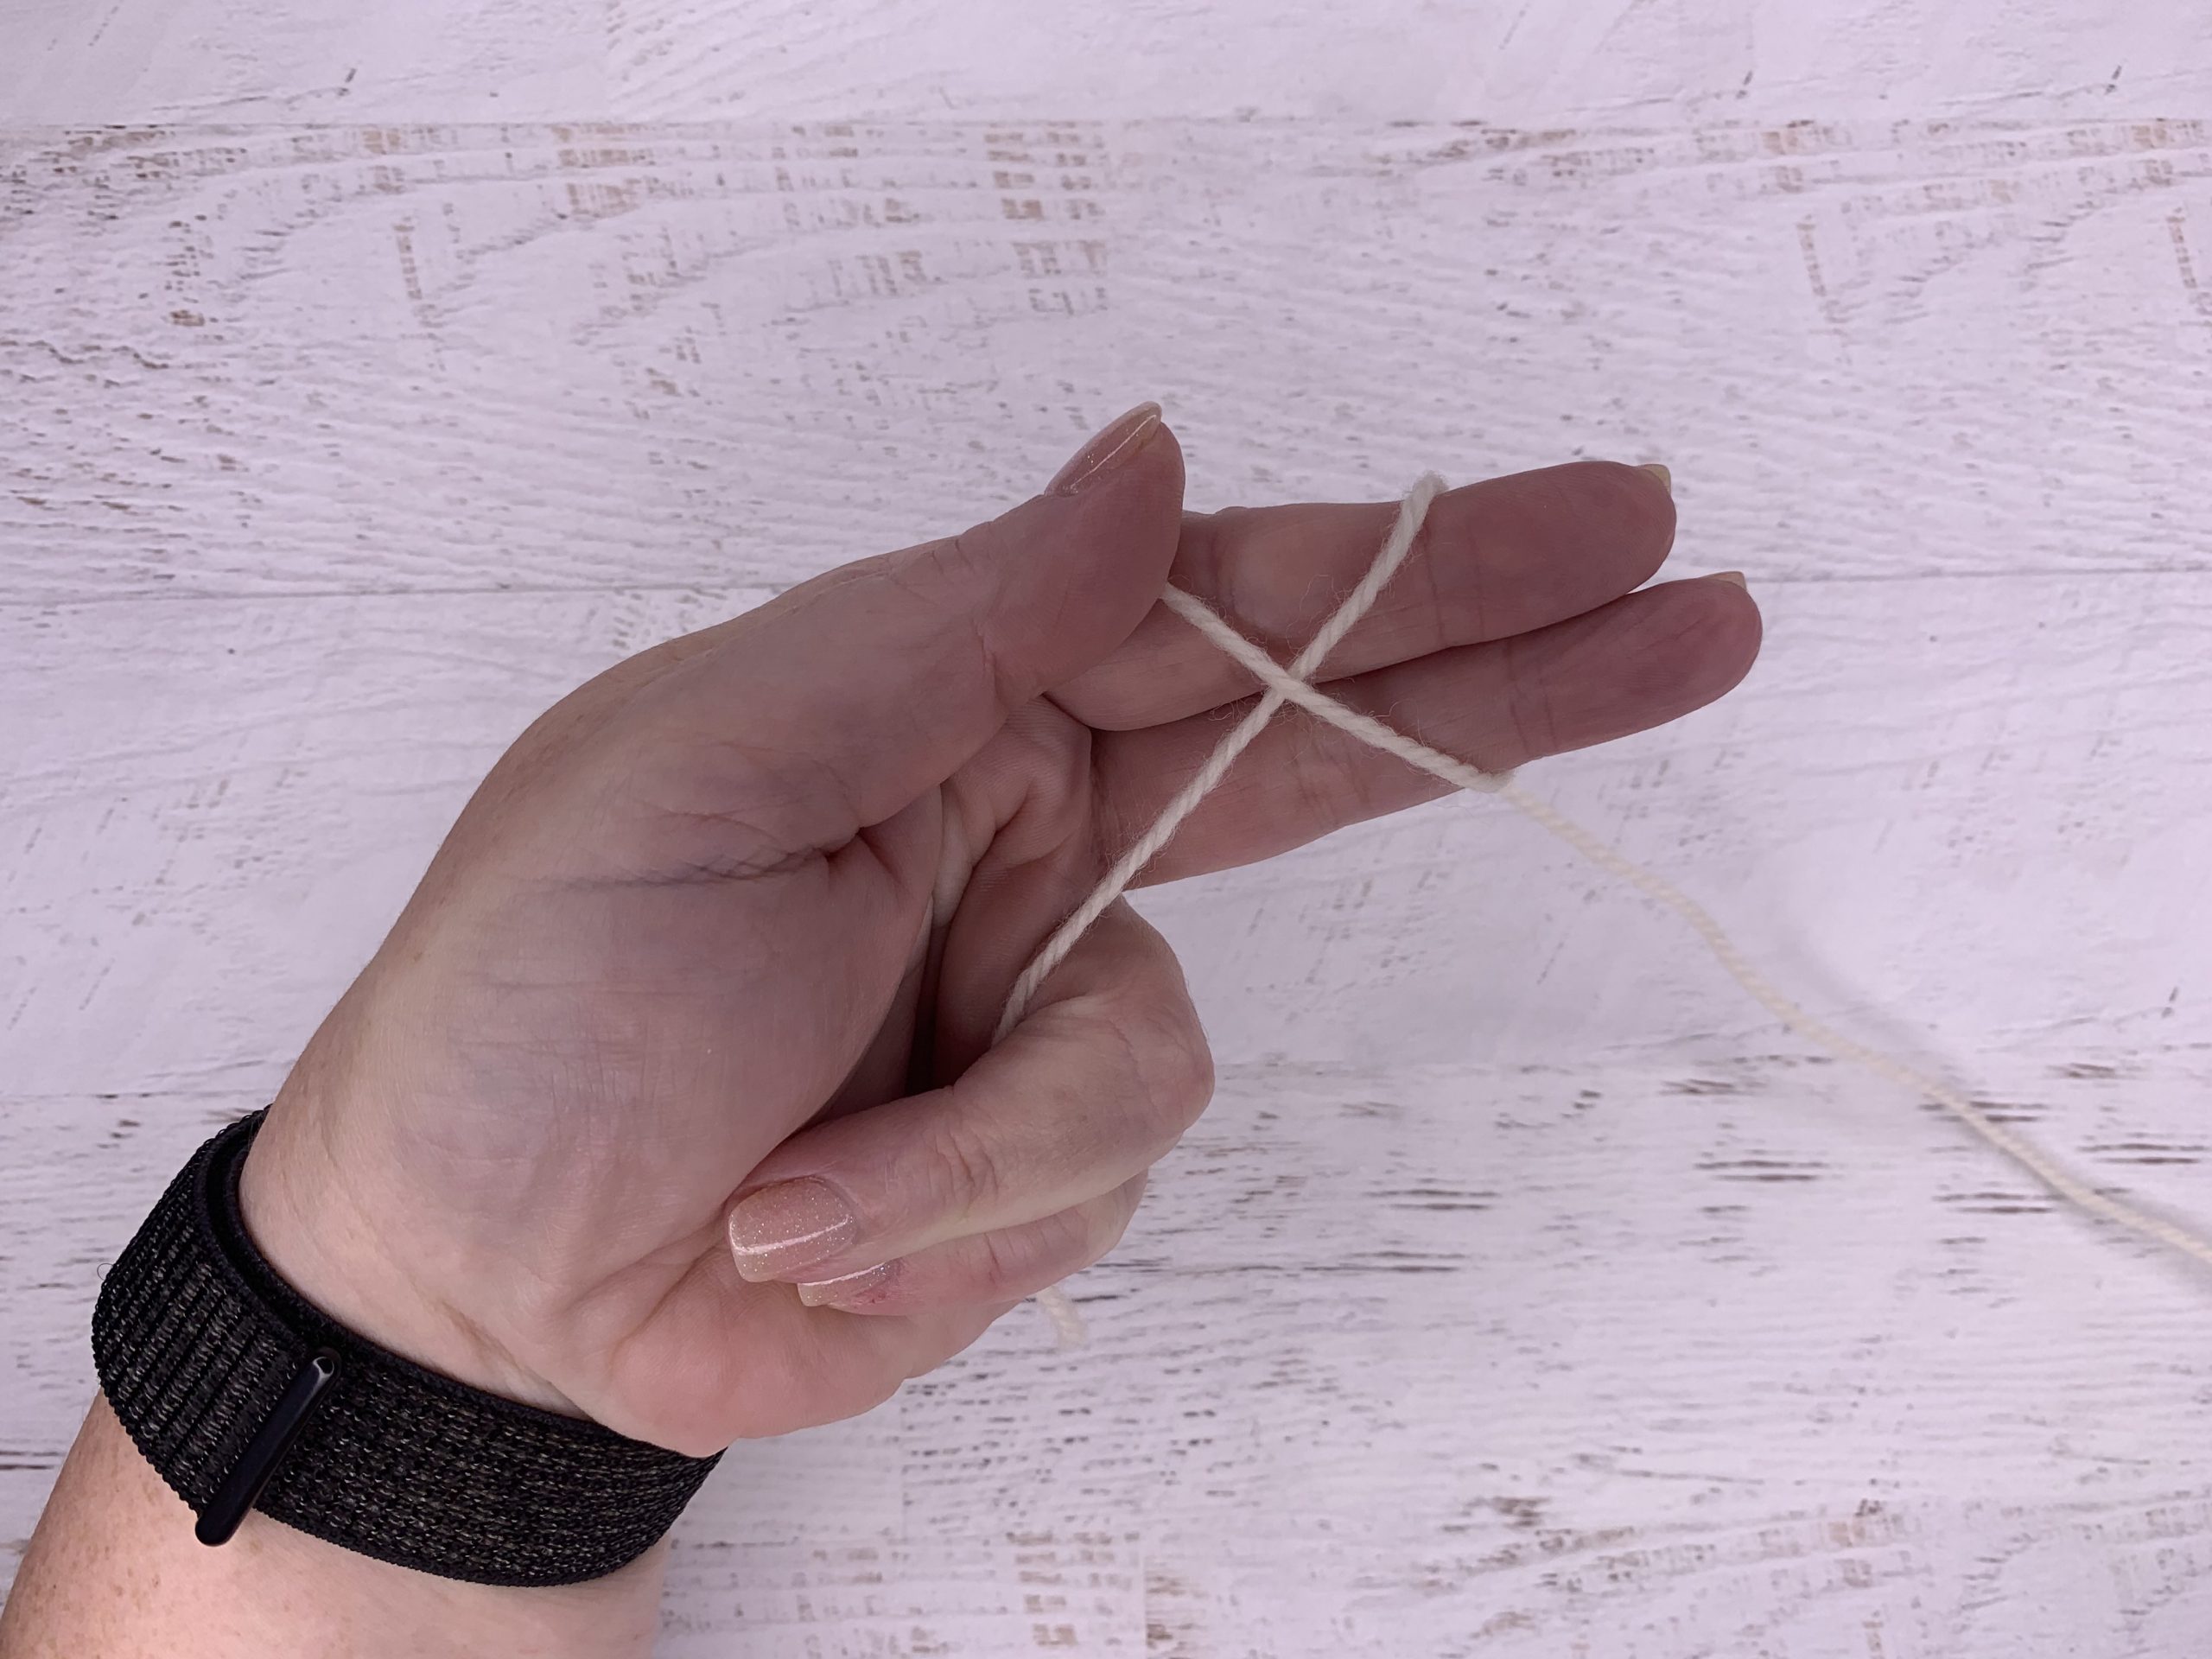
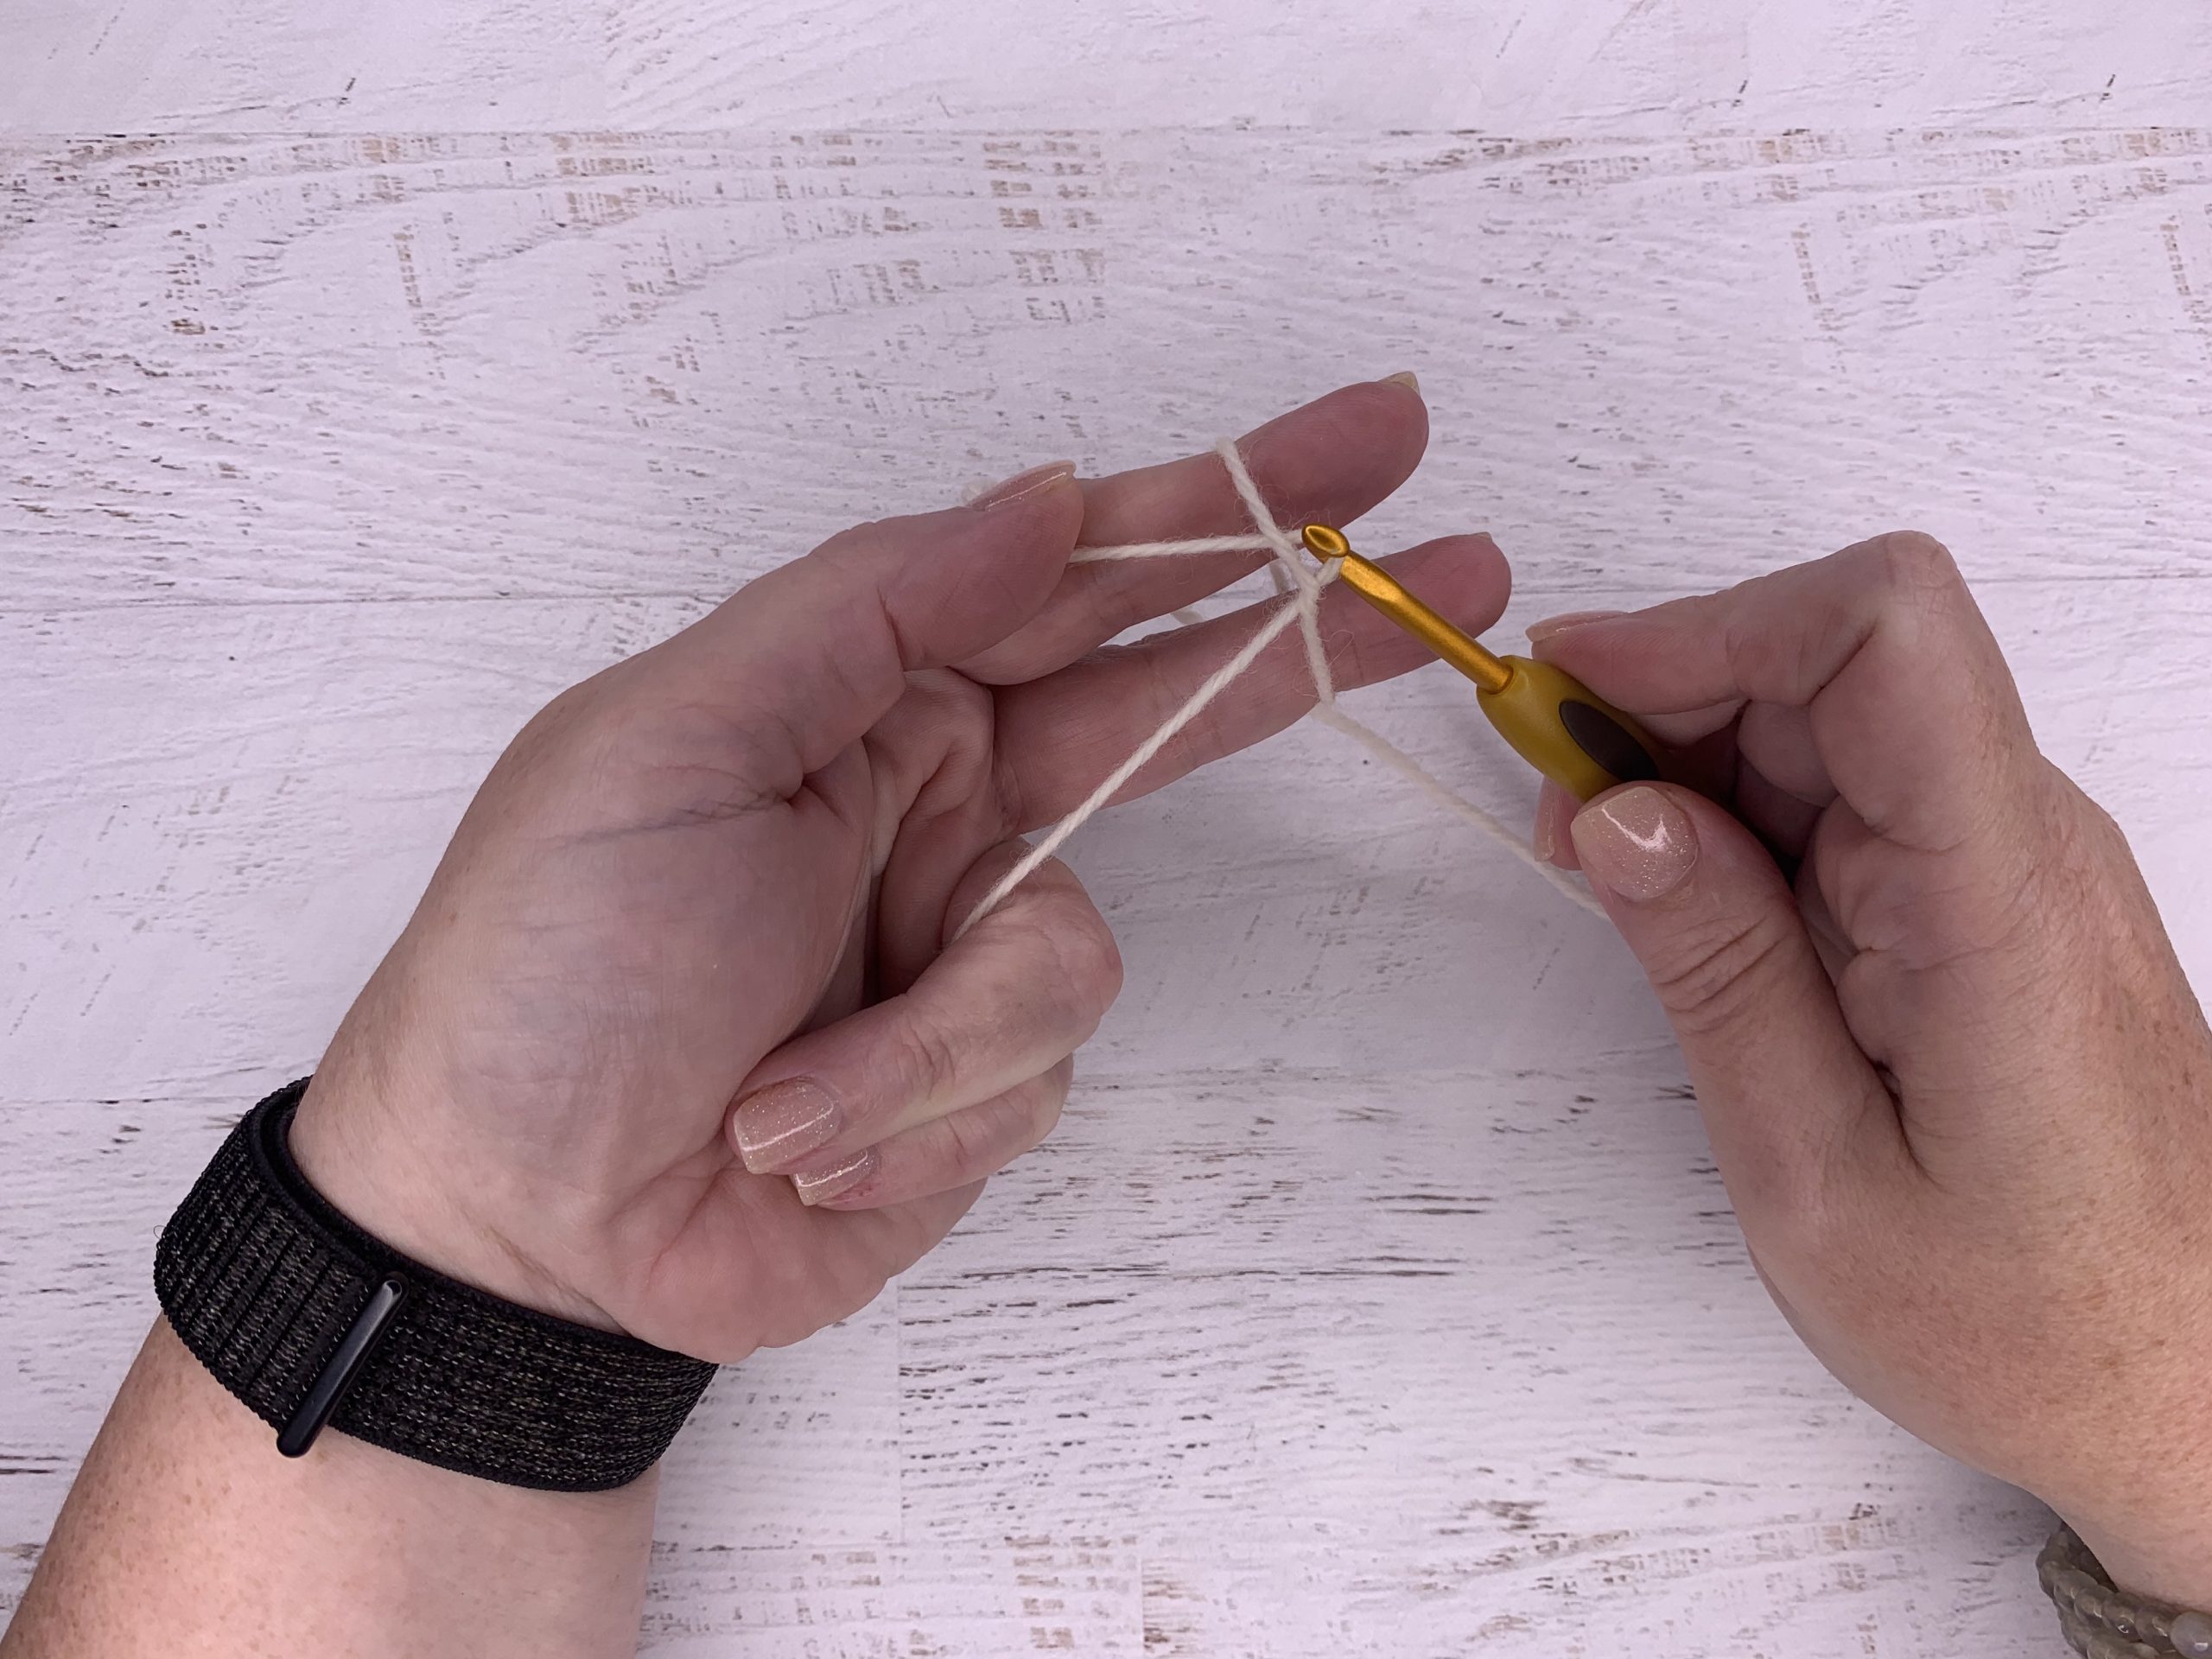
STEP TWO
Wrap the working yarn back over your index and middle fingers, making an X as shown with the working end of the yarn hanging down over the back of your hand again. Use your ring finger and pinky finger from your left hand to hold down the tail yarn and keep the tension on the loop.
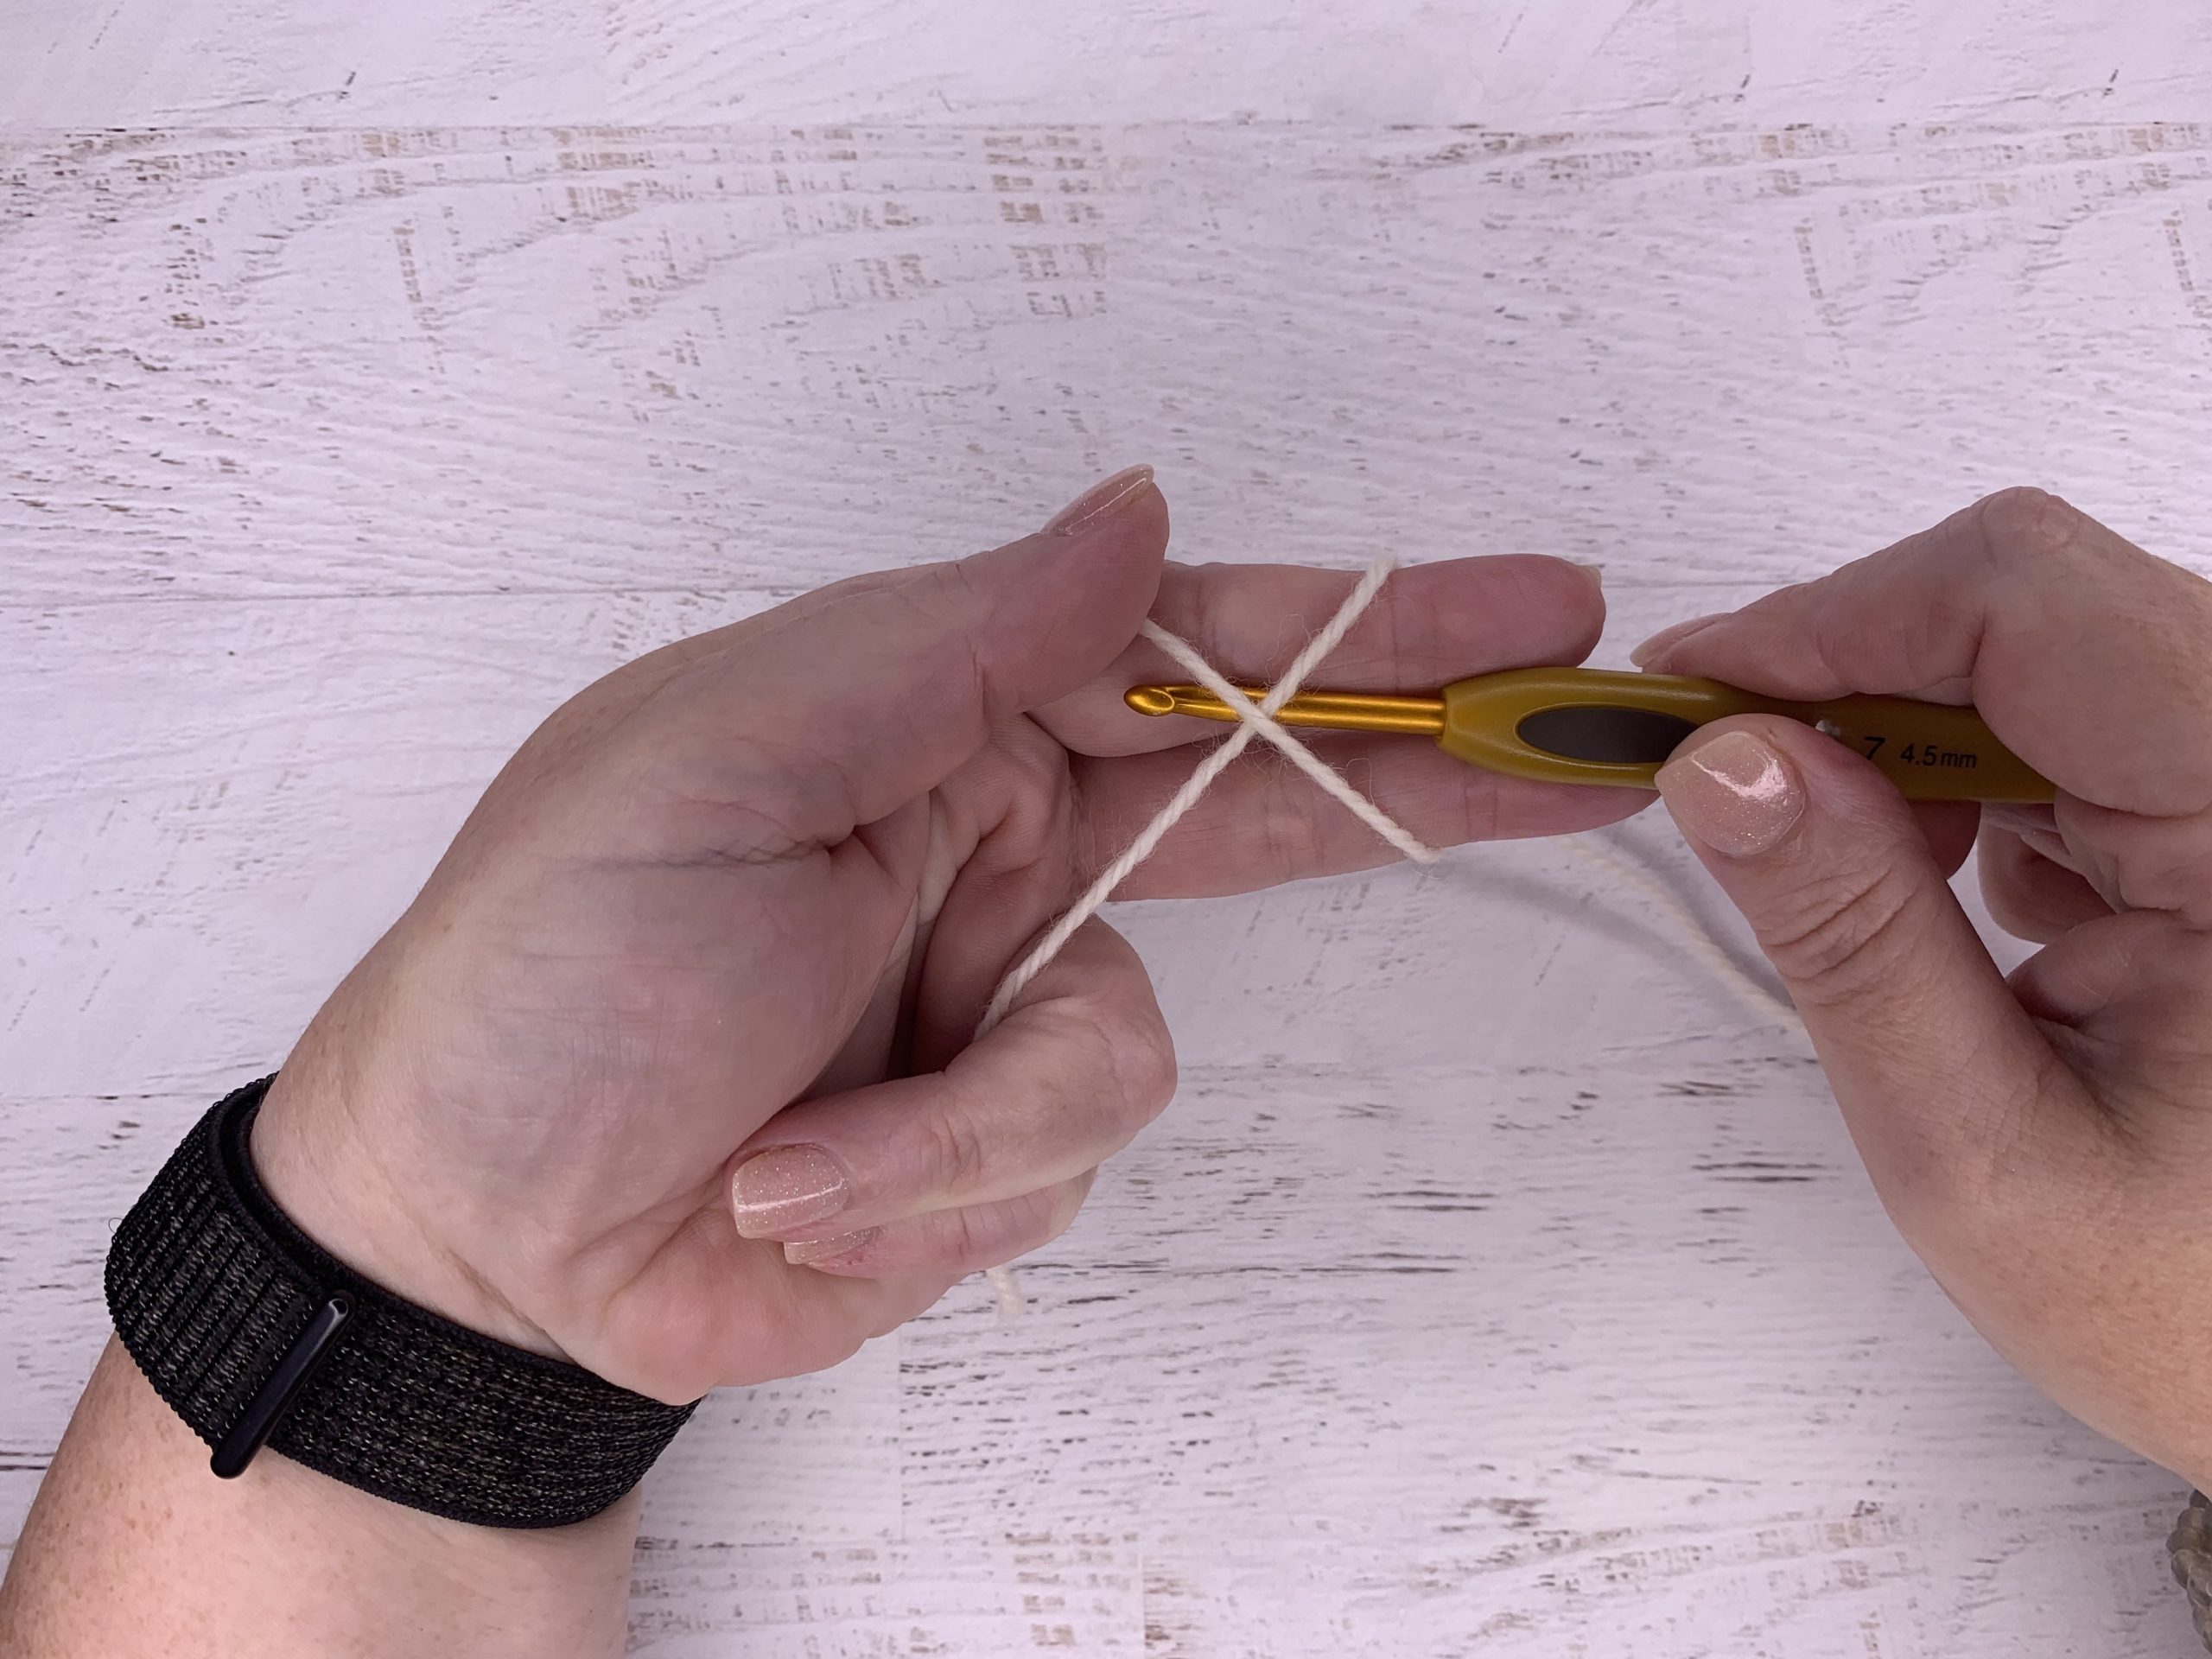
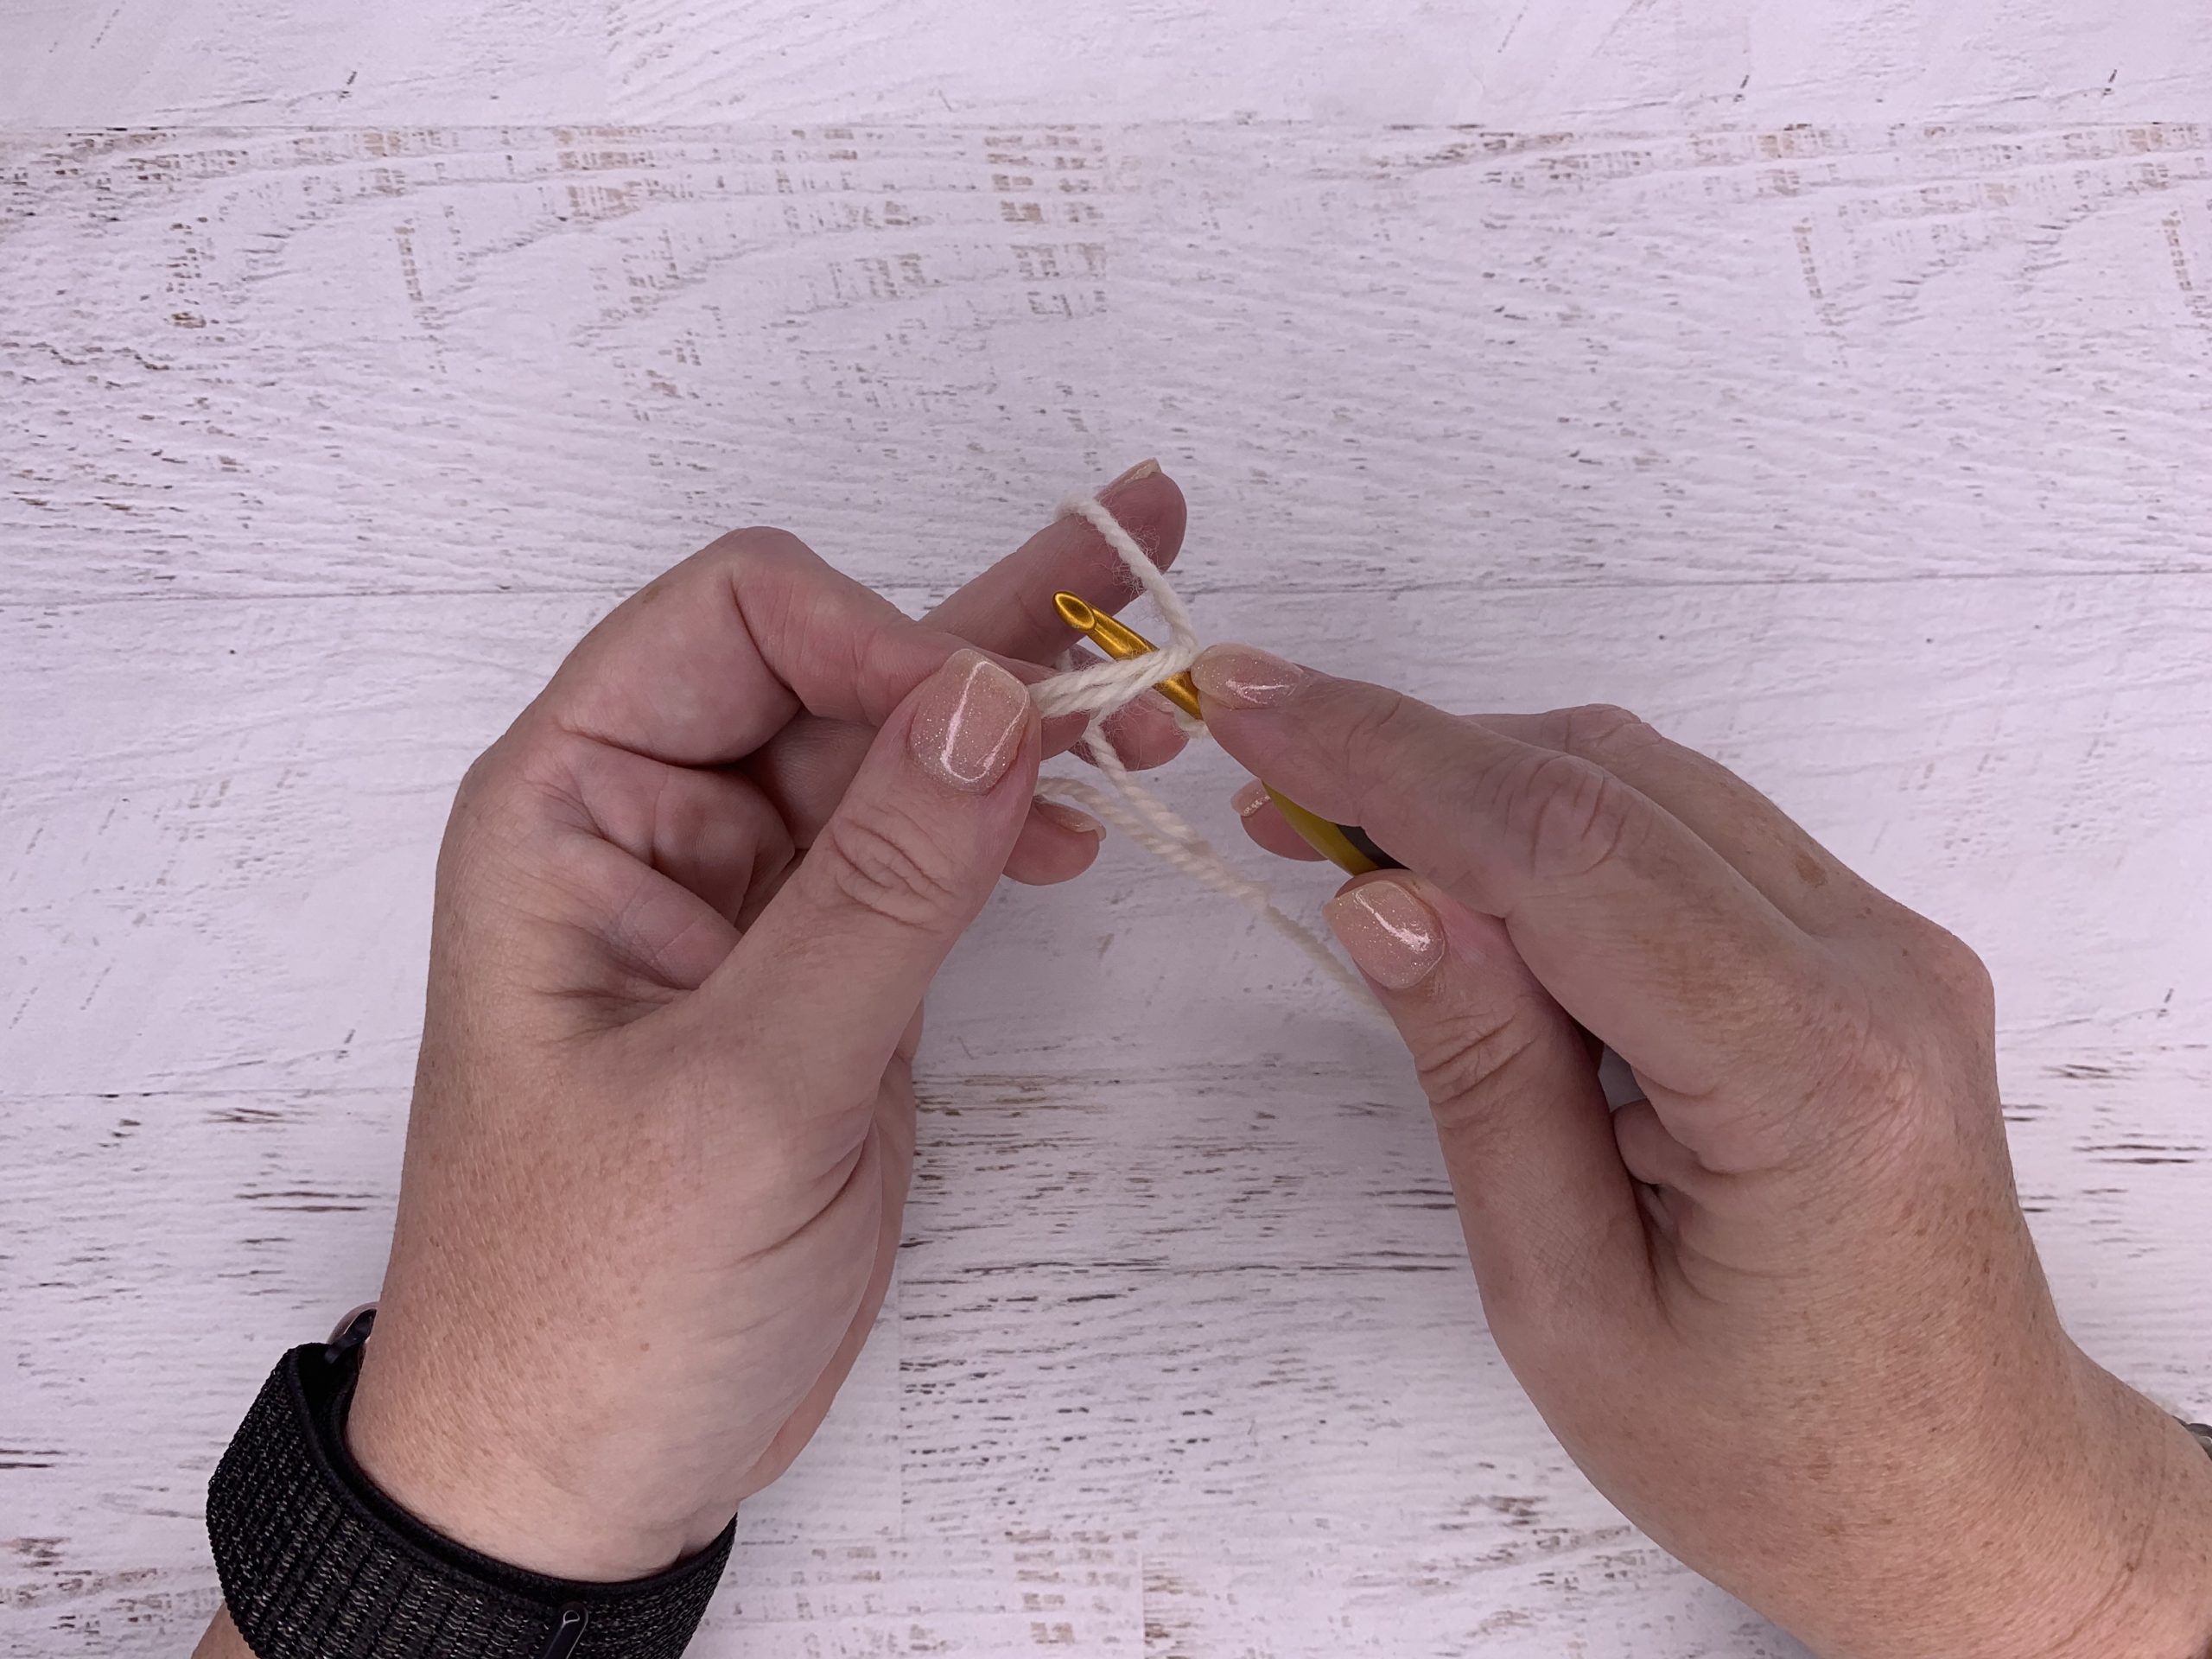
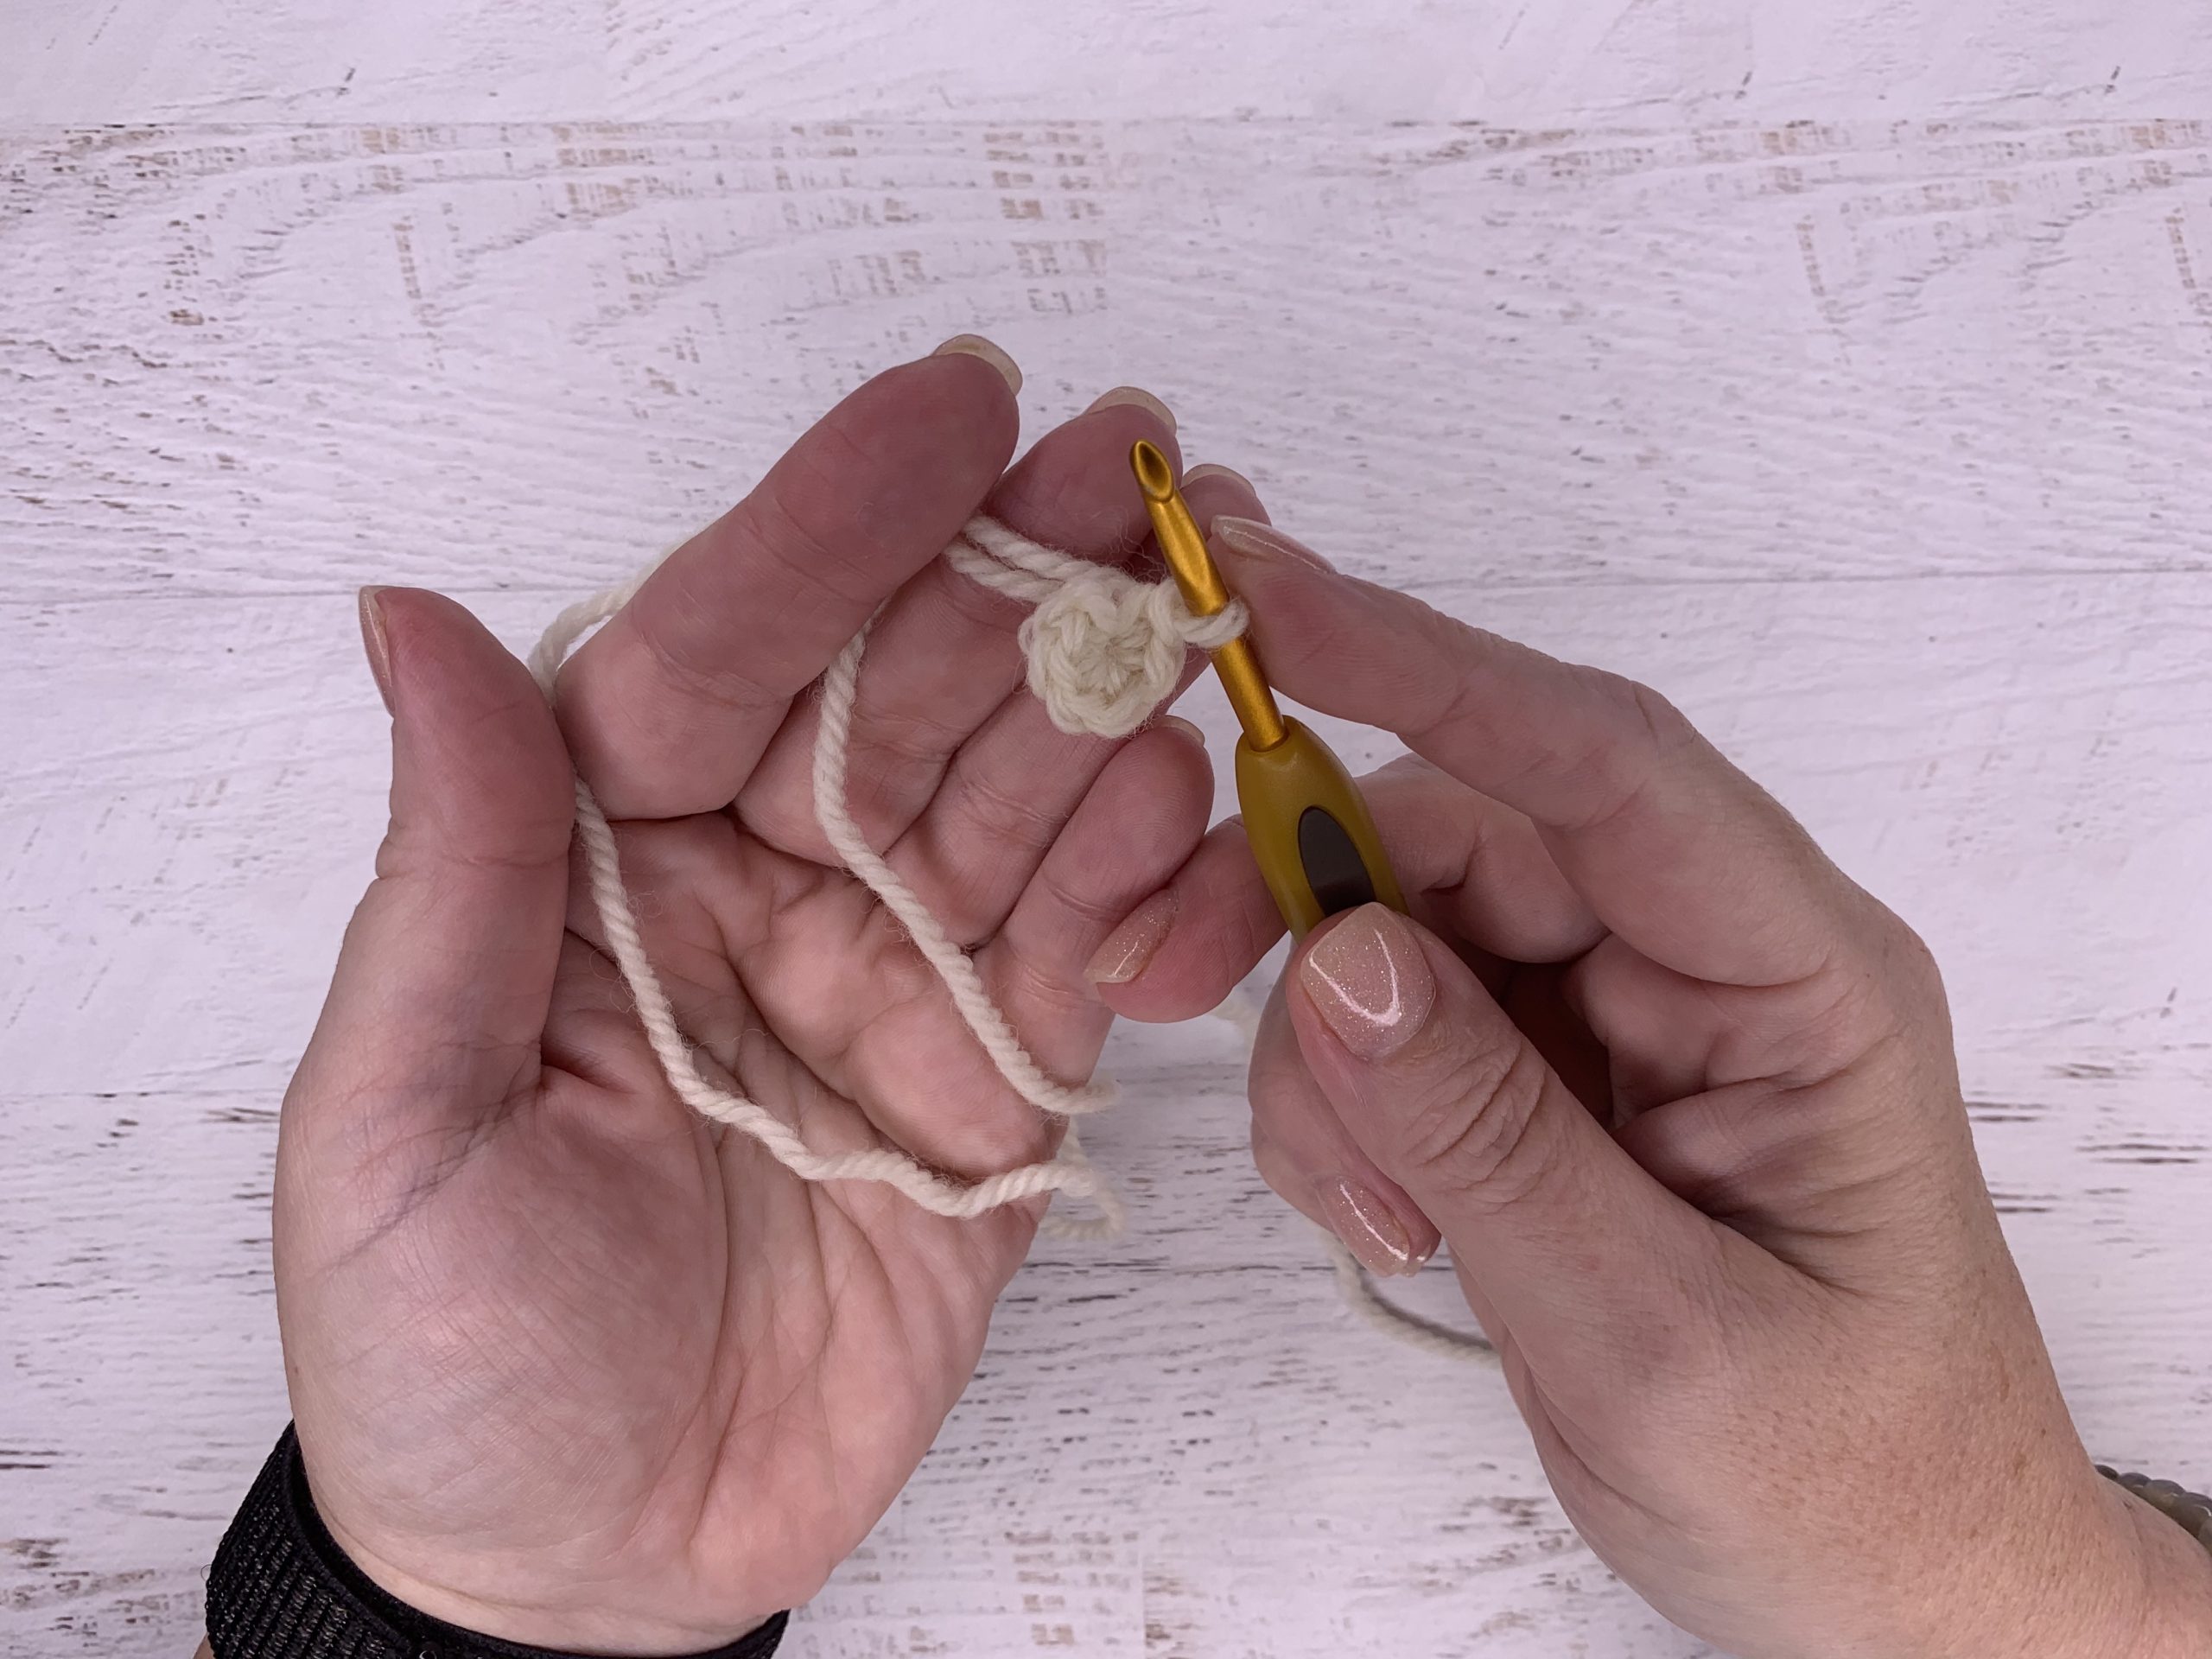
STEP THREE
Insert your hook from right to left under the X.
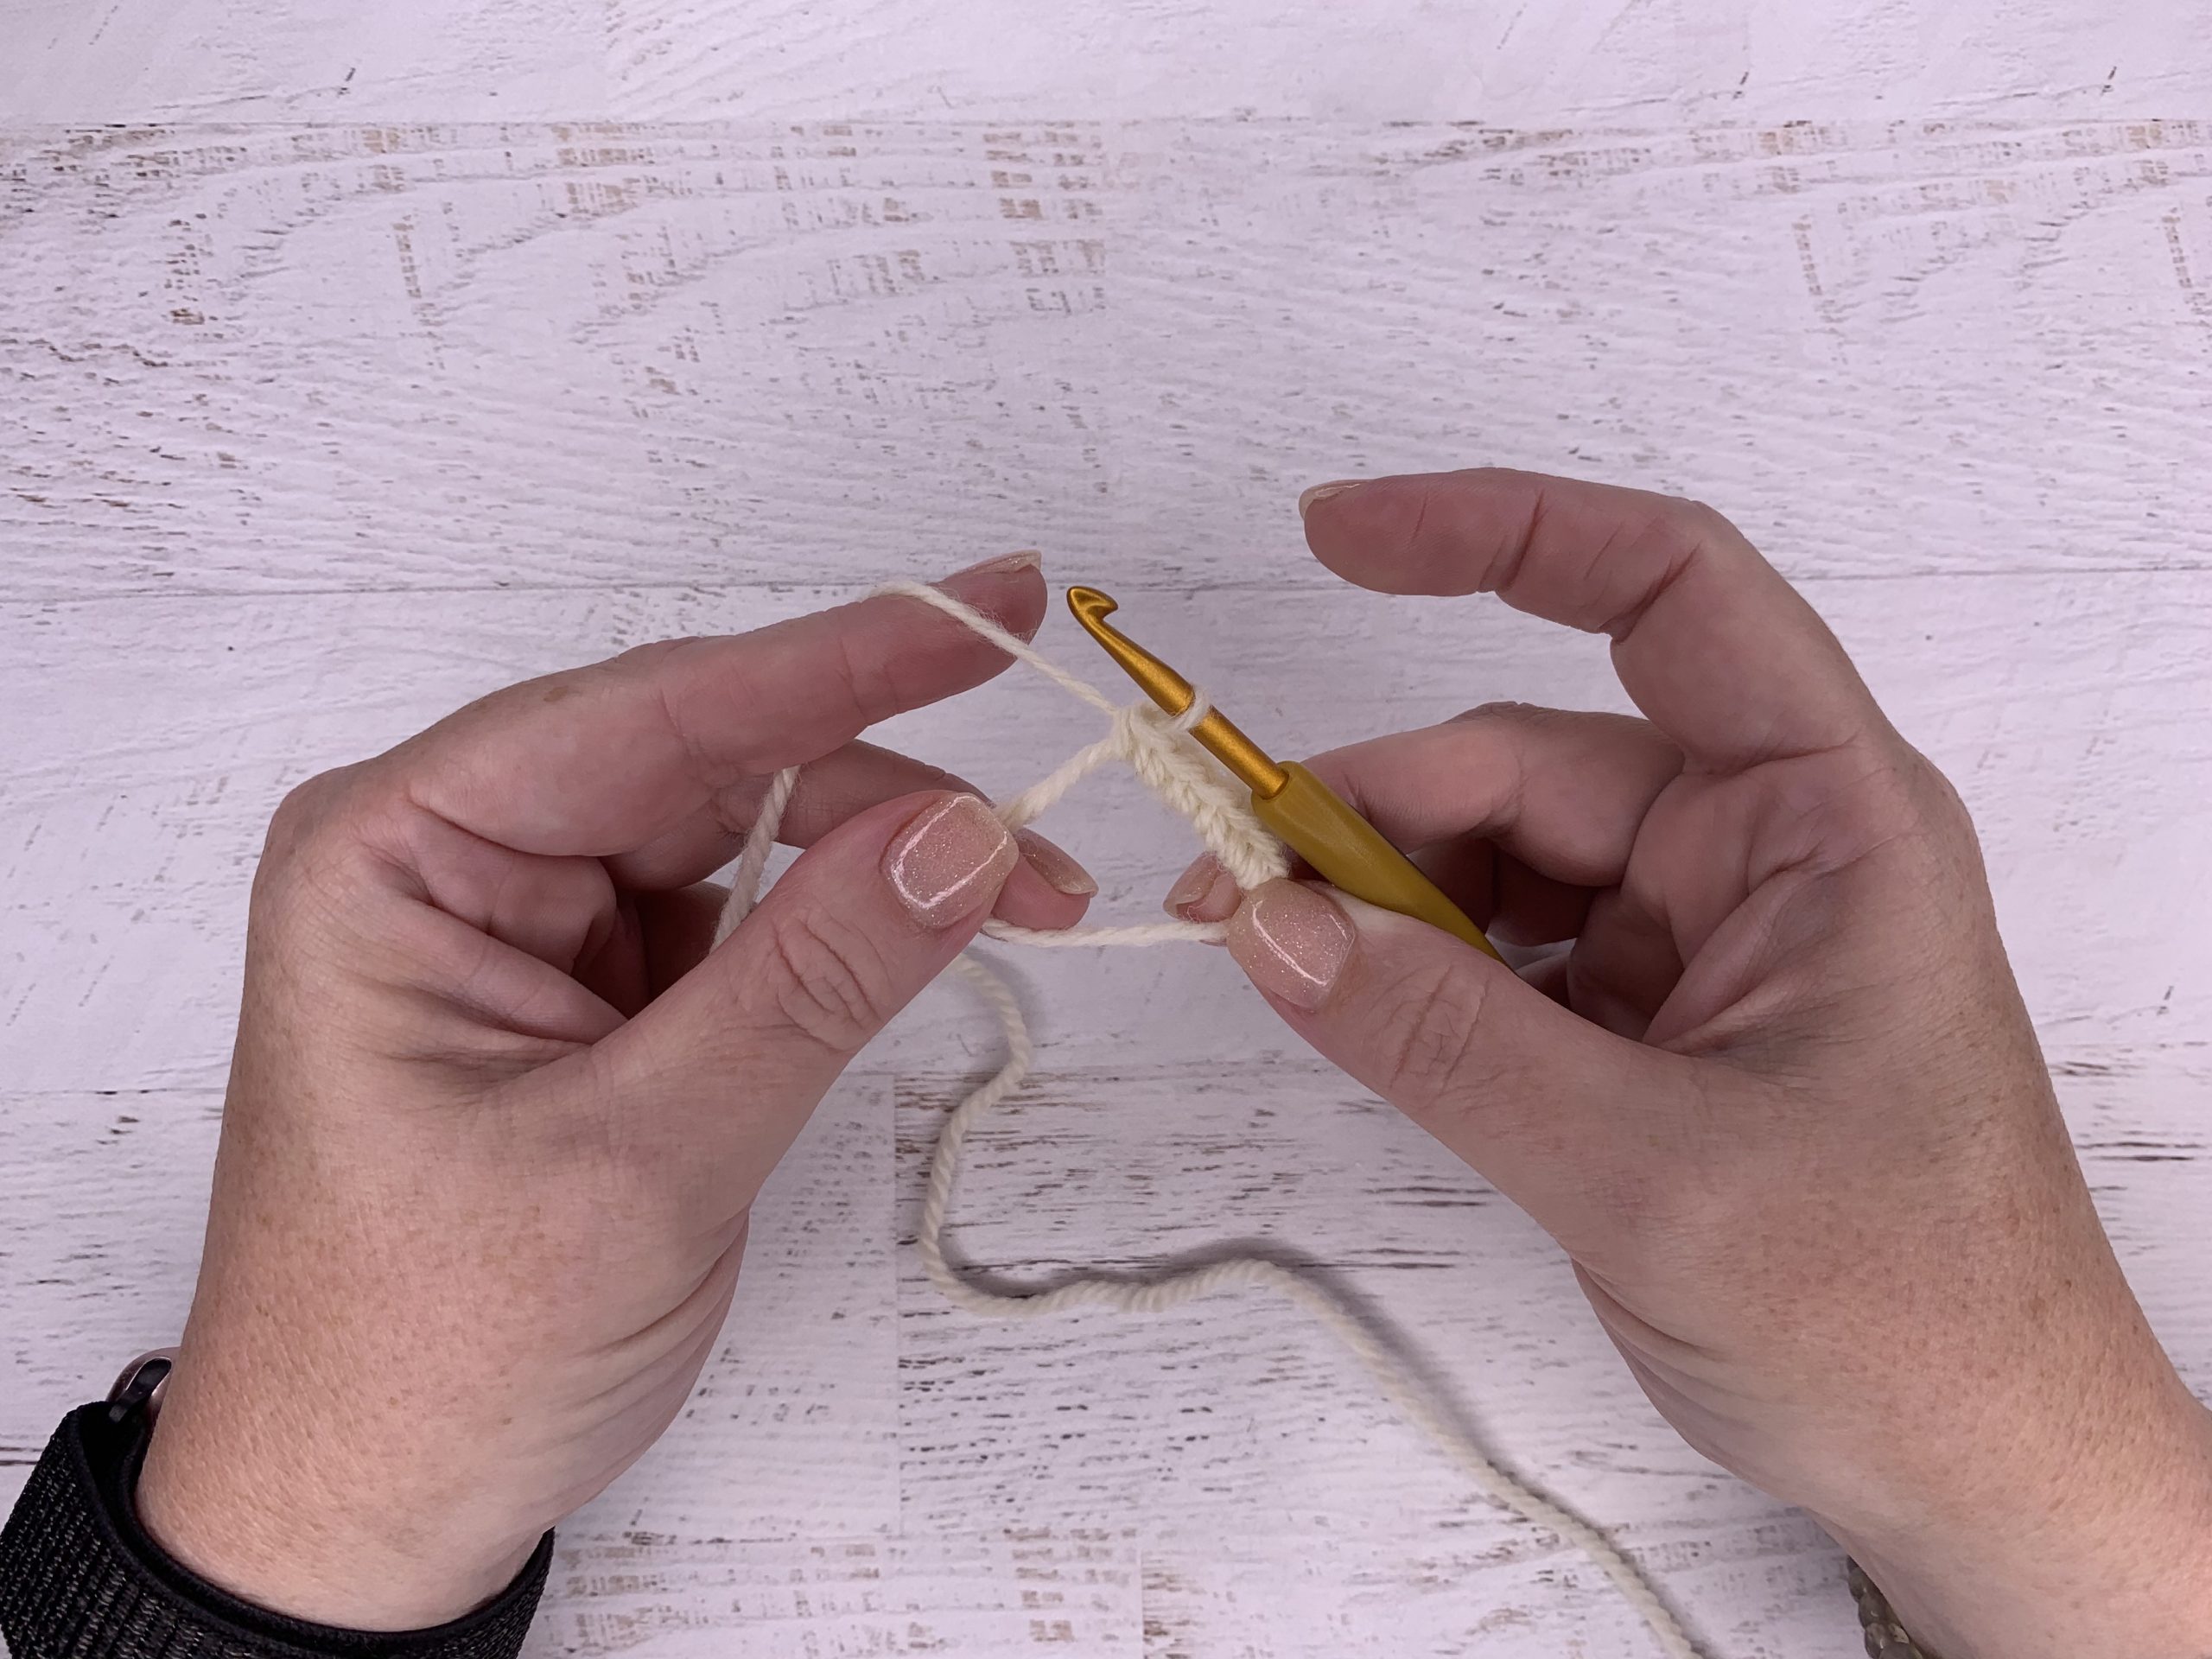
STEP FOUR
Use the hook to pull through a loop from the working yarn.
STEP FIVE
And then yarn over to chain one to close the loop.

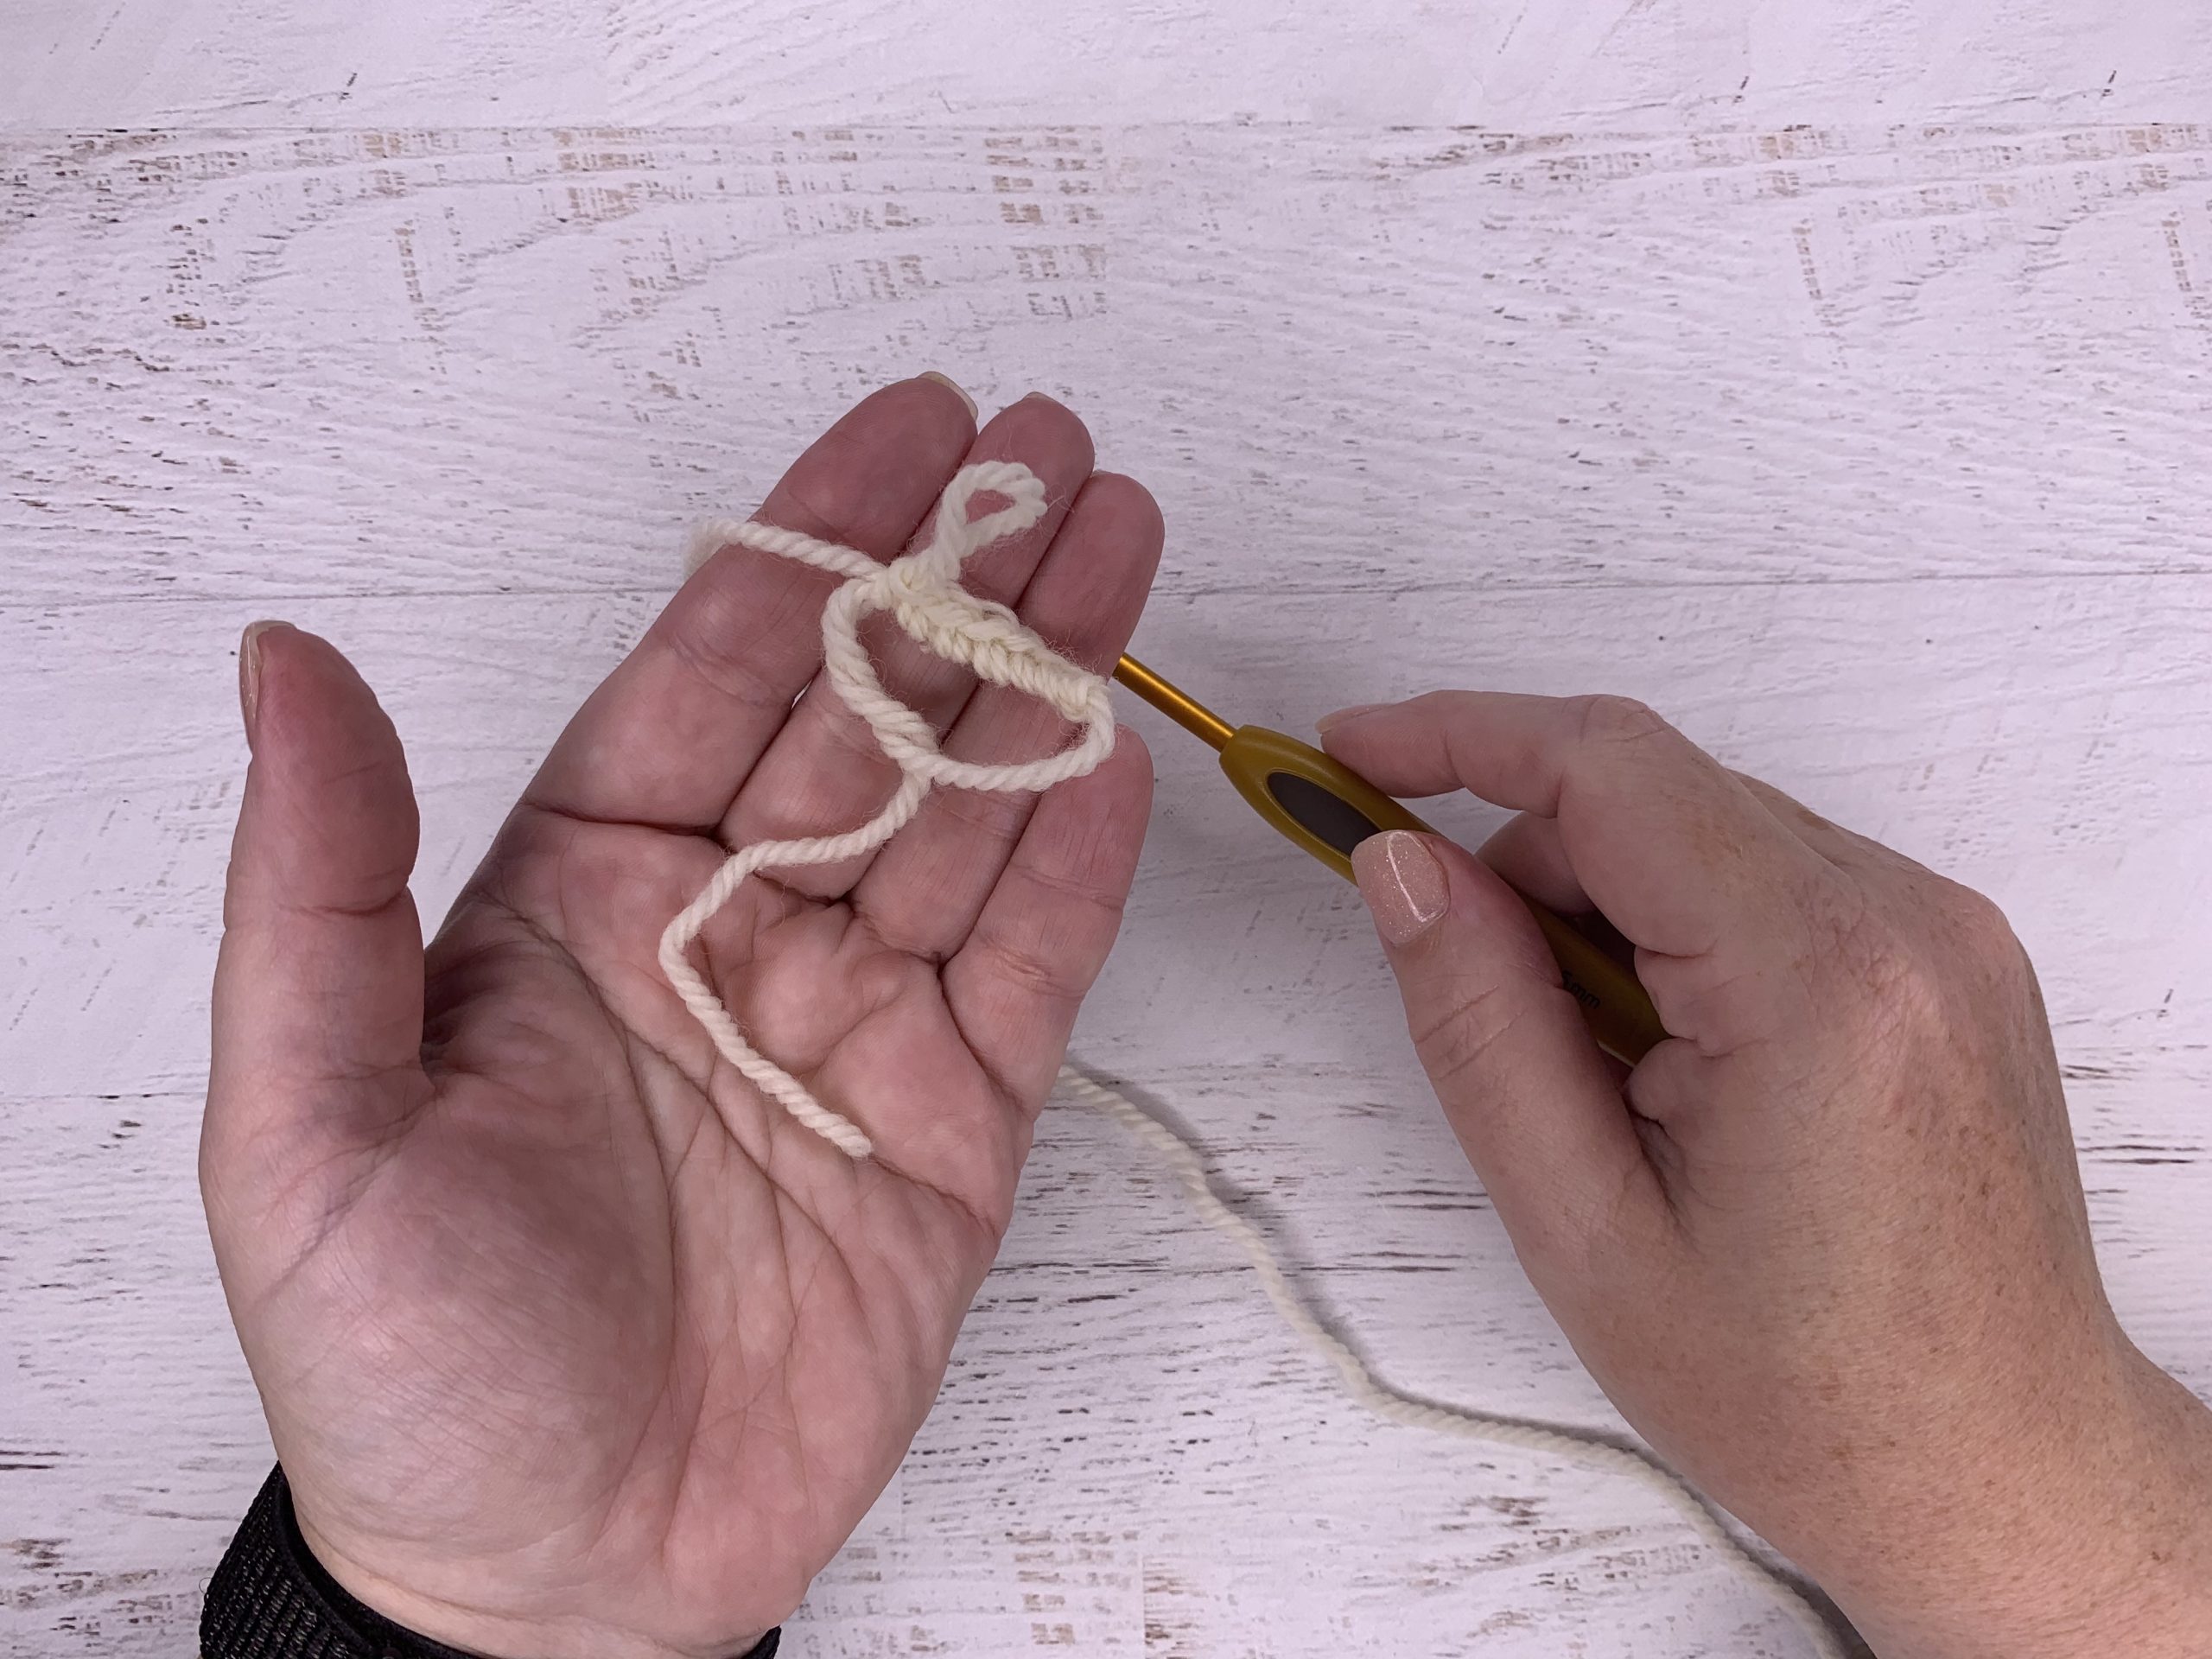
STEP SIX
Carefully remove the loop from your fingers with the doubled strands and the tail end to the left. Begin to work stitches directly into the magic loop, making sure that each stitch is worked around the two strands that run along the top of the magic loop.
STEP SEVEN
Pull gently on the tail to close up the magic loop.
And that’s all you do! It’s broken down into seven steps, but you’ll find once you practice them that you will move smoothly and quickly from one step to the next. Pay attention to your pattern, as sometimes it will call for chaining more stitches before you work the actual stitches into the magic loop. And now you are a crochet magician!
I am deaf senior lady, smile and love sneak video or pictures as crochet corner to corner box if it look like dc each chain?! hopefully get details by your helping me out what am learning how to make it if I change color? Depending on design or shape ?
Excellent and clear instructions. The photos are really clear. Thank you.
Wow!!!! Instructions and pictures were so clear!!’ Excited to try!!!
That is actually very easy....
Do you have left-handed illustrations? It gets hard holding my computer screen up to a mirror and crocheting at the same time! LOL. I can follow the beginning and reverse in my head, but by step 6 I'm totally lost, backwards and upside down!
Good directions!! I always sturggle with this and it really is easy!! Thank you!!!
It was very helpful & clear
Clear instructions. Thanks for making it easy to understanding.
beautiful!
This is amazing when the step and instructions are so clear and precise. thank you