
Class
Steeking: Cutting Your Crochet on Purpose
$39.99
$10.00
At a Glance:
- In-depth Instruction; over 269 mins
- On-demand video access anytime
- Bonus downloadable PDF resources
- Access to class Q&A
Item:
U7041E
Description
If the idea of cutting through your crocheted fabric makes your hair stand on end, then you need to check out this class! Crochet colorwork fanatic, Brenda K. B. Anderson takes a deep dive into the process of steeking her crochet projects. After explaining why you would want to cut your crochet, Brenda shows us her method for adding steeks into your work; she explains the anatomy of a steek and shows us how it works. You will learn how to add a steek into your project, three methods for reinforcing a steek so you can choose the method that works best for you, and you can ensure that your project will not fall apart.
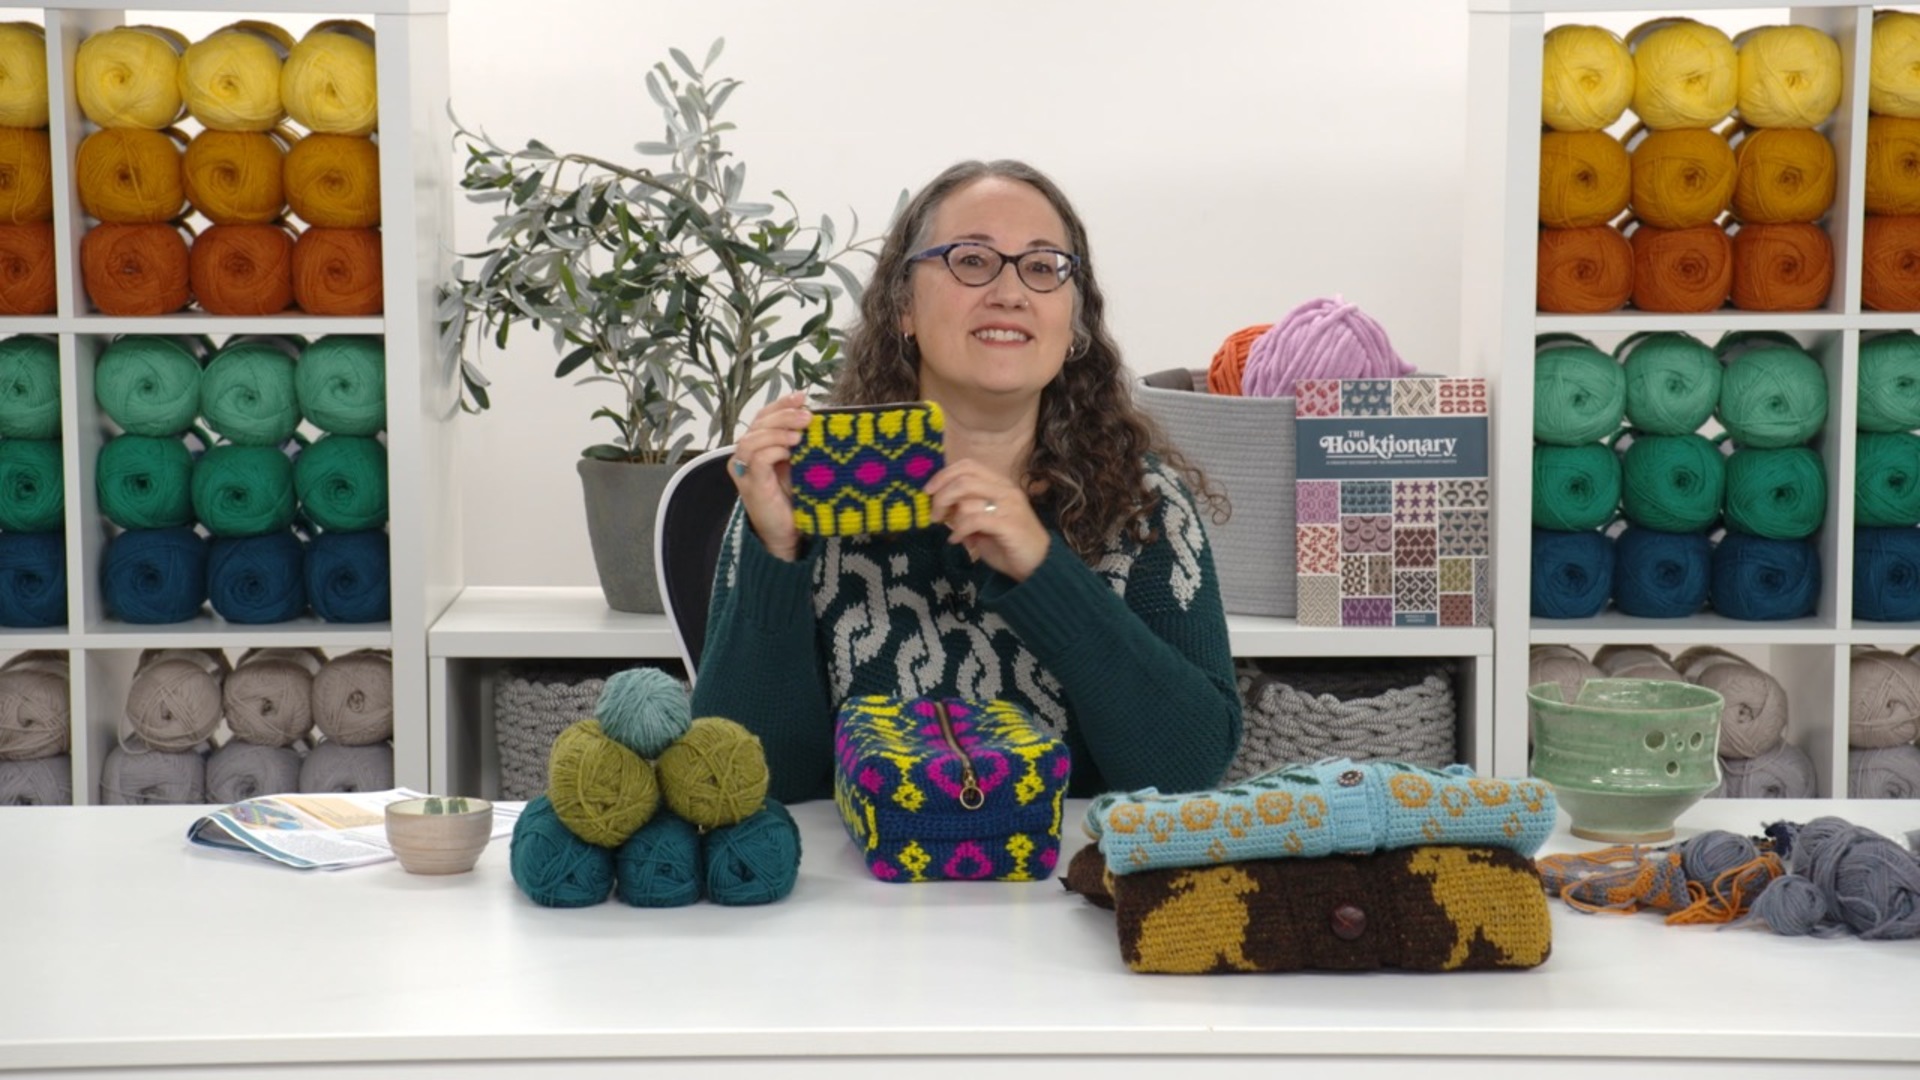
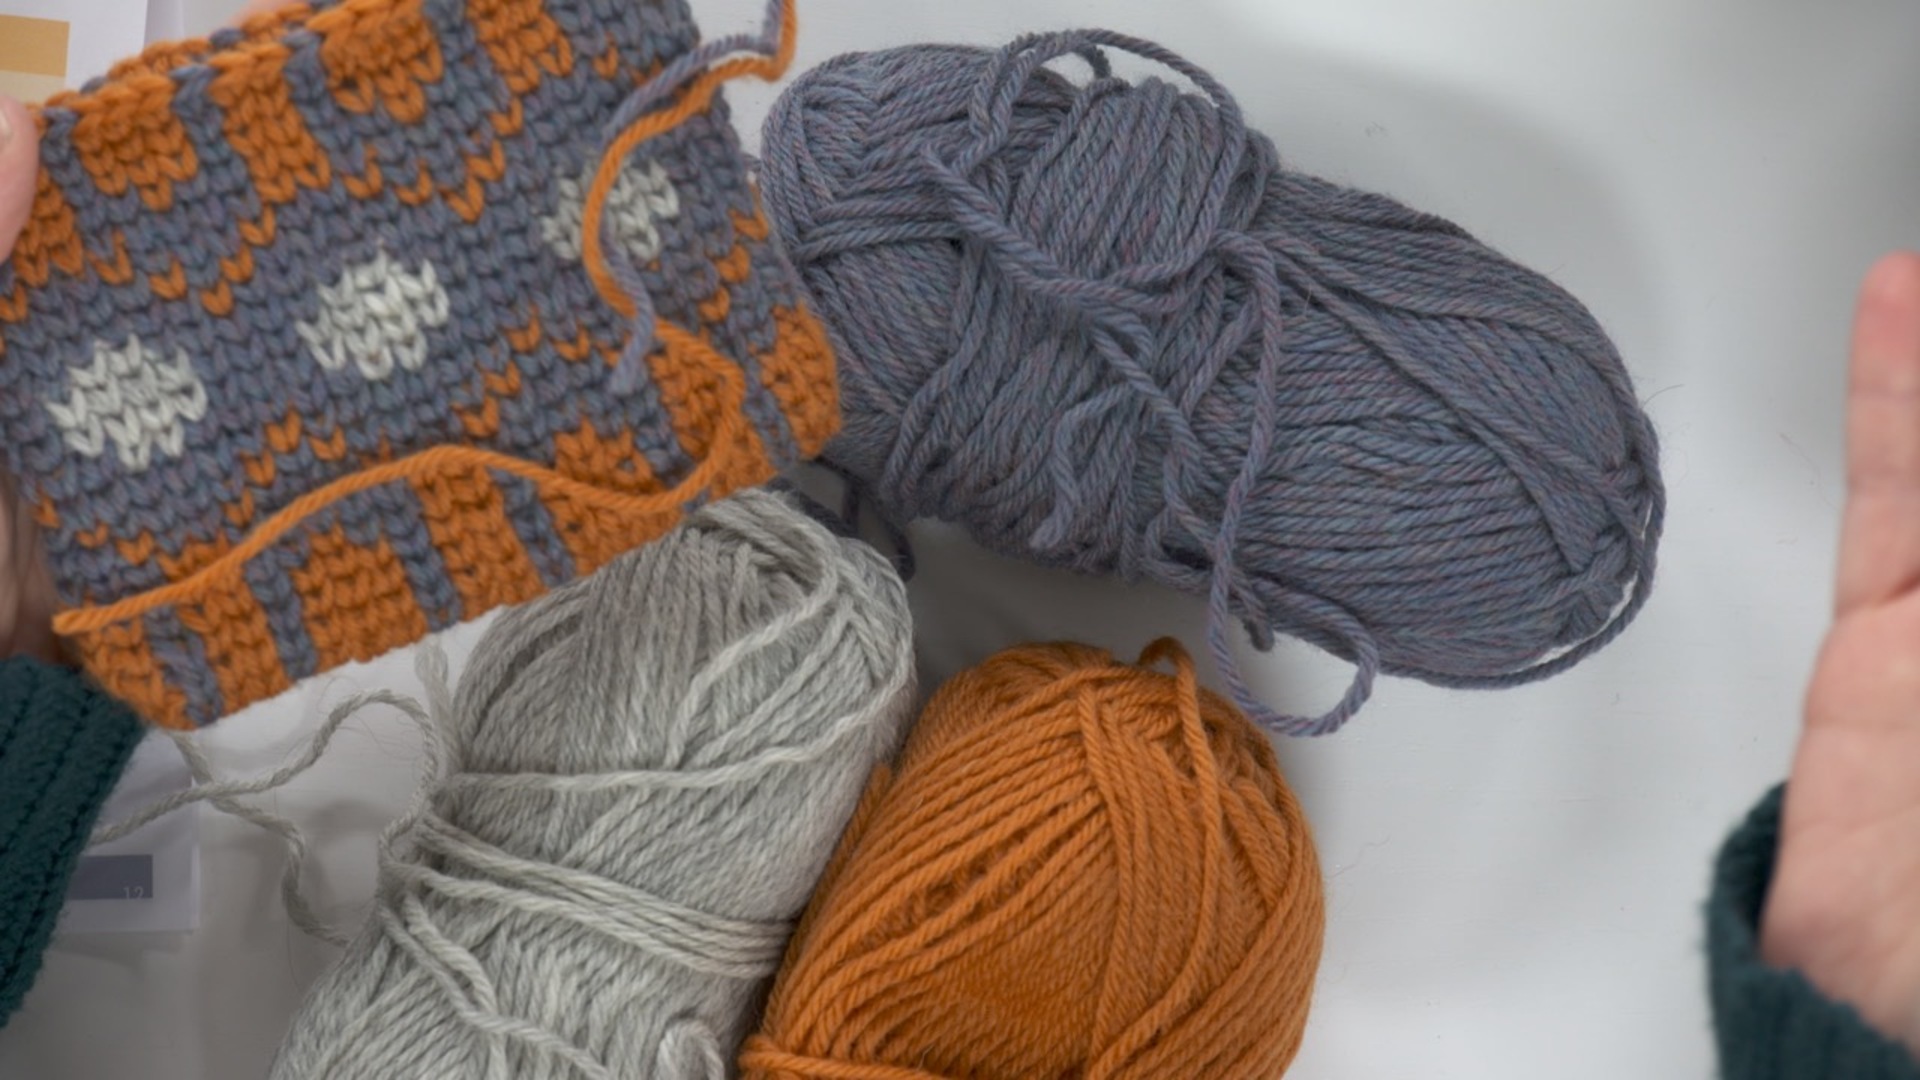
Brenda designed 2 exclusive projects just for this class so that you can put these skills into action right away: The Notions Pouch and the matching Boxy Bag. The Notions pouch is a small project, perfect for checking your gauge and practicing your colorwork skills before moving on to the more involved Boxy Bag. The Boxy Bag is a 3-D shaped colorwork bag, only possible to construct with the help of steeking. You will learn how to add steeks to this project, how to reinforce them, how to cut open your project and how to seam it together. Brenda walks you through all the necessary steps for completing these gorgeous projects, with loads of tips along the way. She demonstrates how to create beautiful colorwork fabric using the Center Single Crochet stitch, shows us two methods of fixing colorwork mistakes and shares tips on choosing colors carefully. You will learn how to add a button band to a steeked front opening, and how to disguise a steeked edge if you do not want it to be seen. With over 4 hours of clear video instruction, you will be fully prepared to cut up your crochet without fear!
Class Sessions
Introduction
2:12
Brenda introduces us to the two projects that we will be making in this class: The notions Pouch and the Boxy Bag. The Notions Pouch gives us a chance to practice our colorwork skills and is used to check gauge before moving on to the steeked project. The Boxy Bag’s interesting construction is only possible because of steeking. When making this bag, you will learn how to plan your steek, how to cut it and how to reinforce it.
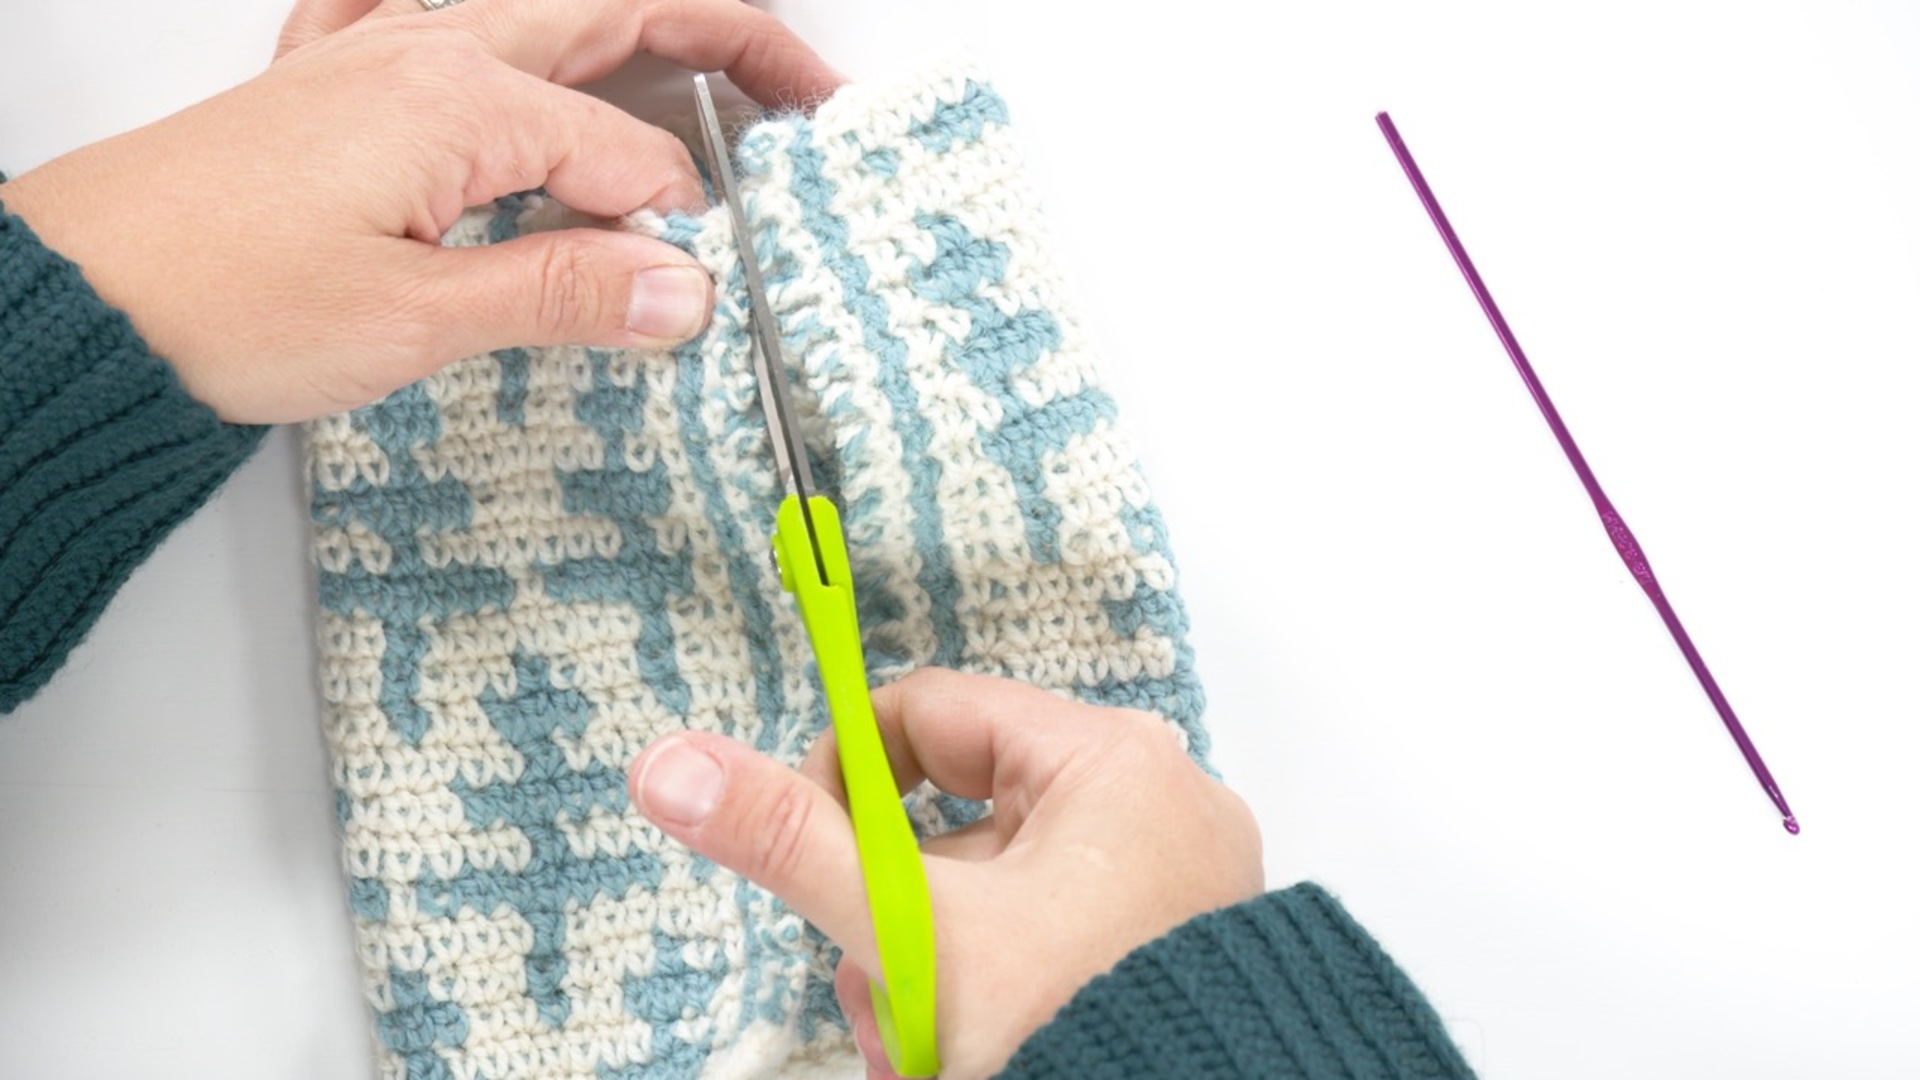
What is Steeking?
10:43
In this lesson, Brenda explains why steeks are used and shows us how they are made in crochet. She explains where to add extra stitches to our pattern so that they can give us a place to cut our work and function as seam allowances.
Three Methods for Reinforcing a Steek
20:57
Brenda demonstrates each of her three favorite ways to reinforce a steek: surface crochet, machine stitching, and felting.
Steek Finishing
14:34
In this lesson Brenda shows us how to add some professional touches to our steeked projects. She demonstrates how to add a button band along a steeked opening, as well as how to cover up a steeked edge on the inside of our work.
Making the Notions Pouch
42:55
Brenda first discusses the materials needed for both projects and gives us a few tips on choosing colors. Next, she demonstrates how to create the Notions Pouch. She shows us how to begin working in the round by using a set-up row. Then she shows us how to work in the Center Single Crochet stitch pattern, how to change colors, how to read a colorwork chart, and how to fix incorrect stitches.
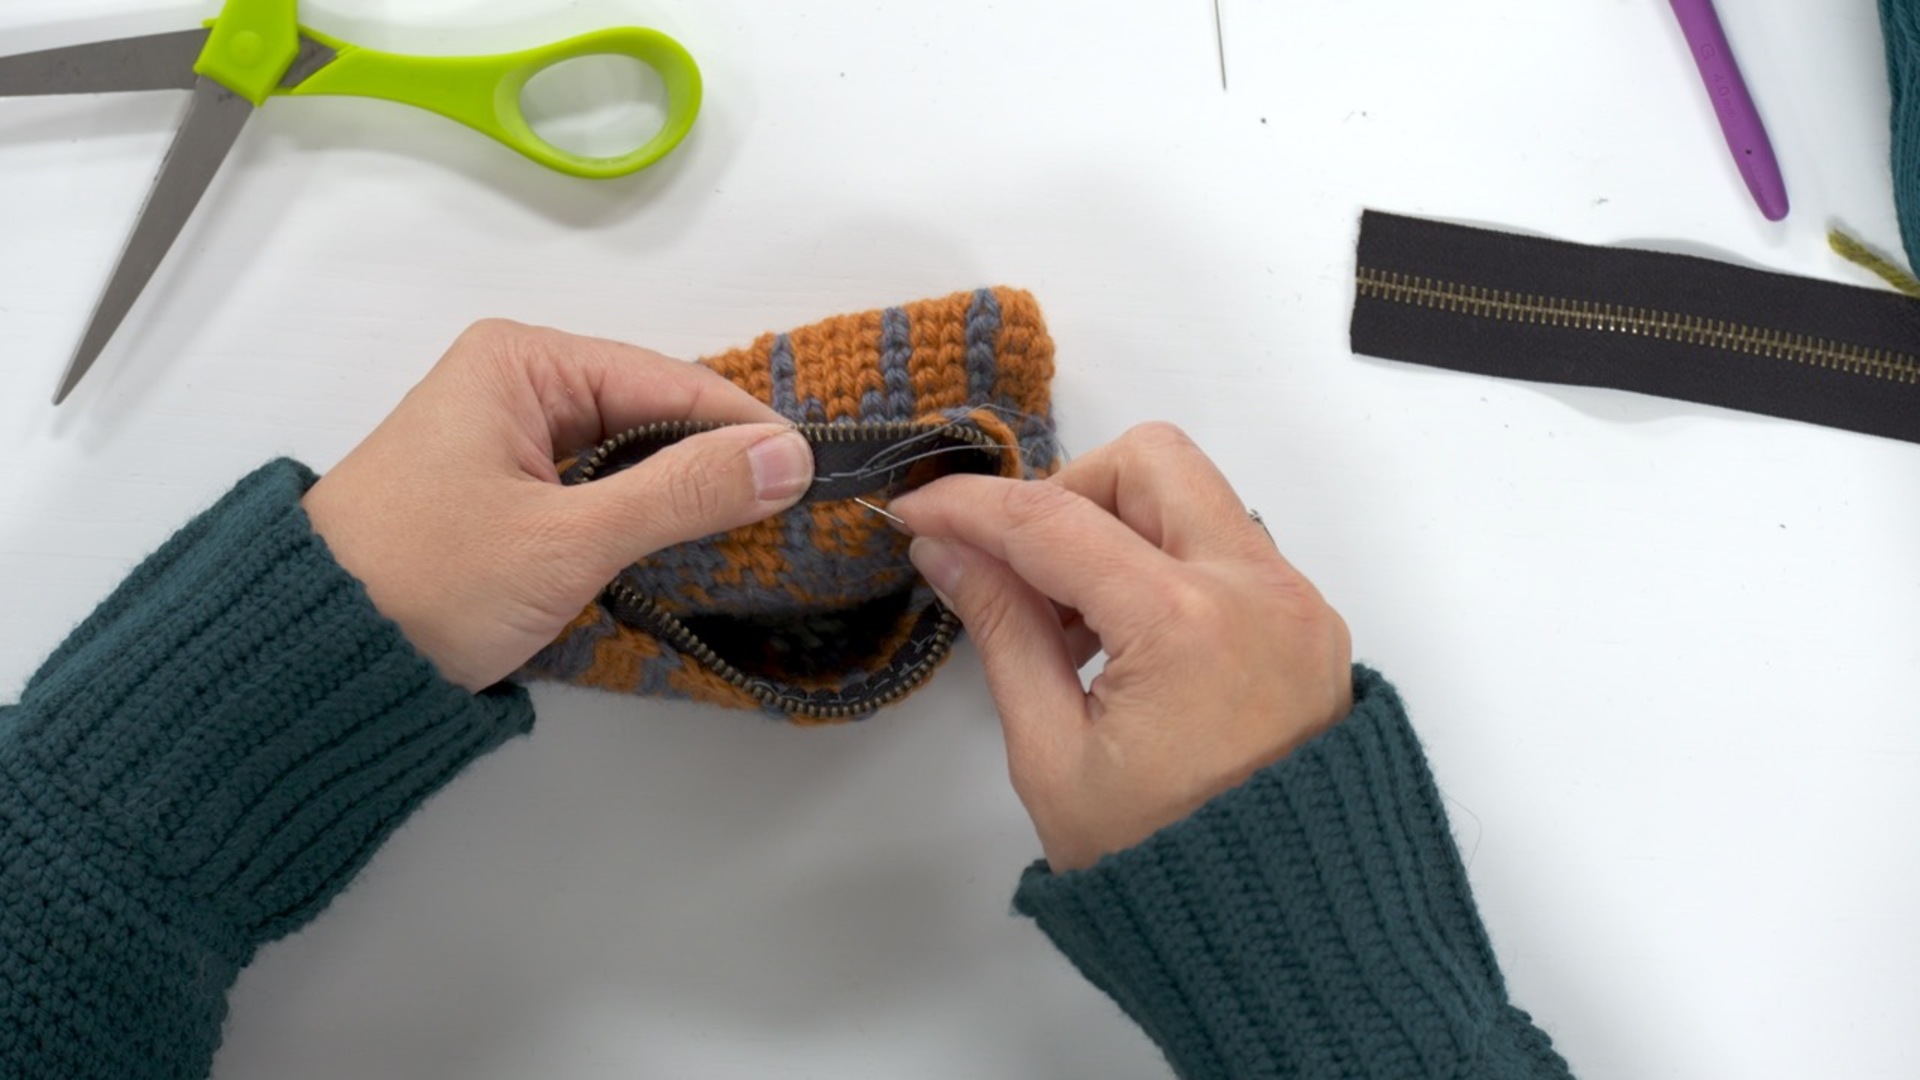
Installing the Zipper
23:25
In the Session, Brenda shows us how to make a custom-length zipper by shortening it from the bottom. She then shows us step-by step how to install a zipper into the Notions Pouch. This lesson is also applicable to the Boxy Bag as well.
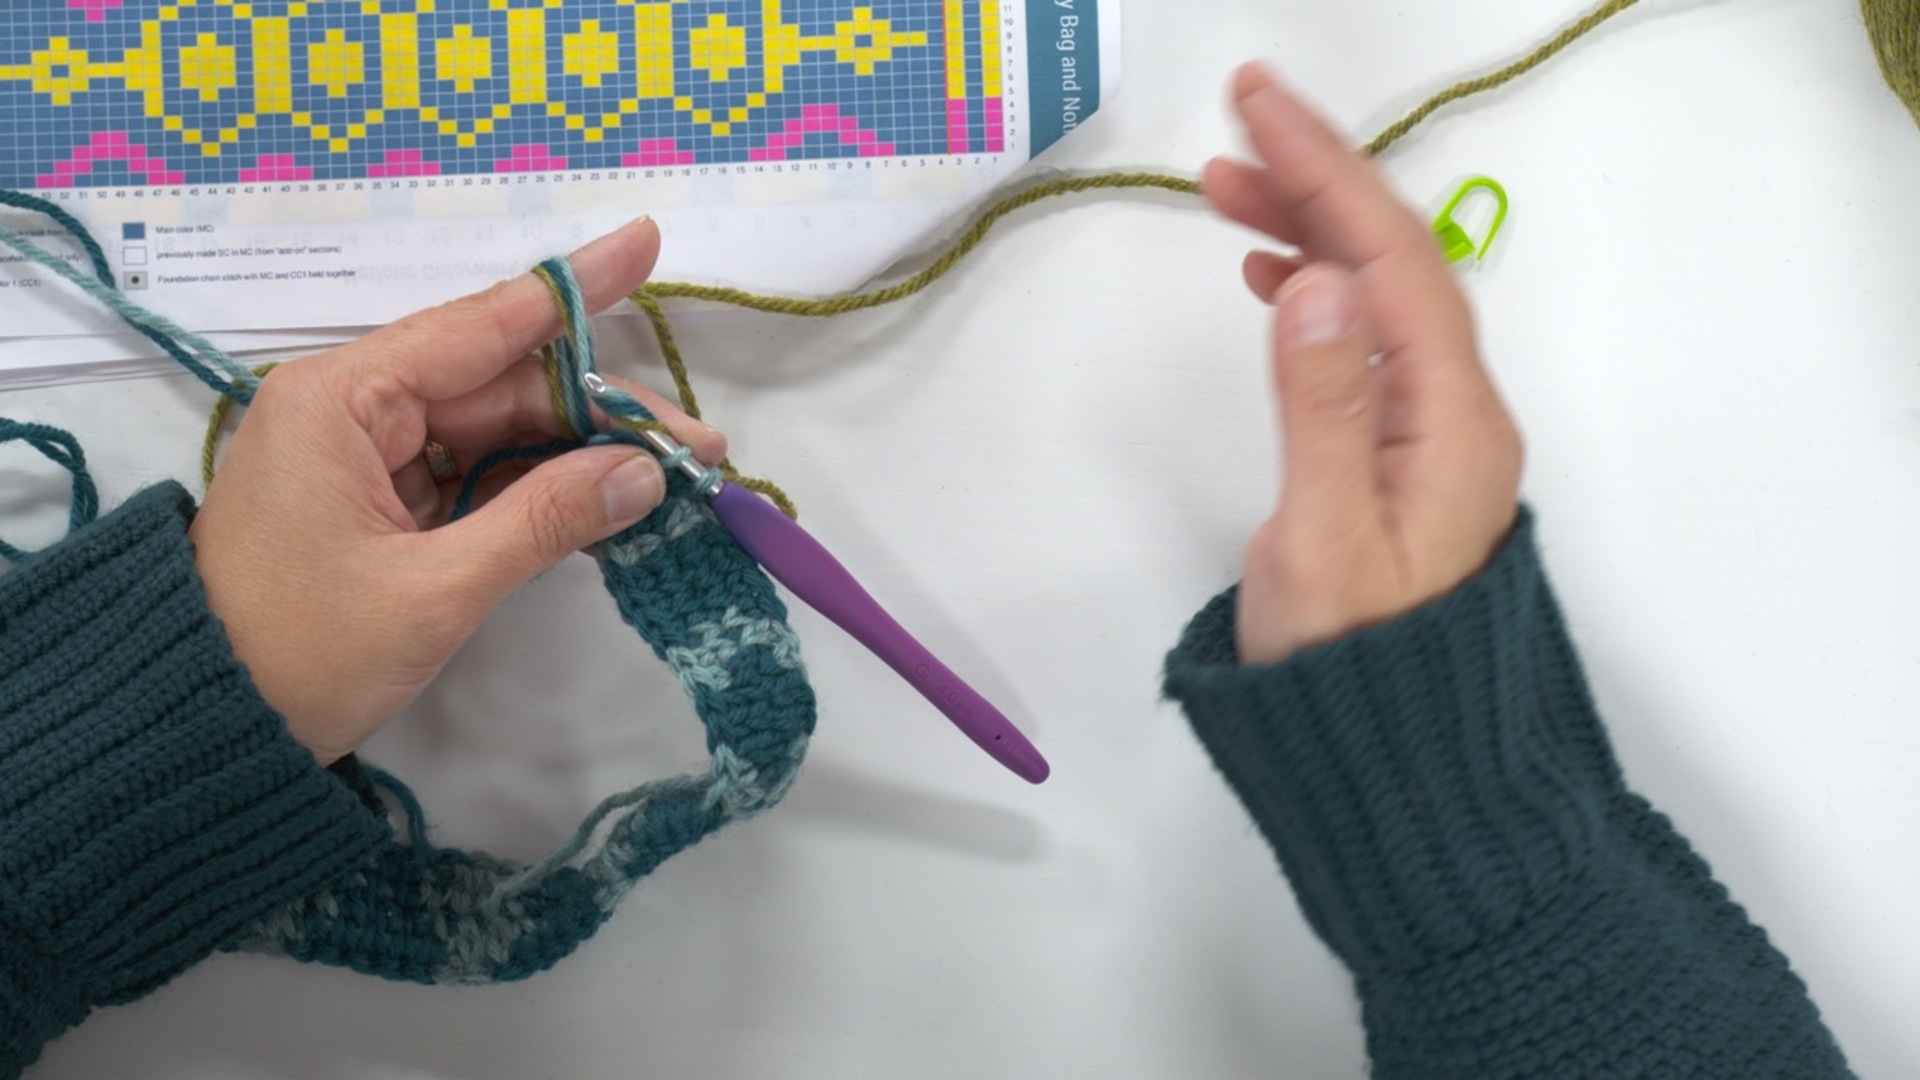
Getting Started on the Boxy Bag
56:45
Brenda shows us step by step how to begin working on the Boxy Bag. She begins with a set-up row, then works in the round in the Center Single Crochet stitch pattern following the chart. She shows us how to create the steek stitches along each edge of the bag. She also provides lots of tips for working with three colors at a time.
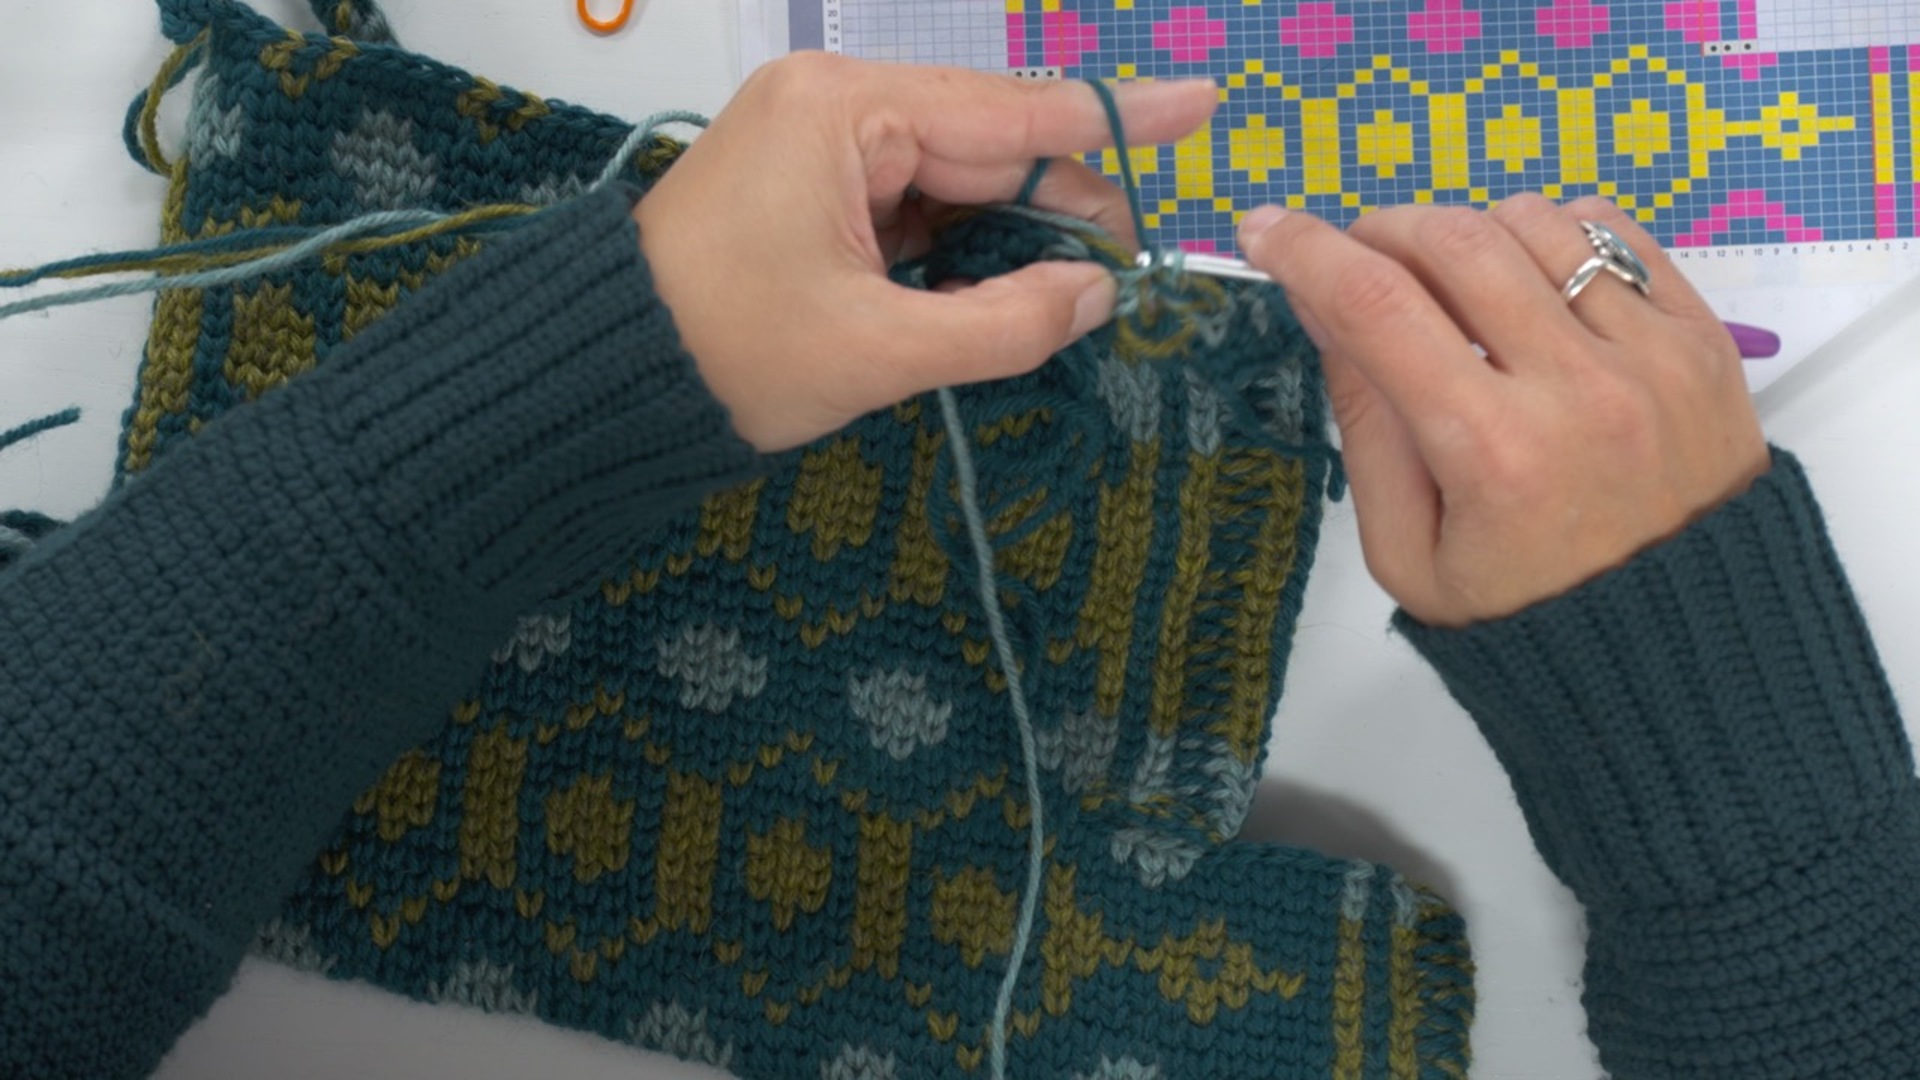
Continuing the Boxy Bag Pattern
50:40
We continue working from the pattern and the chart to finish the rest of the crocheted portion of the Boxy Bag. Brenda shows us how to create the “capital I” shaped piece by changing the amount of stitches per round. First, she shows us how to skip over stitches on both sides to make the narrower center section. Then she shows us how to add stitches to each edge to create the wider section at the top.
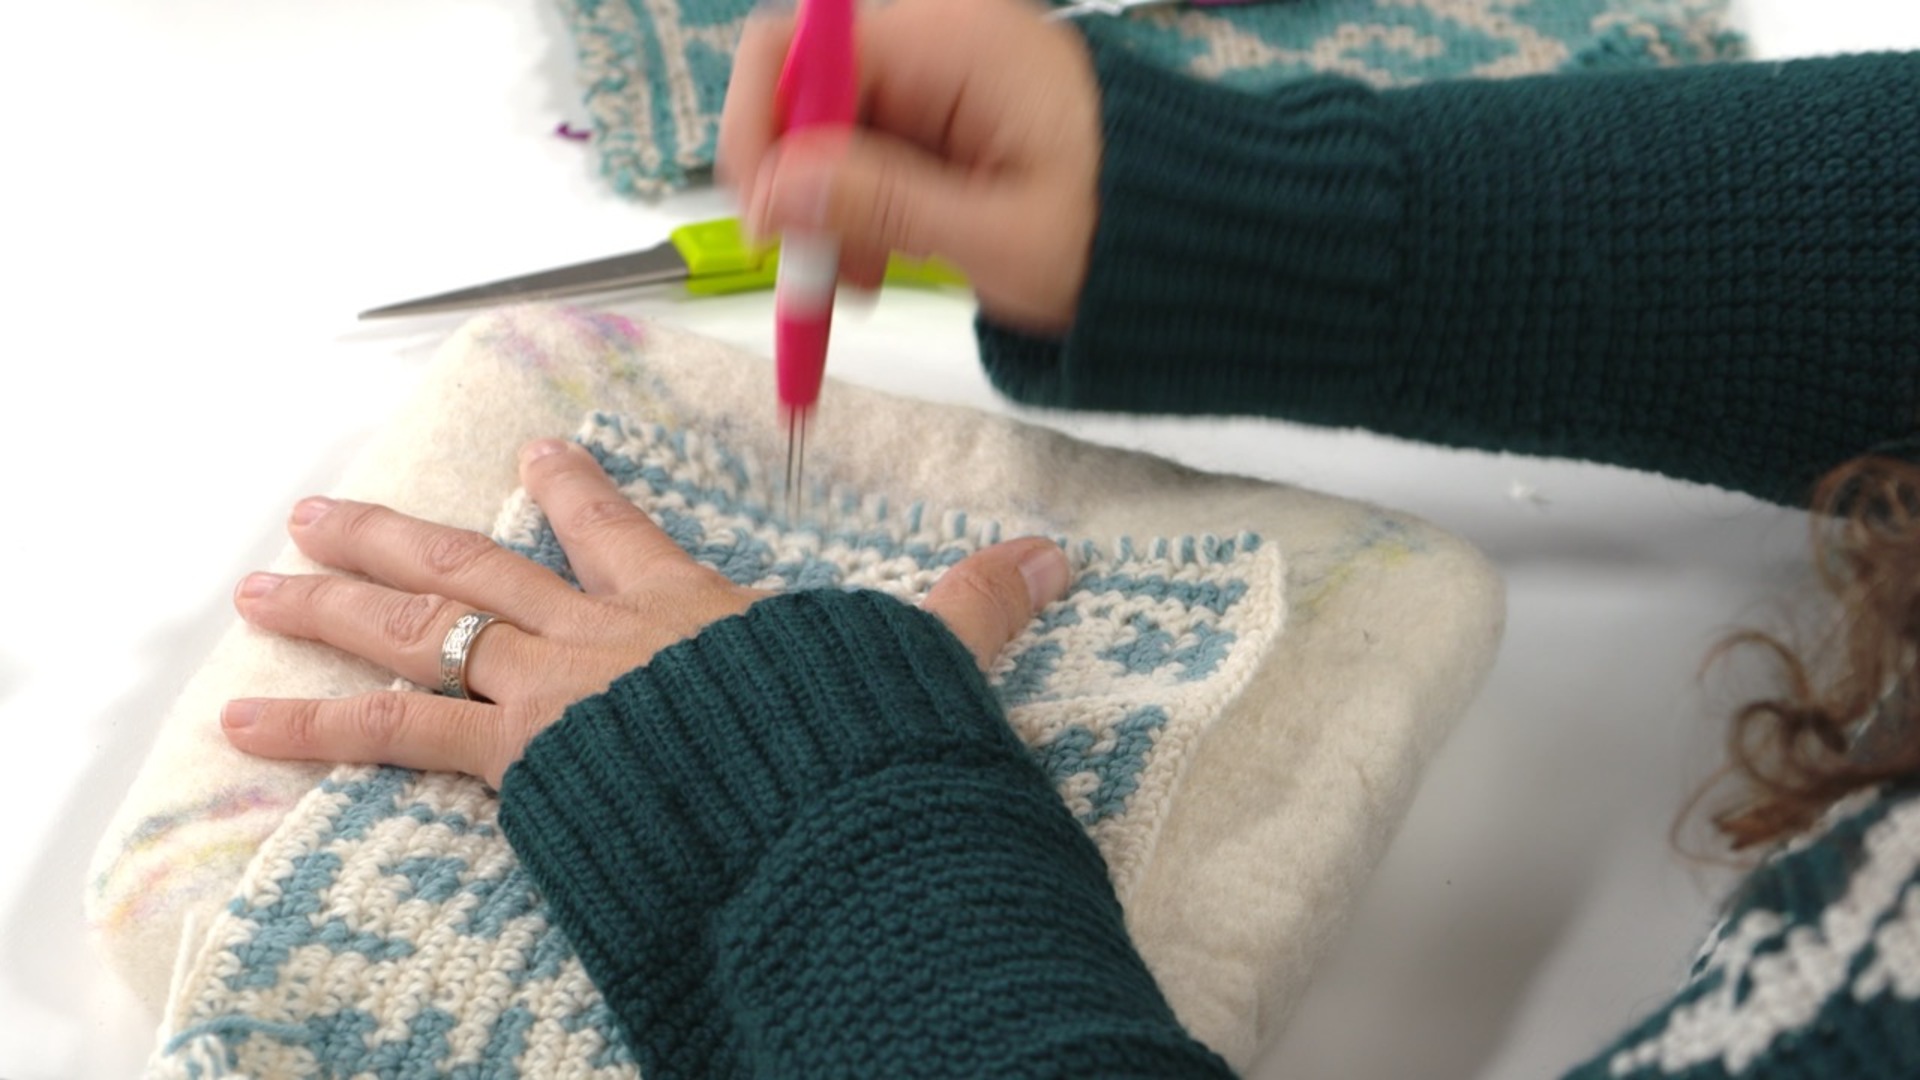
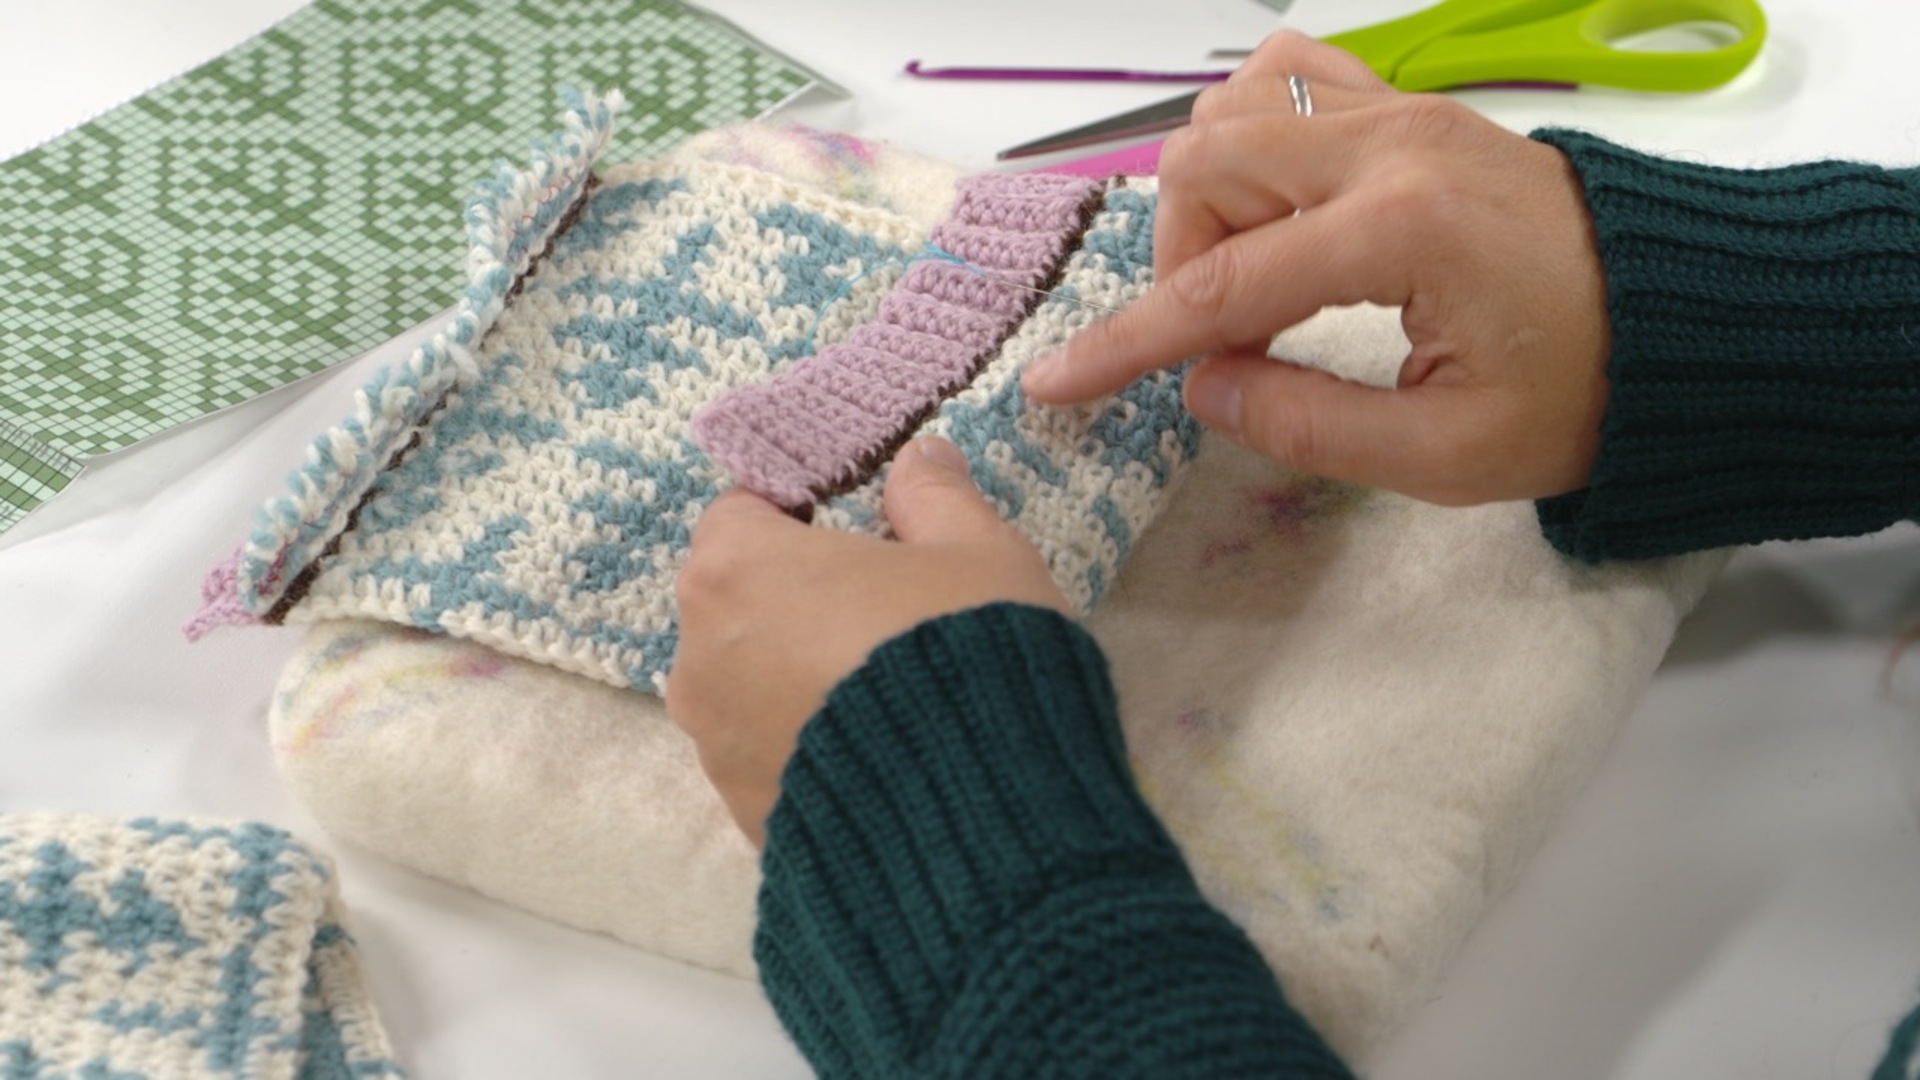
Finishing
28:56
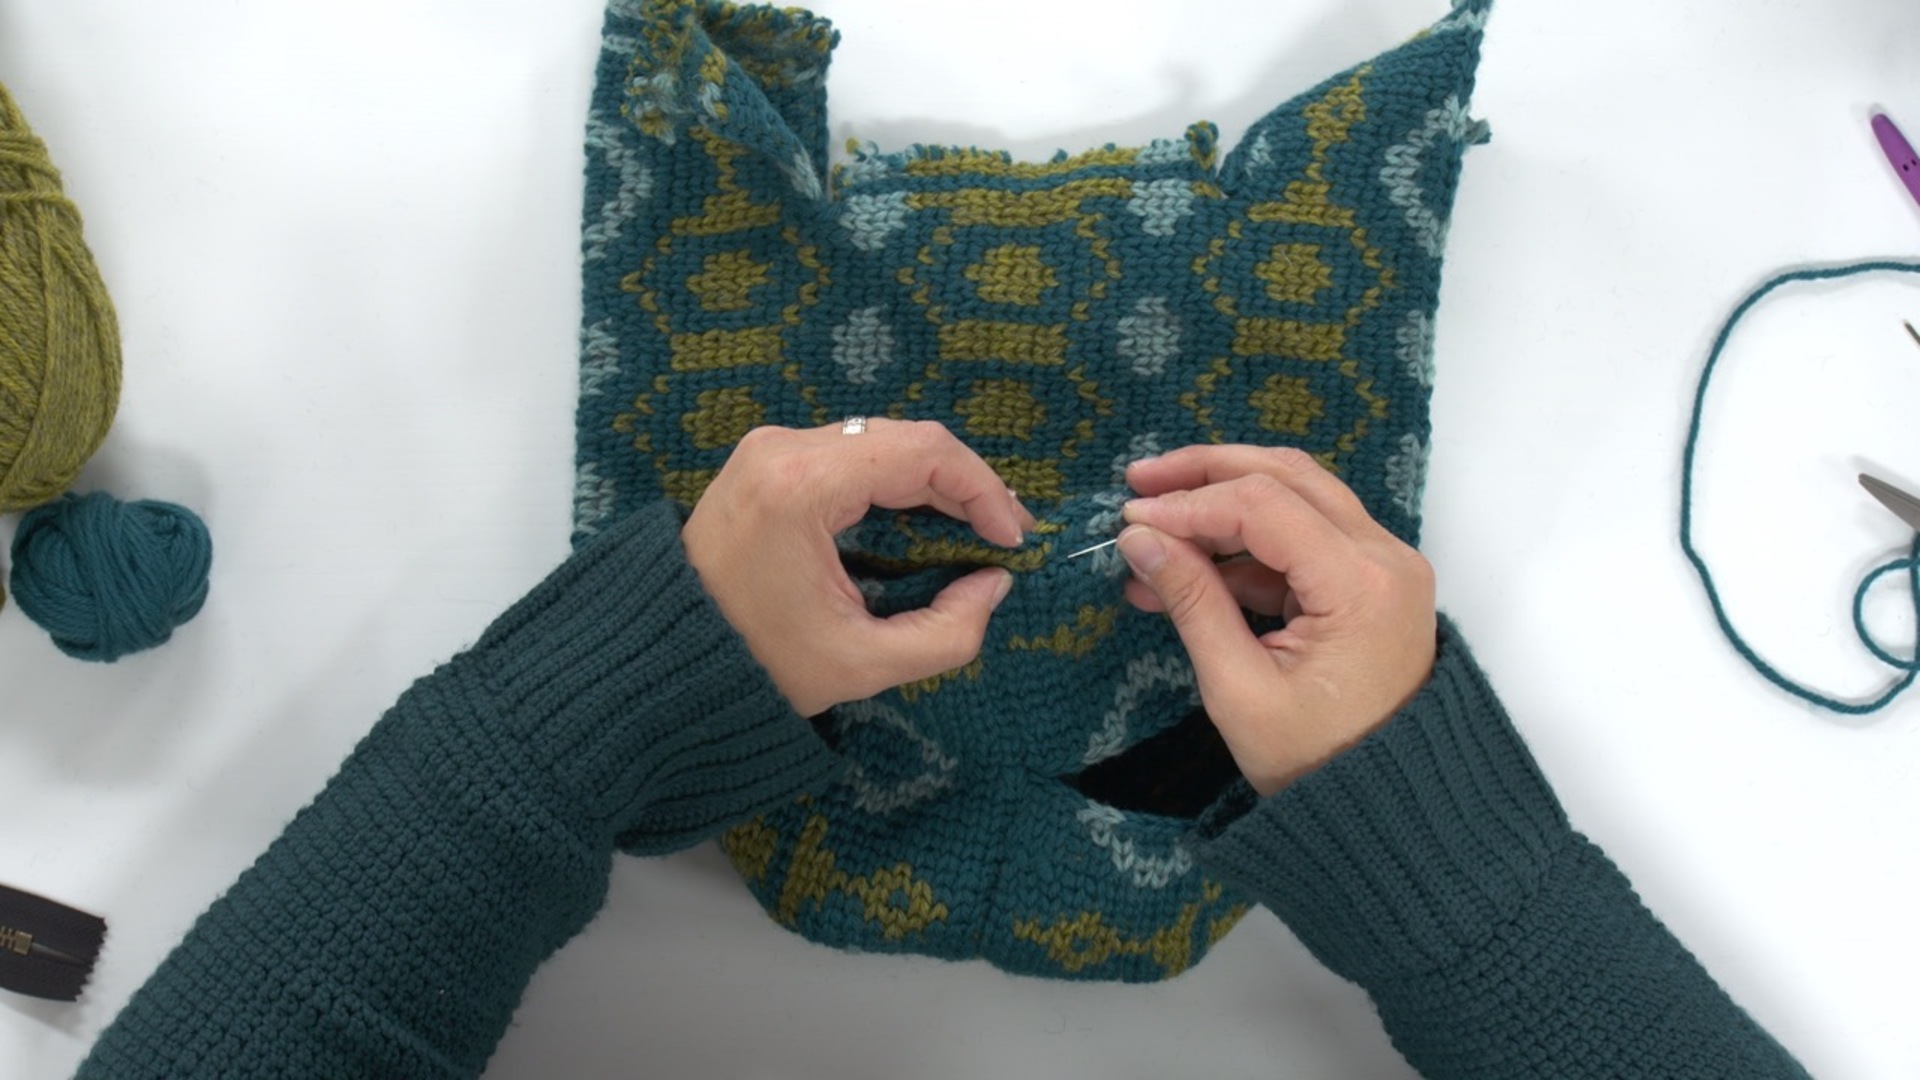
Brenda shows us how to reinforce the steeks in the Boxy Bag and cuts it open. Then she takes us step by step through the process of seaming the bag.
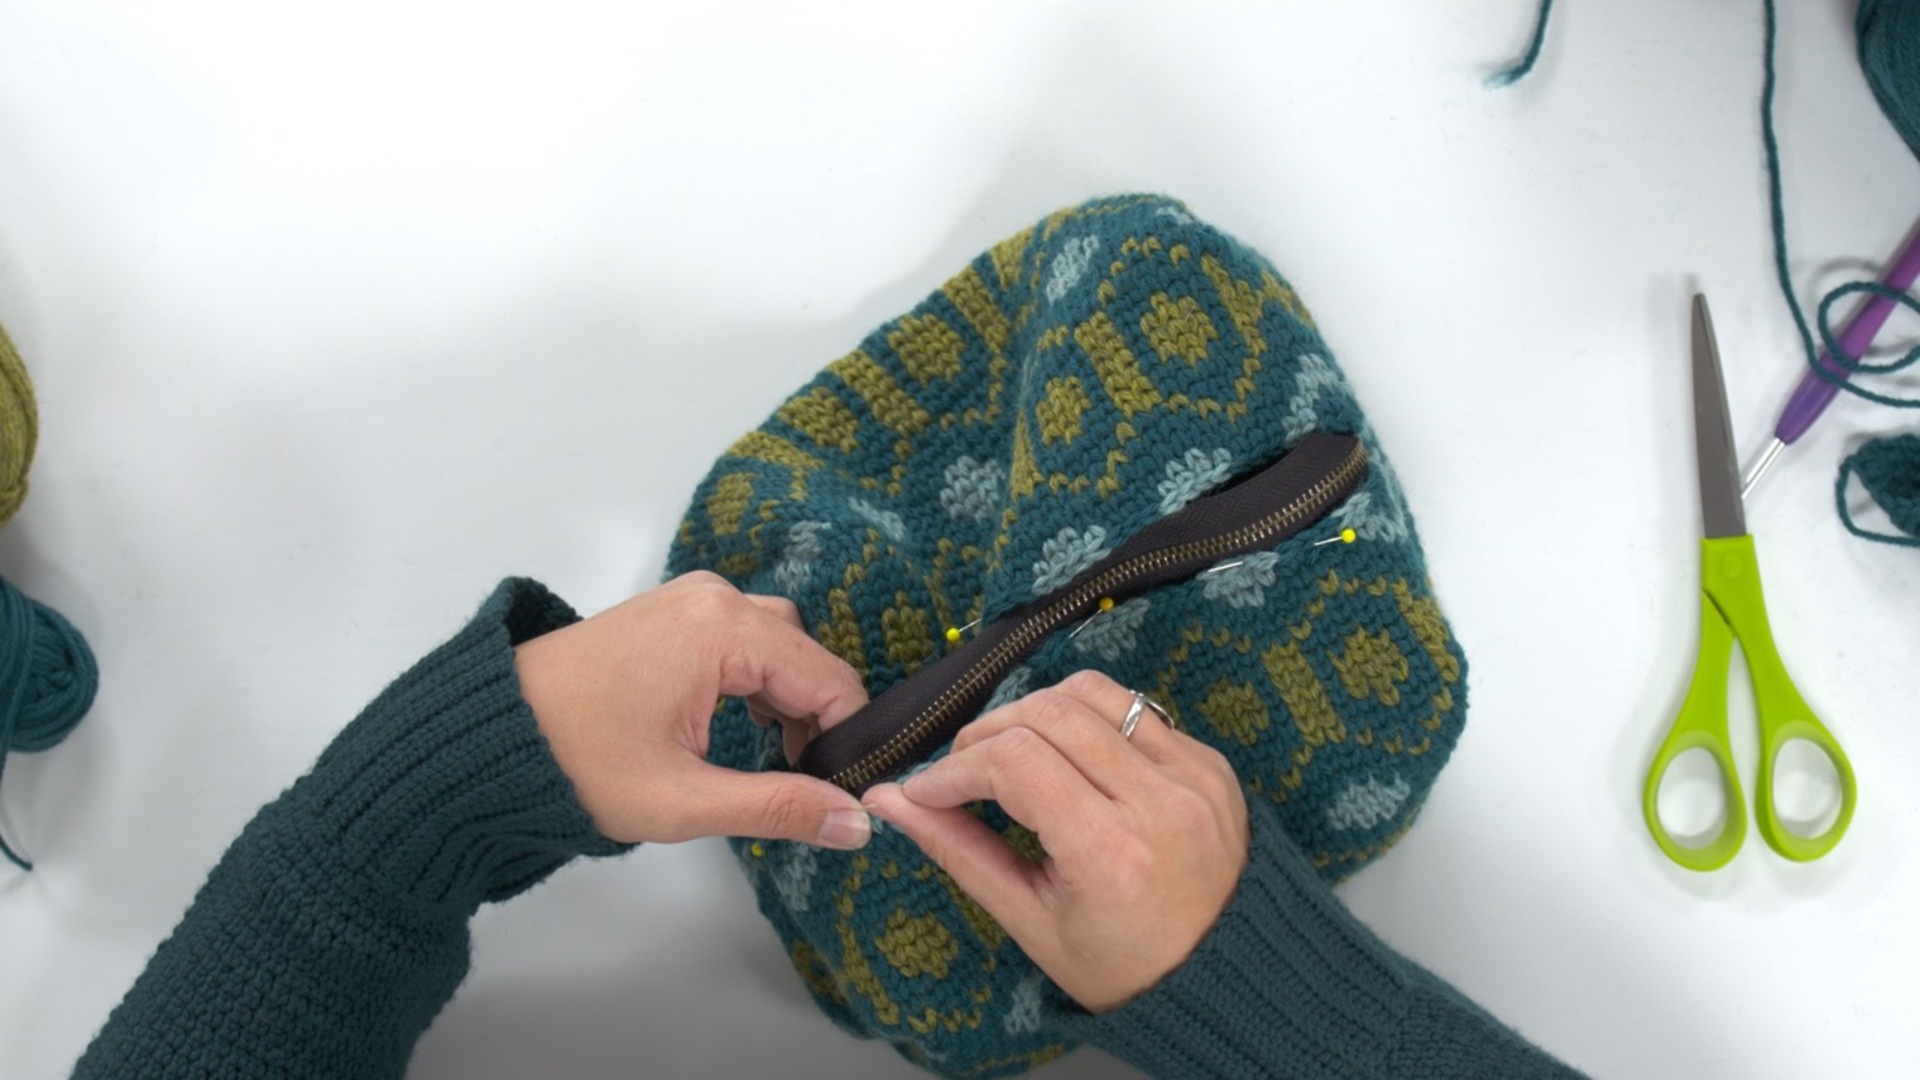
Zipper Installation
17:28
Brenda demonstrates how to pin the zipper in place in the bag and refers us back to Session 6 for sewing instruction. She finishes the bag by making and installing the straps for the sides of the bag.
Your Instructor
Brenda K.B. Anderson
Brenda K. B. Anderson crochets, knits, and sews into the wee hours after her kids have gone to bed. She loves designing stuffies that make her laugh, and accessories that beg to be worn over and over again by her friends and family. Brenda is the author of Beastly Crochet and Crochet Ever After and also teaches a Craftsy Class: Crochet Mittens and Fingerless gloves. She has contributed to several books and numerous magazines and is the managing editor of the Creative Crochet Corner. She lives in a little house in Saint Paul, MN where it is sweater weather nine months of the year and blogs about her crafty adventures at Craftsplosion.com.
Bonus Material
Steeking: Cutting Your Crochet on Purpose Resources
Bonus Materials available for download after purchase.
