The other day, I was packing for a cabin getaway when I realized I couldn’t fit my box of rapid Covid tests into my first aid kit box. Not a big deal, right? But it was bothering me that I had to pack them separately in my luggage until I realized something: I can just crochet my own first aid kit pouch! I can make it any size I want—large enough to fit my Covid test box, plus all the other bandages, tweezers, medicines, etc. that I would normally bring along with me.
So I got out my acrylic workhorse yarn, grabbed a hook, and got to work. I wanted this pouch to be super simple so that anyone could customize the size for their own needs without doing any math, so I started with a single crocheted rectangle for the base of the bag.
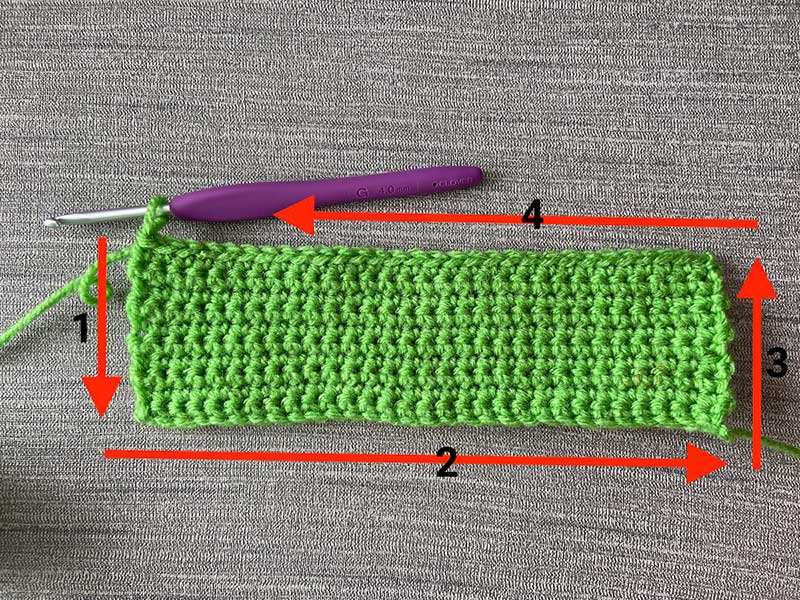
I made a foundation chain that was the same length as my Covid test box, then worked back and forth in turned rows until my rectangle was tall enough to match the footprint of the Covid box (2”).
Once I had determined the bottom shape of the pouch, I began working around the perimeter of the rectangle, working into the row-ends on the short sides to begin working in the round.
The photo below shows the finished rectangle, with the direction of work for the very first round shown with arrows. When I worked across the row-ends (the shorter sides of the rectangle), I made one stitch into each row-end.
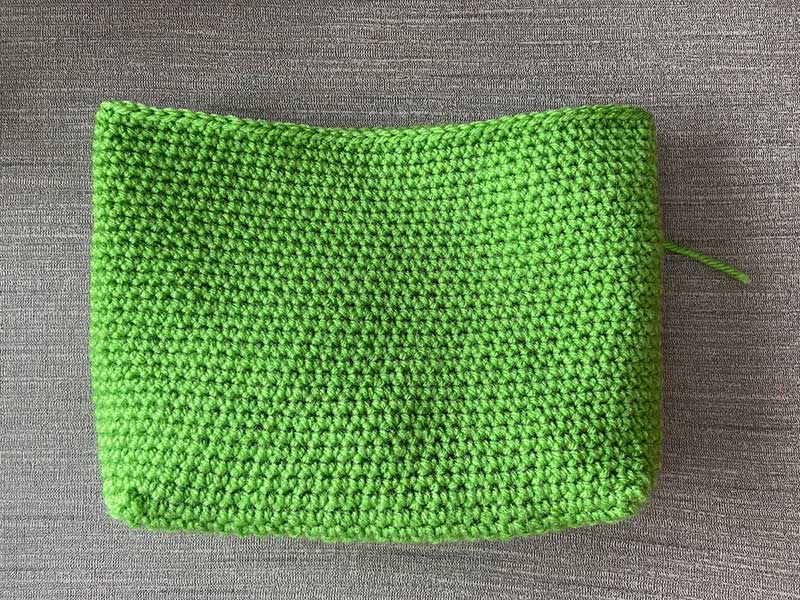
Next, I worked evenly (one single crochet into each stitch) in the round until the pouch was as tall as I needed it to be.
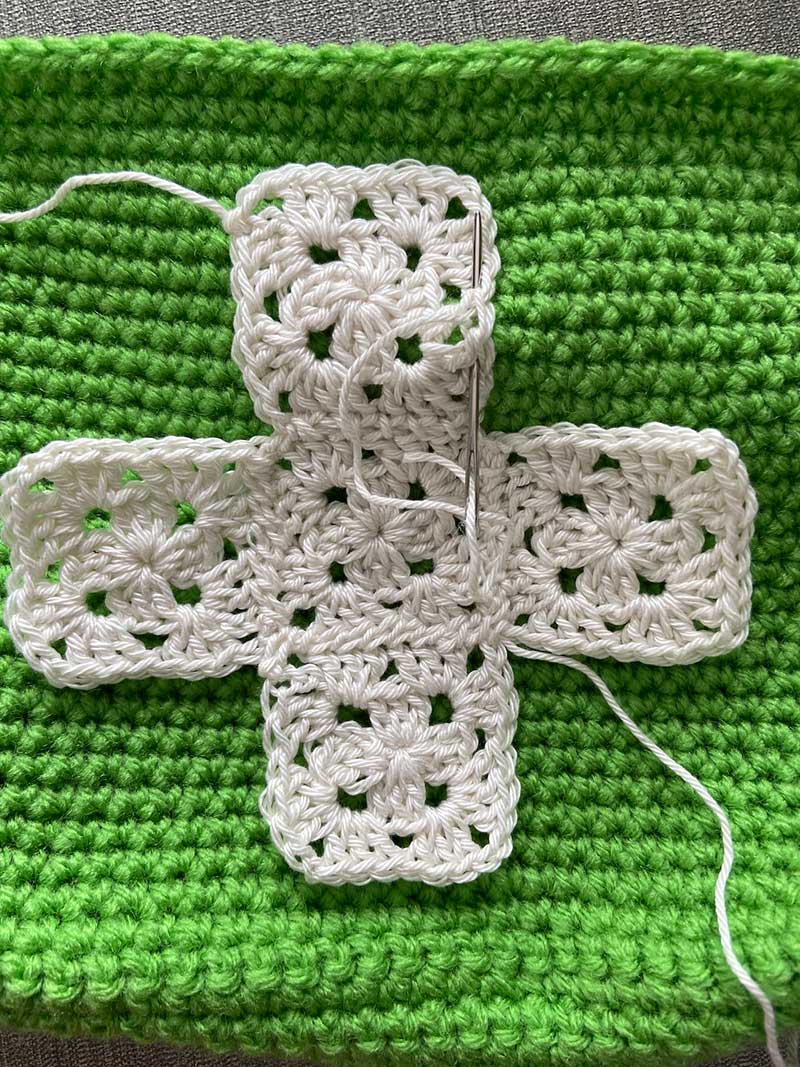
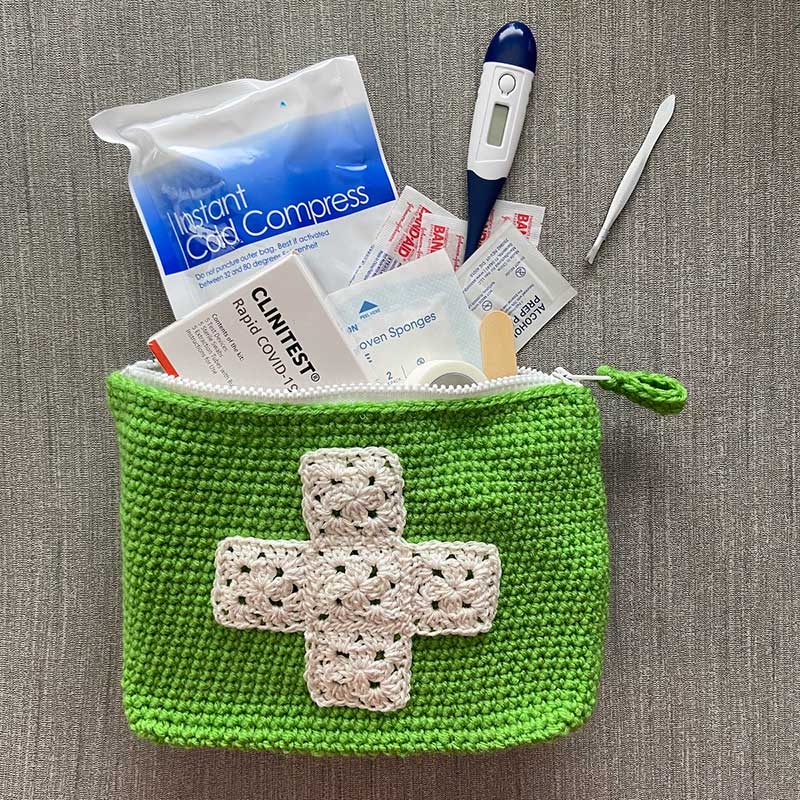
I realized I could make the plus sign emblem (the international symbol for first aid you see on most kits) with several granny squares stitched together. I couldn’t resist doing this! Just because I was making something practical didn’t mean it couldn’t also be super cute too, right?
Using a thinner yarn and a smaller hook so that the granny squares didn’t get too large, I made five granny squares and stitched them together in formation. Then I stitched them to the front of the pouch. You could use any granny square pattern here as long as the squares are small enough to fit on the front of your bag.
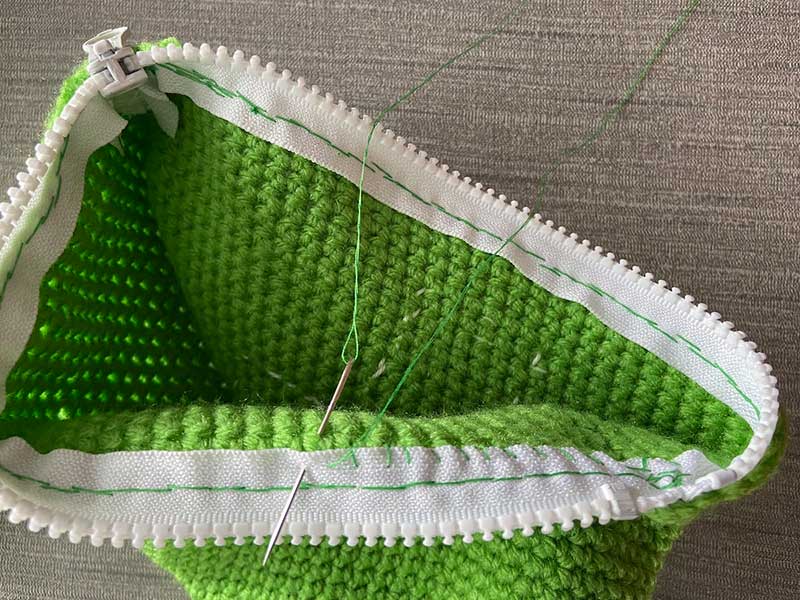
Next, I added a zipper to close the top.
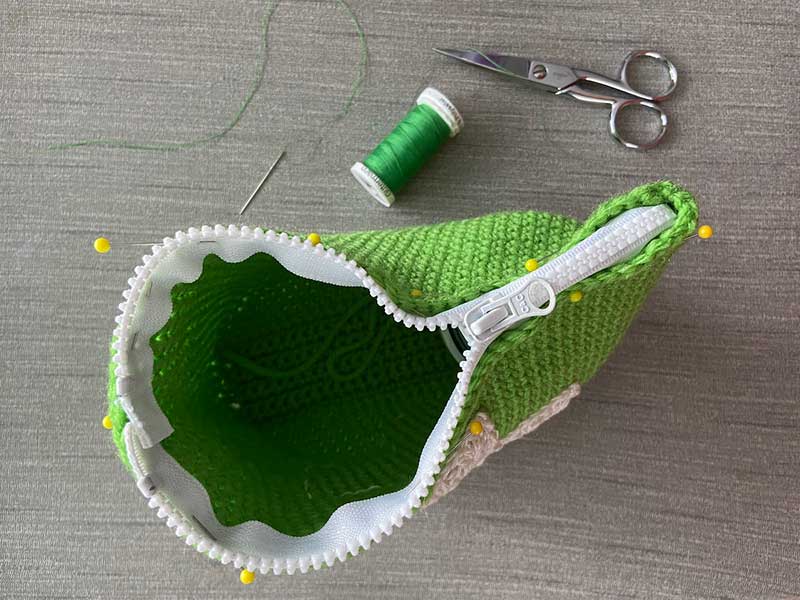
I pinned my zipper in place, then stitched it in with sewing needle and thread.
Check out Sewing a Zipper into Your Crochet Project for some extra help with the zipper.
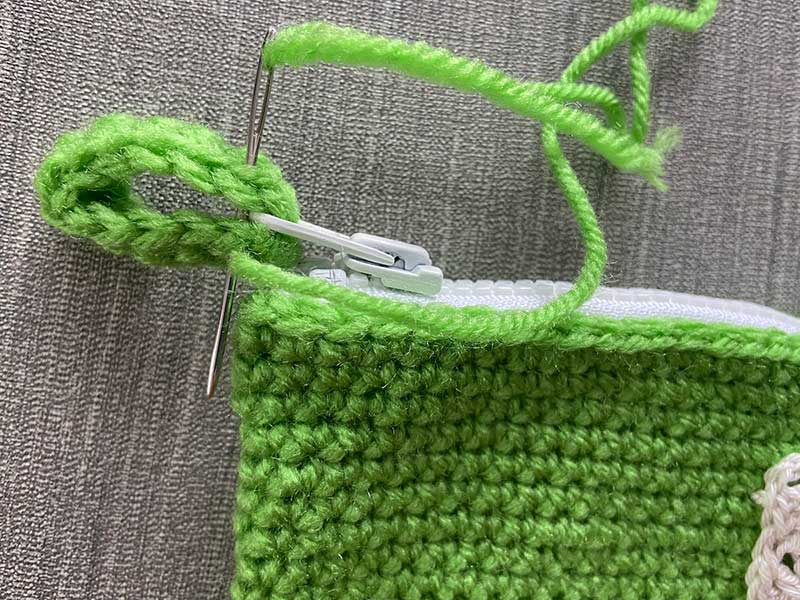
I thought it would be nice to have an extra loop added to the zipper pull for quick access, so I crocheted a small strip and stitched it through the hole in the zipper.
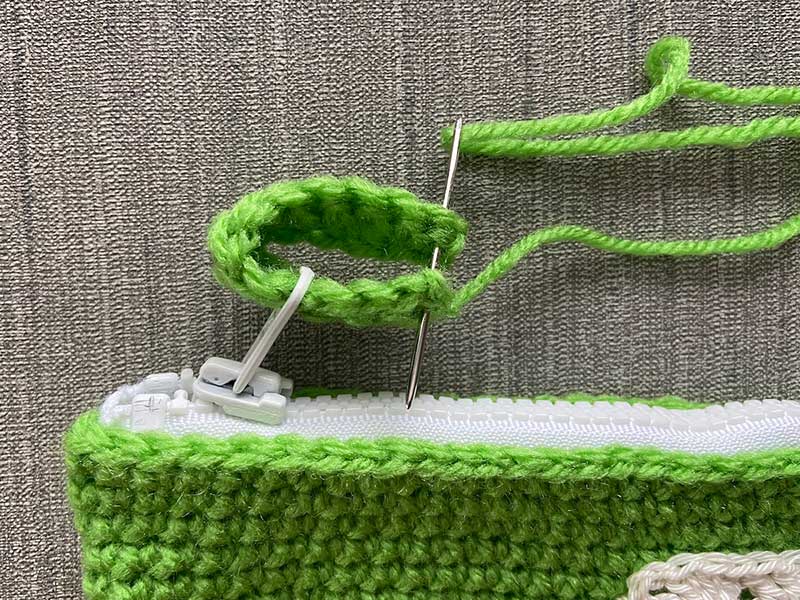
Then I tacked it to itself just above the hole in the pull so that it would stay in place.
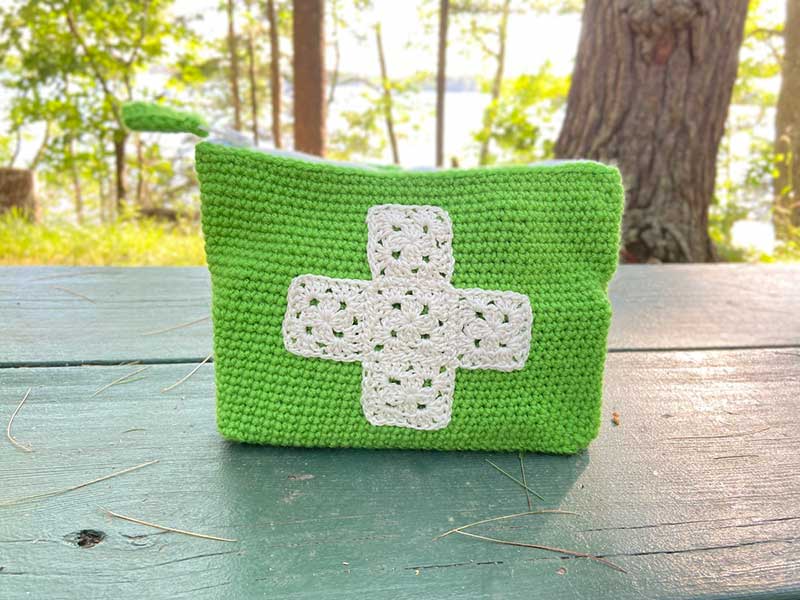
Ta-da! I finished my new crocheted first aid pouch!
First aid kits are super useful to have for yourself and your loved ones. If you know a student going off to college or a friend who likes to travel, putting together a simple crocheted first aid kit also makes a thoughtful and practical gift.
Download the free pattern for this project here! The instructions include information for adjusting the size to your needs too.
If you don’t know what you should put in a first aid kit, here are a couple links to get you started.
CDC/American Red Cross Mayo Clinic
P.S. Wondering why I made this pouch white and green and not red and white? While working on this project, I learned that a white background with a red cross is the symbol for the Red Cross and is not public domain. The international symbol of first aid is actually a green background with a white cross. Crochet teaches us new things every day!

The American Red Cross colors are a RED cross on a white background!
Love new crochet challenges