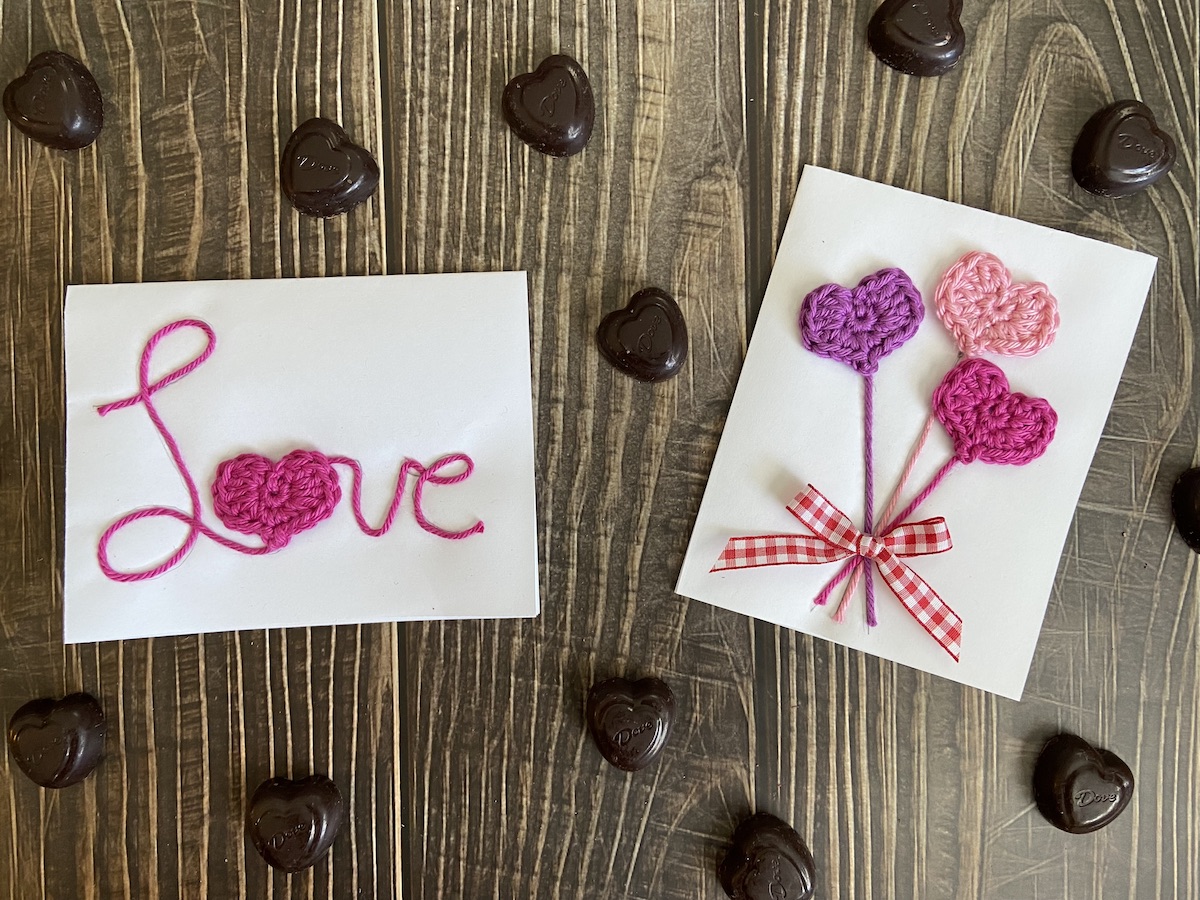
To be honest, Valentine’s Day was never my favorite holiday. Whether in a relationship or not, it just seemed like a day that caused unnecessary stress and unrealistic expectations. In more recent years, however, I’ve been learning to embrace this holiday and use it as a reminder to show those around me that I care about them. It seems like everyone could use a bit more love lately, so I designed this little project to help spread it around! This project is also a great Valentine’s Day activity for the kids. Make these cards with the little ones to give them out at school to their friends or teachers! Directions for using your crochet hearts for embellished Valentine’s Day cards are included here, but if you aren’t interested in making cards, there are so many more uses for them! You can stitch them to hats or mittens, to the front of a baby’s onesie, or even to decorate a pair of old jeans. String several hearts together for a necklace, attach a keyring to make a crocheted keychain, or make your next amigurumi toy even more adorable with a little heart stitched to its chest. The list goes on and on! Best of all, you probably already have all the materials that you need!
To make your own crochet-embellished Valentine’s Day cards, you will need:• About two yards of sport weight yarn per heart
Note: Customizing is absolutely fine here! Use whatever you have. A thinner yarn, such as a sock weight or crochet thread, will make a smaller heart, whereas a thicker yarn such as a worsted weight will create a larger heart. I used We Crochet Shine (which is a sport weight) in colors Cosmopolitan, Crocus, and Blush.• Corresponding size hook (I used an F 3.75mm hook)
Note: If you are unsure about what hook to use, look at the yarn label and use the suggested size.• About ½ yard of yarn to create the word on the “Love” card
• About 8” of ribbon for the bow on the “Heart Bouquet” card
• One piece of paper per card, folded twice (this doesn’t need to be anything fancy; I used copy paper, but cardstock would work well, too)
• Pencil
• Elmer’s glue and/or a hot glue gun (depending on ribbon choice, hot glue may hold the ribbon bow to the card more securely)
 Download the PDF here!
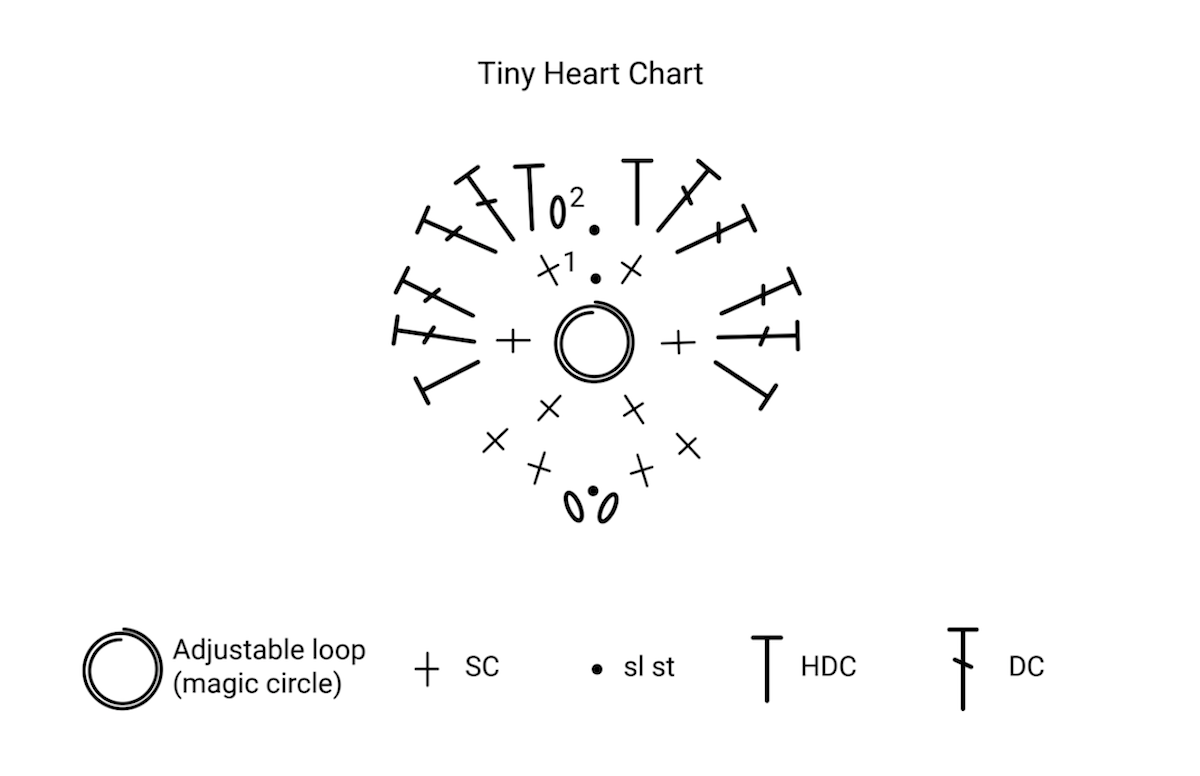
How to Crochet Your Heart:
Round 1: Make adjustable loop (also called a magic ring), 6 SC into loop, sl st into loop, pull on beginning yarn tail to tighten loop. Do not join but continue work in the round. 7 sts.
Round 2: Ch 1, [1 HDC, 2 DC] into next st, [2 DC, 1 HDC] into next st, 2 SC into next st, ch 2, sl st into 2nd ch from hook, 2 SC into next st, [1 HDC, 2 DC] into next st, [2 DC, 1 HDC] into next st, sl st into last st (into the sl st from previous round).
Fasten off. Weave in ends, unless using beginning yarn tail for “stem” in the “Heart Bouquet” card. Steam or wet-block hearts if desired.
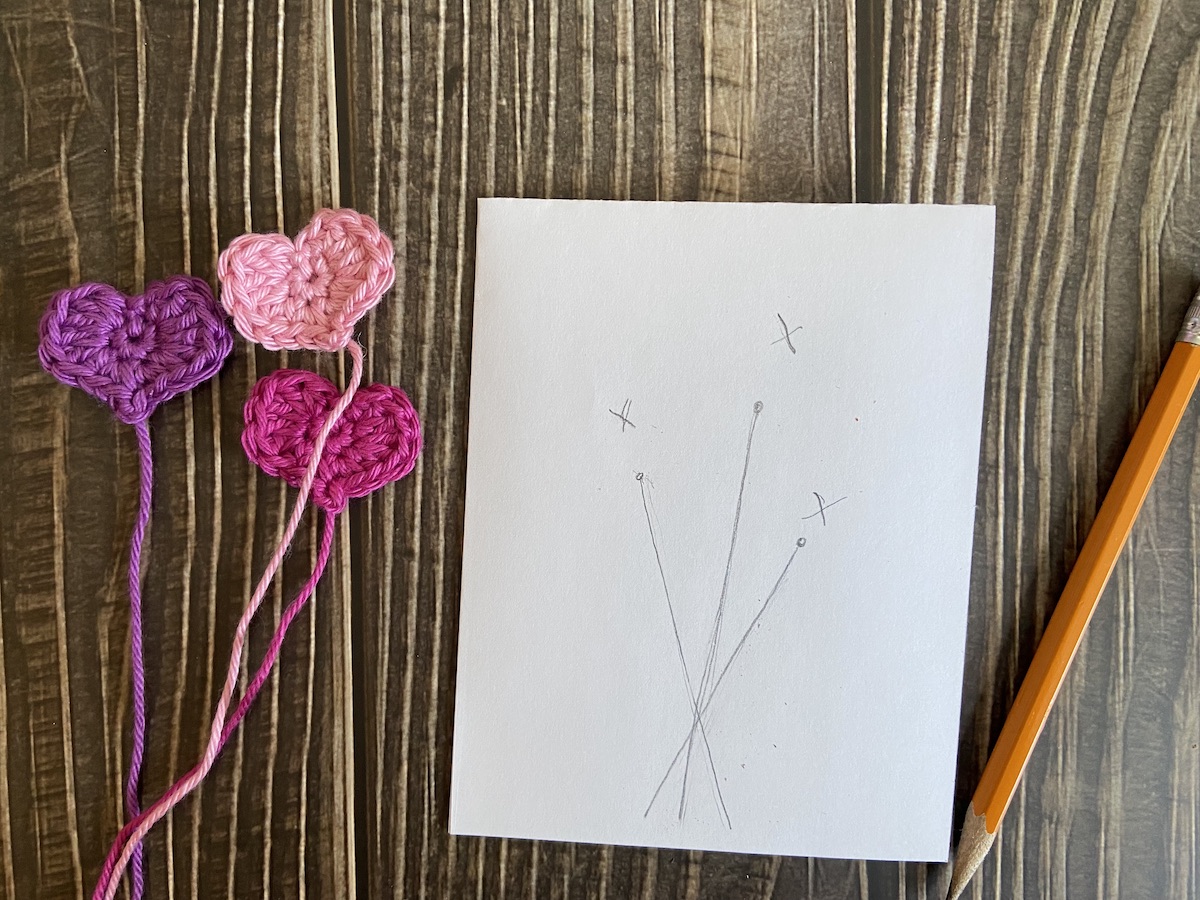
How to Make the “Heart Bouquet” Card:
1. Arrange your hearts on the card as shown in the images below.
2. Use a pencil to lightly mark the placement of the center of your heart, and lightly trace lines where you would like the “stems” to be.
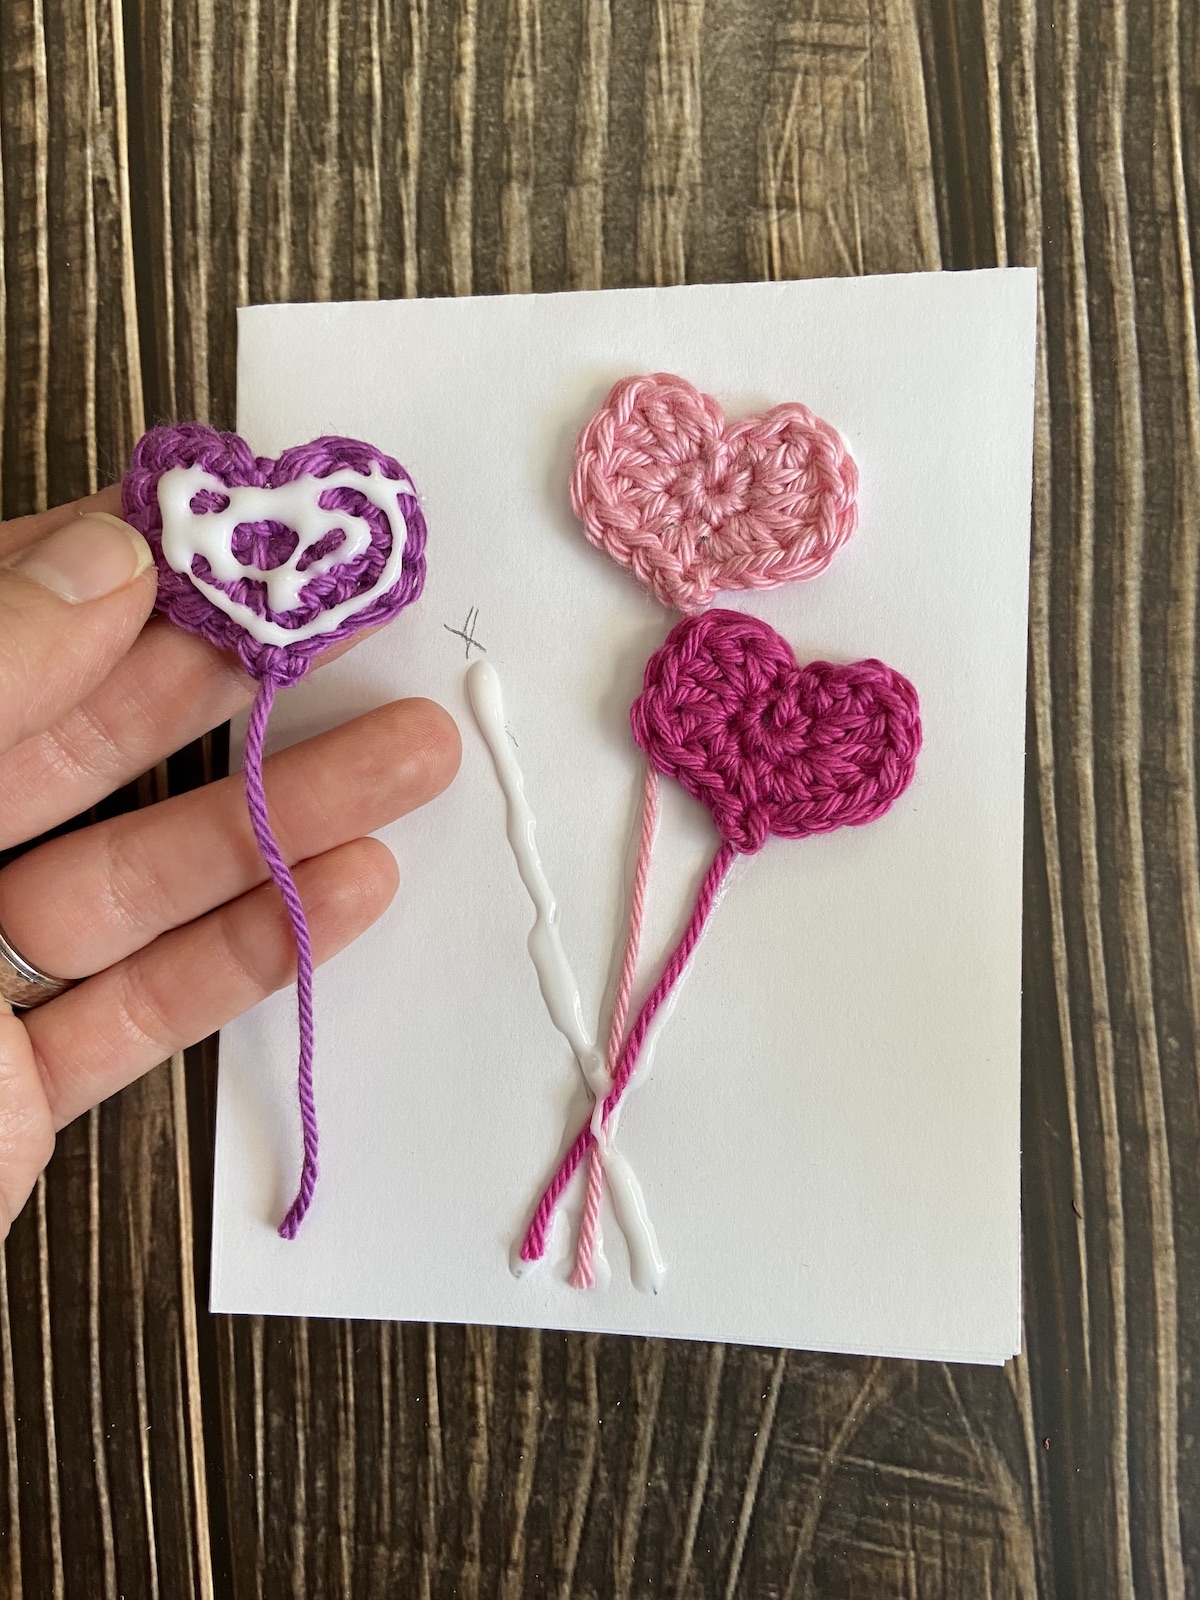
3. Apply glue to the lines on your paper, and cover the back of the crocheted heart with a layer of glue.
4. Attach each heart/stem to your card one at a time.
5. Allow to dry.
6. Tie your ribbon into a bow and glue on top of stems where the yarn intersects with a drop of hot glue.
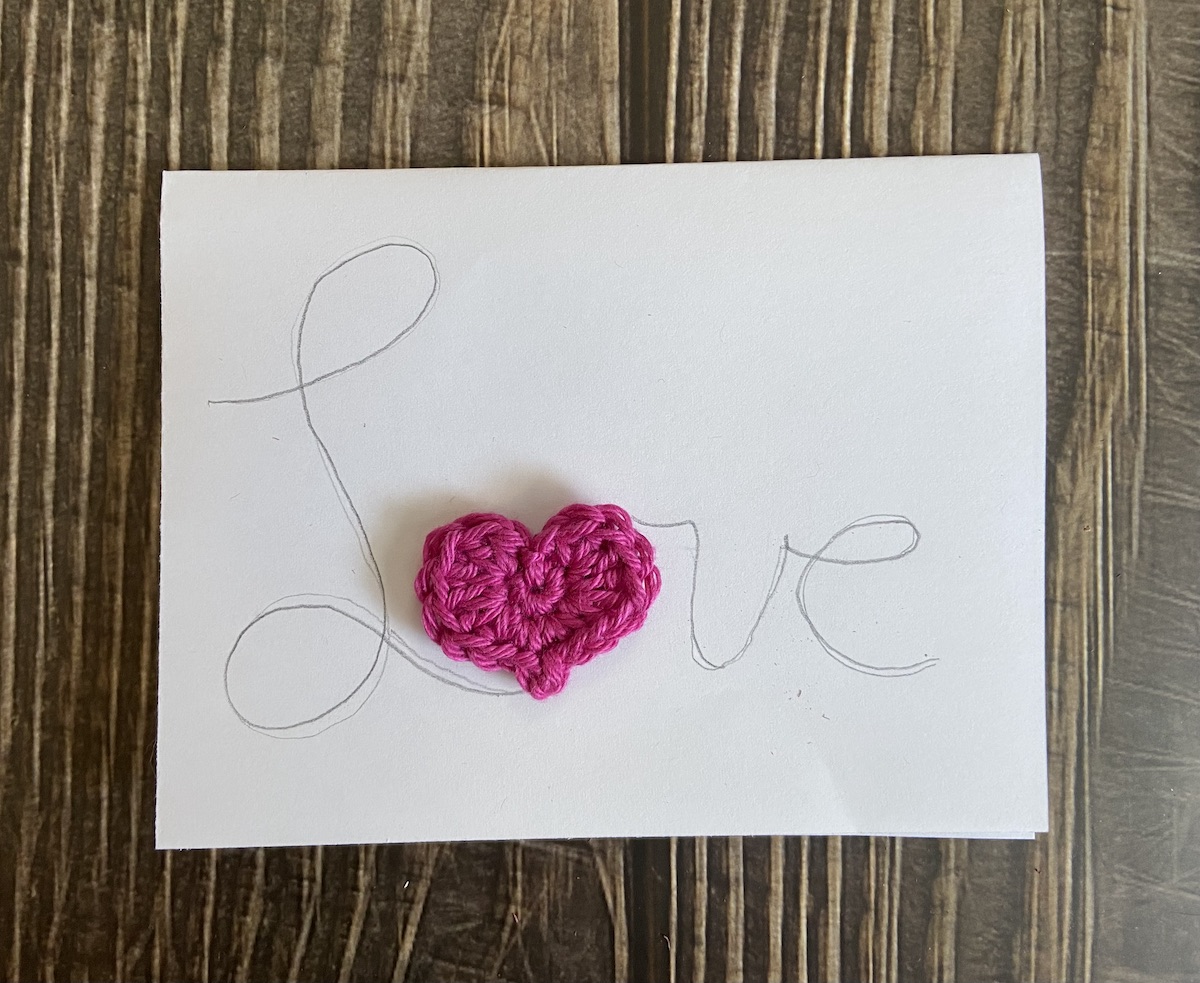
1. Place the heart on the front of the card so that you can visualize how large your letters should be.
2. Using a pencil, lightly write out the word “Love” in cursive on the card using the photo above as reference. Note: The letter “o” will be replaced with the heart, so be sure to leave enough space to accommodate your crochet heart. See how the cursive line goes from the “L” into the bottom of the heart, and exits at the top right side of the heart.
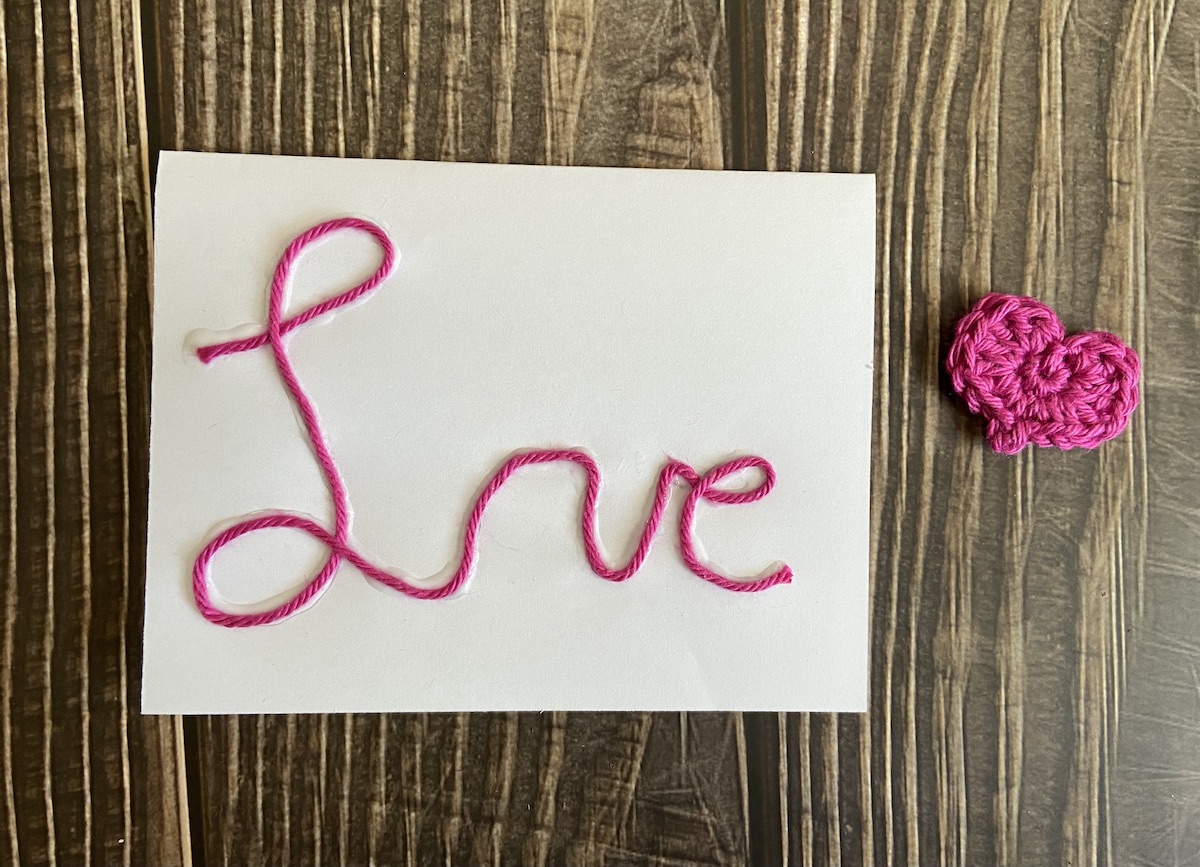
3. Trace your written word with a line of glue. I made my line of glue about the same thickness as the yarn.
4. Place yarn on glue line to create the word.
5. Add a layer of glue to the back of your crochet heart and glue in place of the “o” on your card.
These cards are super quick and inexpensive to make, but the best part is that the recipient will feel so special receiving a cute, one-of-a-kind, handmade Valentine’s Day card. Now, start making your own cards and spread the love!

cute
Darling and such an inspiration!
Love
I love this idea! I would love to share it in a blog post.