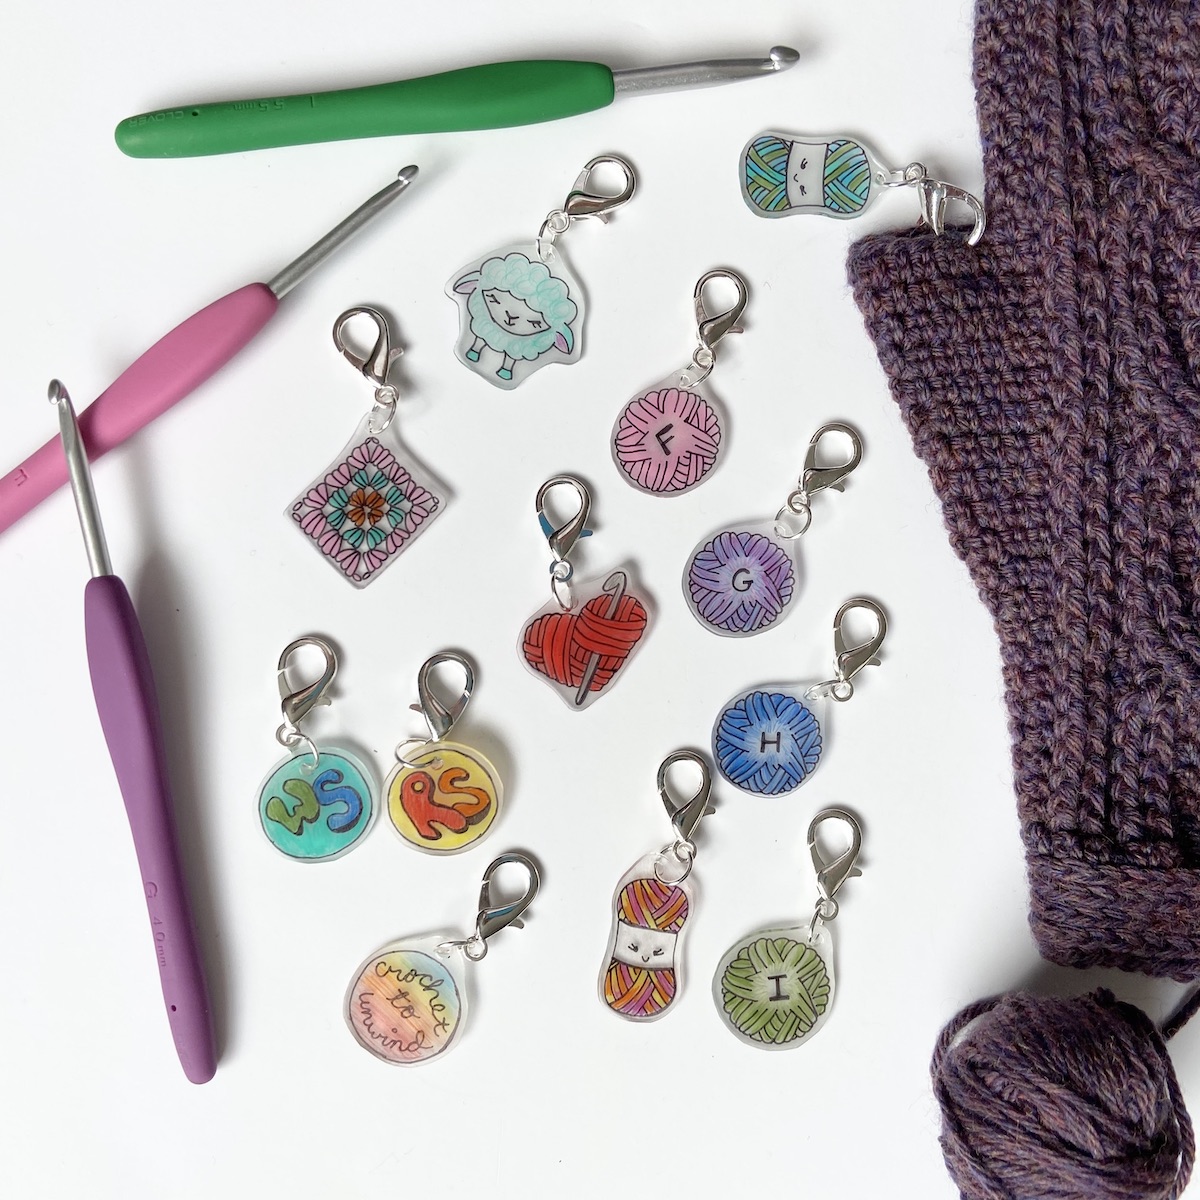
Stitch markers are super useful tools that help us keep track of our progress. They can be used to mark the right side of our work, stitch repeats, decreases, increases, or anything else we need to keep an eye on as we crochet. I always place a stitch marker in the working loop to keep my stitches from raveling when I need to set my project down.
One day I got to thinking—I would love to have stitch markers that are labeled for the hooks I use most. That way, I can mark my project to know which hook I was using when I set my project aside. So, I decided to design my own using heat shrink plastic and lobster claw jewelry clasps!
I was so happy with the results I knew I had to share them. A free PDF template can be downloaded if you’d like to use my designs, but don’t let that limit you. You can get creative with your own designs or enlist your kids or grandkids to draw some for you!
To make your own stitch markers, you will need:
- • Printed pattern template or a sheet of paper with your own designs
- • A few sheets of heat shrink plastic (These come in different sizes. I used three 7.9” x 5.7” sheets.)
- • Colored pencils or Ultra Fine Point Sharpies (I used Sharpies for the outlines and colored pencils for coloring the images.)
- • A standard paper hole-punch
- • A baking sheet, oven, and aluminum foil (to cover the baking sheet)
- • Jump rings (1 per stitch marker) (I used 9mm jump rings)
- • Small pliers (preferably chain nose or needle nose pliers)
- • Lobster claw clasps (1 per stitch marker) (I used 23mm lobster claw clasps)
Instructions:
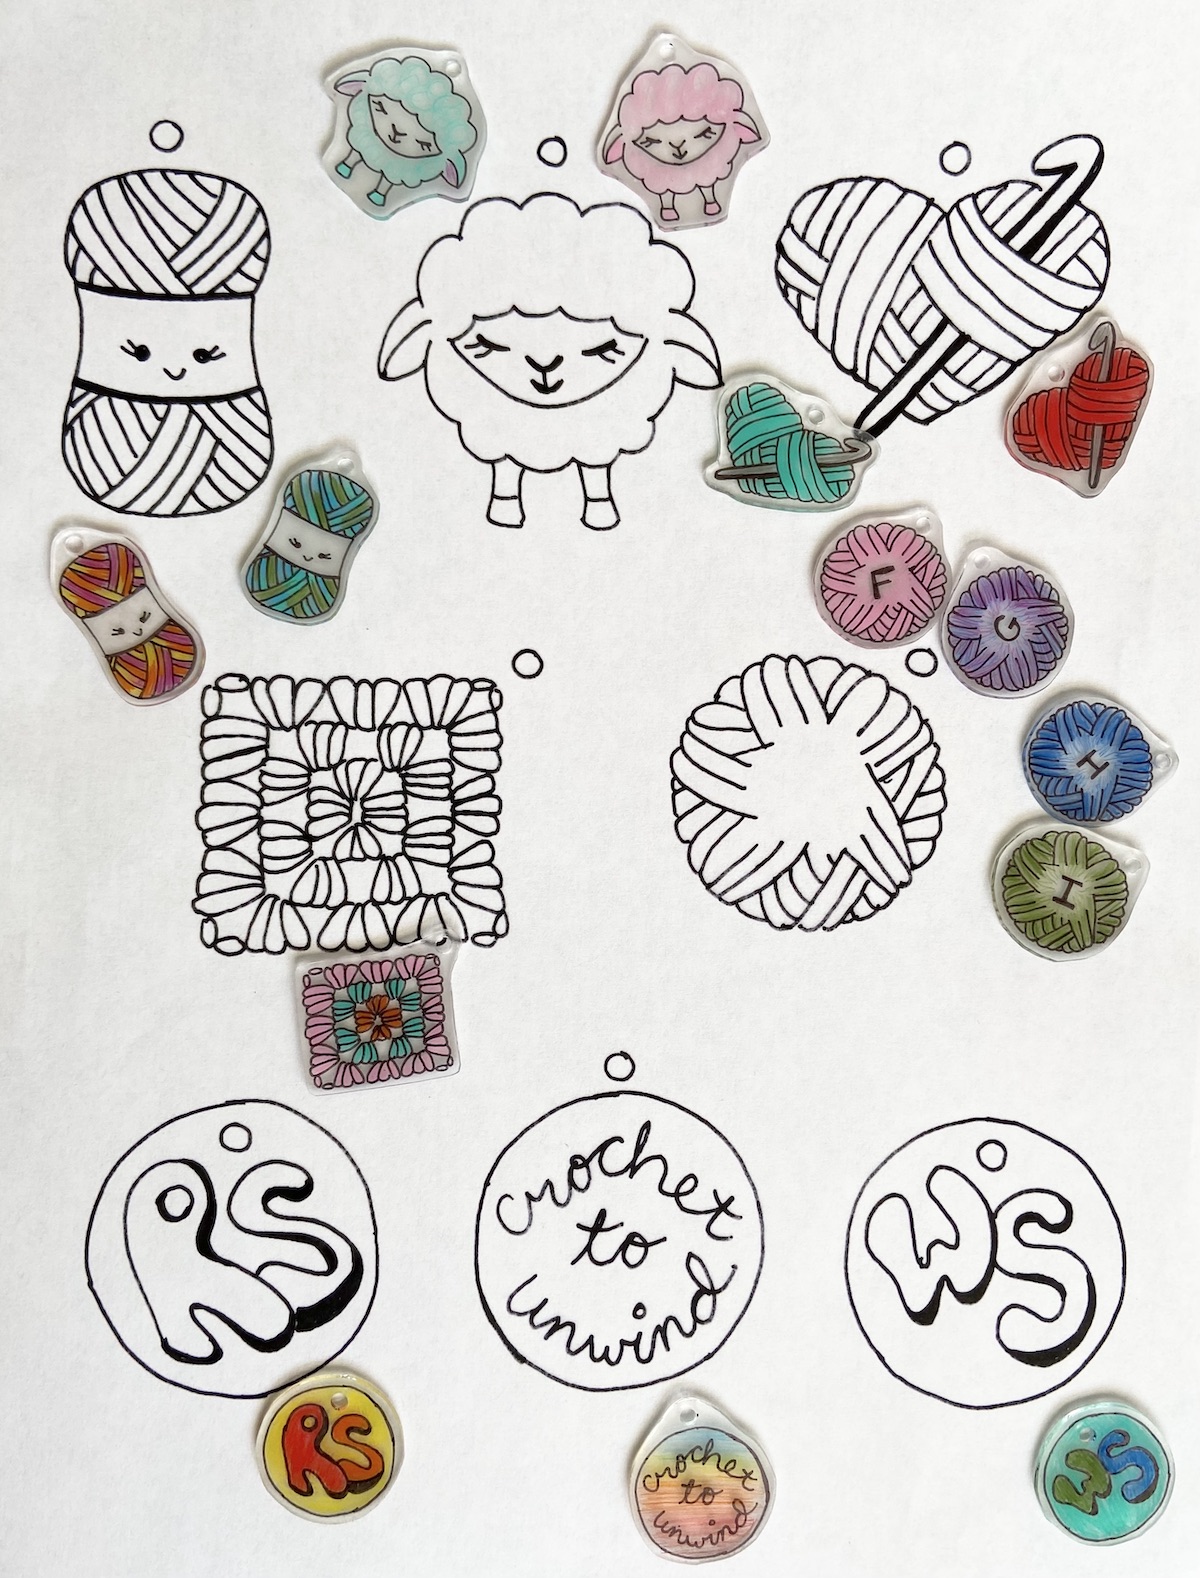
1) First, you’ll need to print out the template or draw your own designs. Designs that are approximately 2” x 2” work well and will end up shrinking to about .75” x .75”.
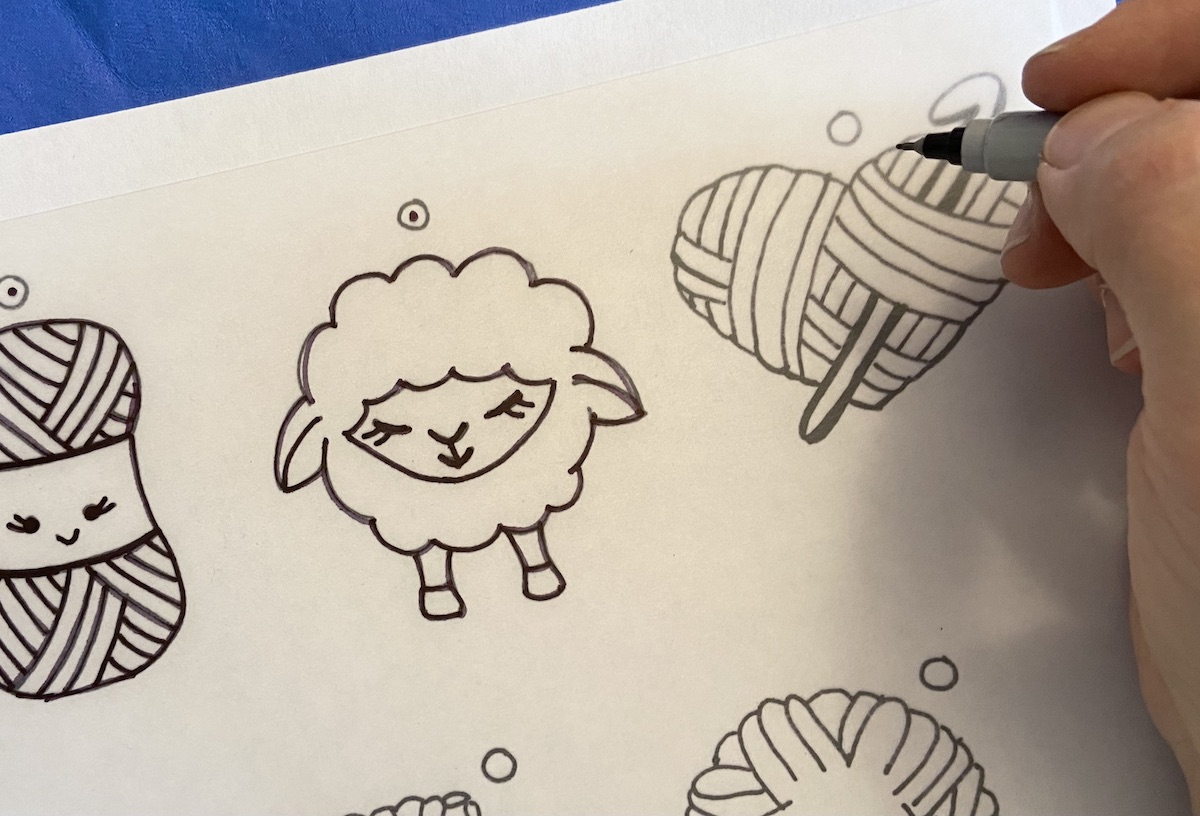
2) Place a sheet of heat shrink plastic over the template with the matte side up and trace with an Ultra Fine Point Sharpie or colored pencil. Use Sharpies or colored pencils to color in the designs. (I used a Sharpie to trace all the outlines first, then colored my drawings in with colored pencils).
Make sure there is enough space between your designs so that you can easily cut them apart. As these shrink in the oven, the color will intensify a bit. Also, be sure to mark a dot where you plan to punch the hole on your stitch marker.
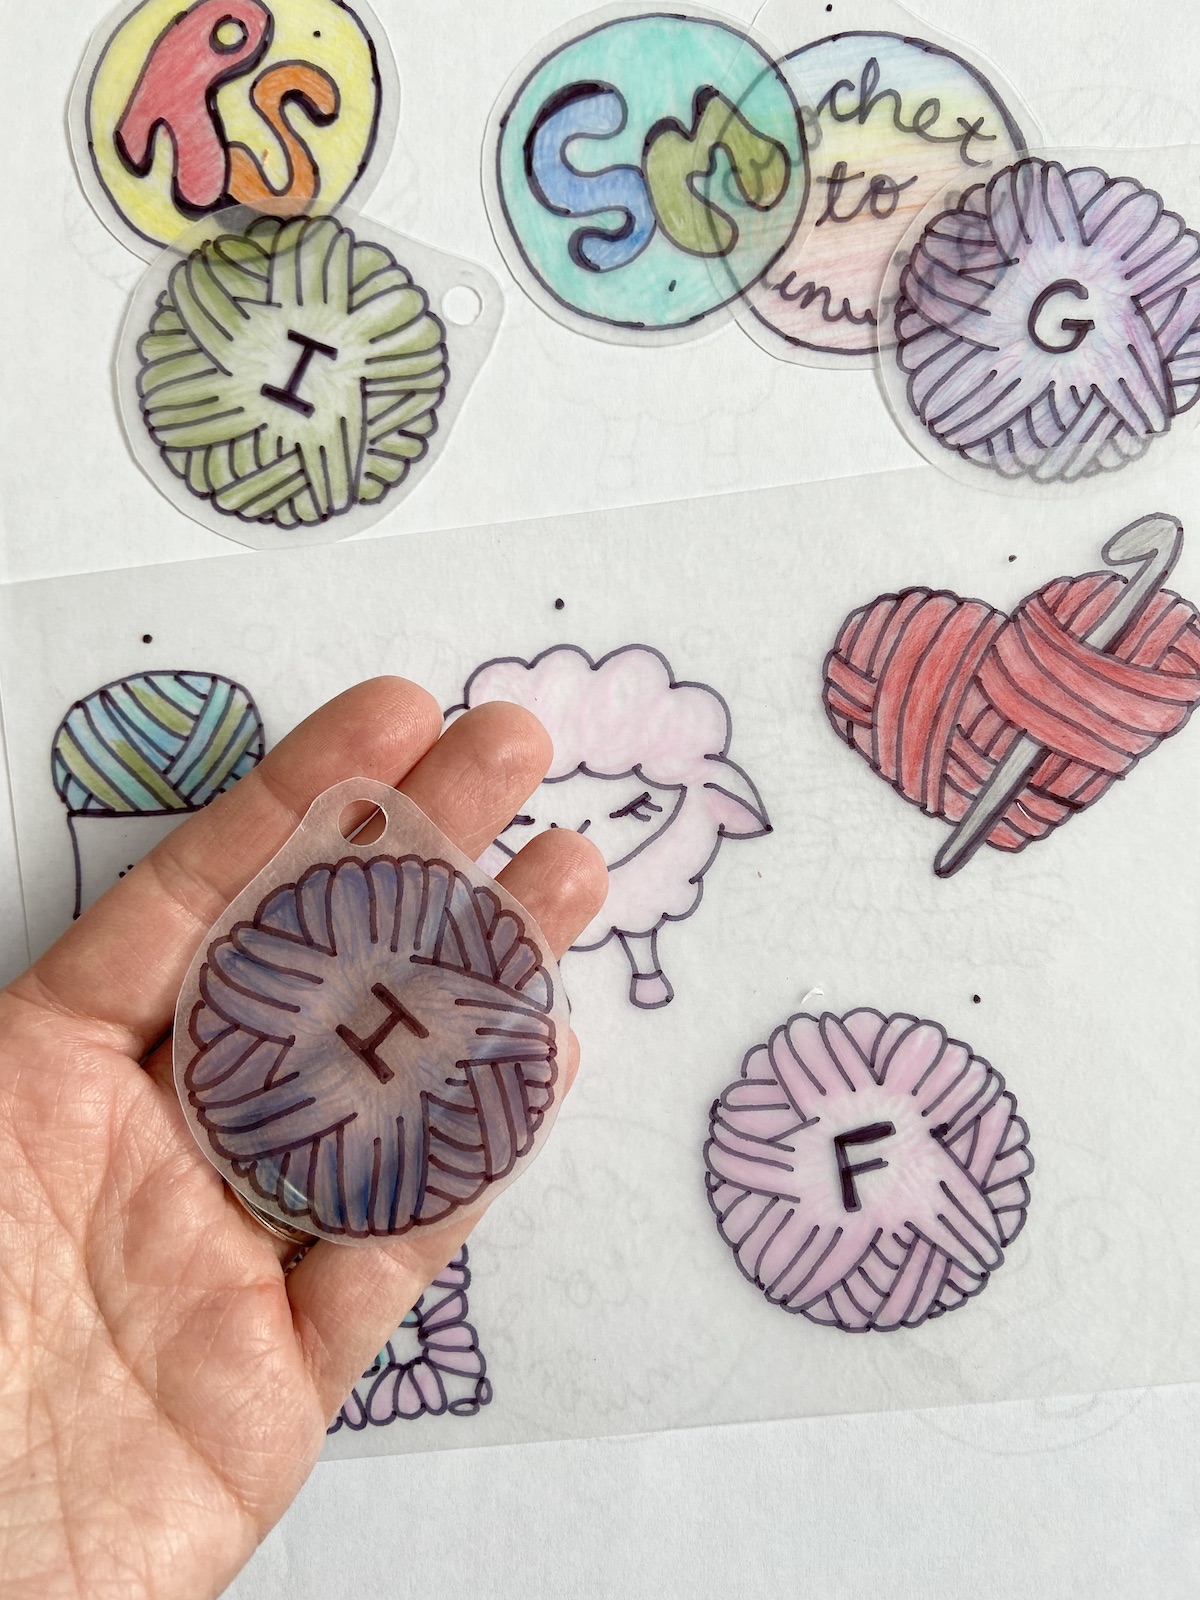
Tip: Notice that the round yarn ball in the template has an empty spot in the middle. This is intentionally left blank so that it can be customized with things you find important. I used this space to write the sizes of my most-used hooks: F, G, H, and I. Some other ideas for this space are: dec or inc to mark decreases or increases, or numbers like 10, 20, 50, 100, and so on to keep track of stitch counts.
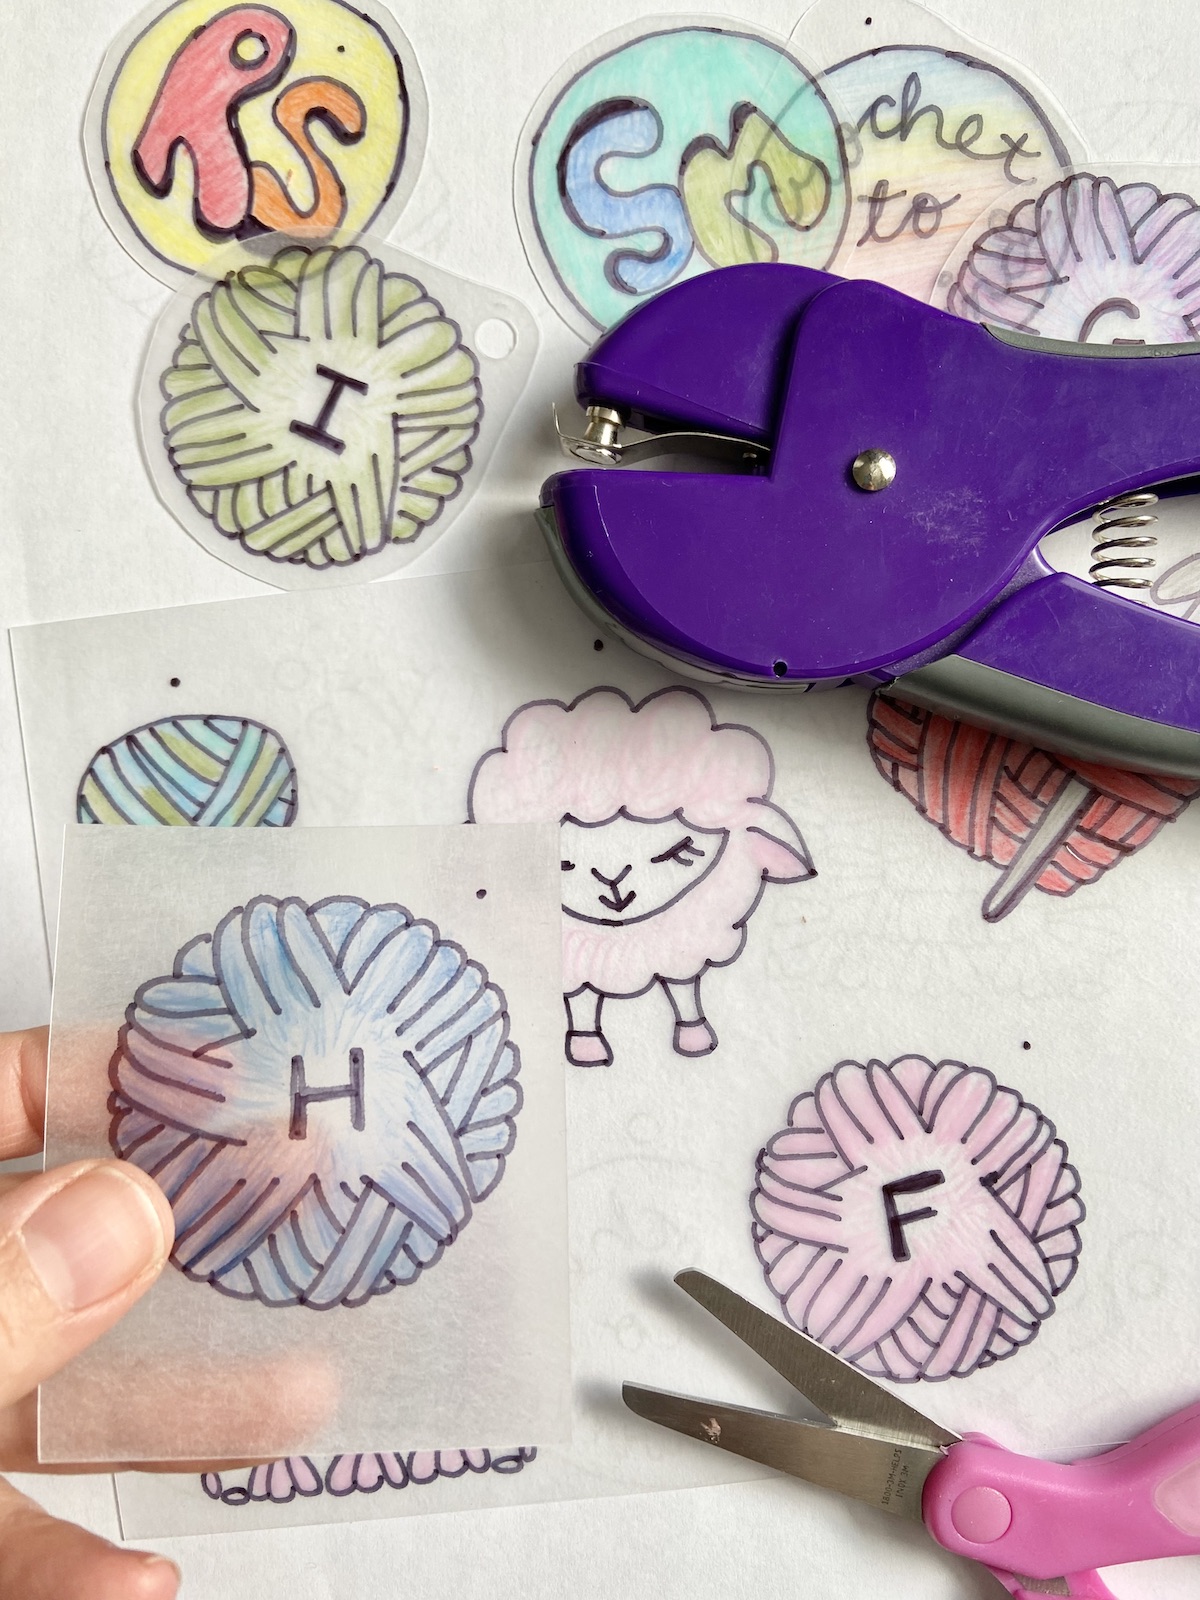
3) Cut out each design. Heat shrink plastic can be very brittle before it shrinks, so it’s a good idea to make simple, straight cuts between pieces to separate them first, then cut around each piece more precisely.
Avoid making any points, jagged lines, or intricate cuts that could create sharp edges on your finished stitch markers. Cut around your drawing leaving a space around all edges including the dot where you will punch the hole. Punch the hole with a paper punch.
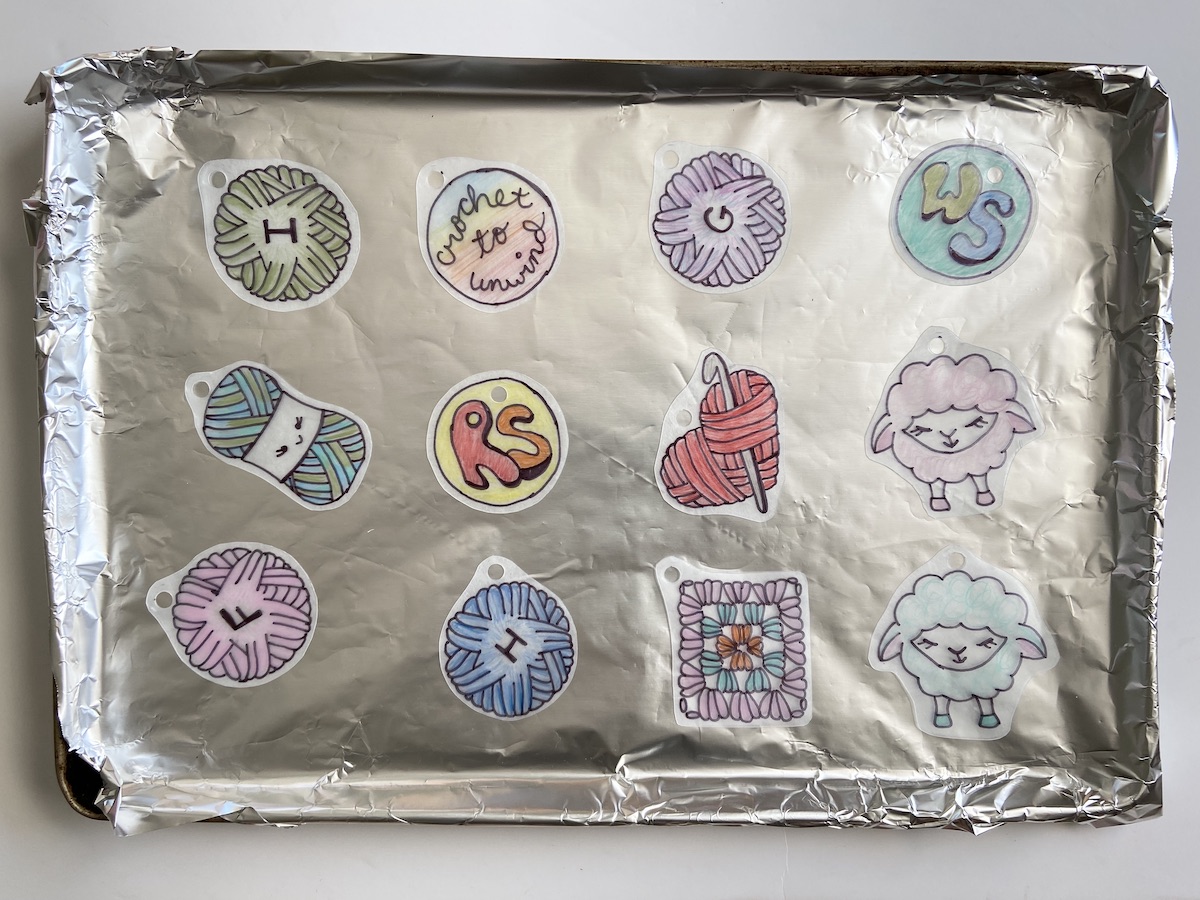
4) Place all pieces on a foil-lined baking sheet with the matte side of your heat shrink plastic facing up (following manufacturer’s directions). Leave some space between each piece as they will curl and uncurl, wiggling a bit as they shrink in the oven.
5) Bake your designs in the oven according to manufacturer’s directions (I baked mine at 330° for two minutes). They will wiggle curl and flip up as they shrink, so make sure you wait until they all lie flat again before taking them out of the oven. Allow them to cool off for a couple minutes.
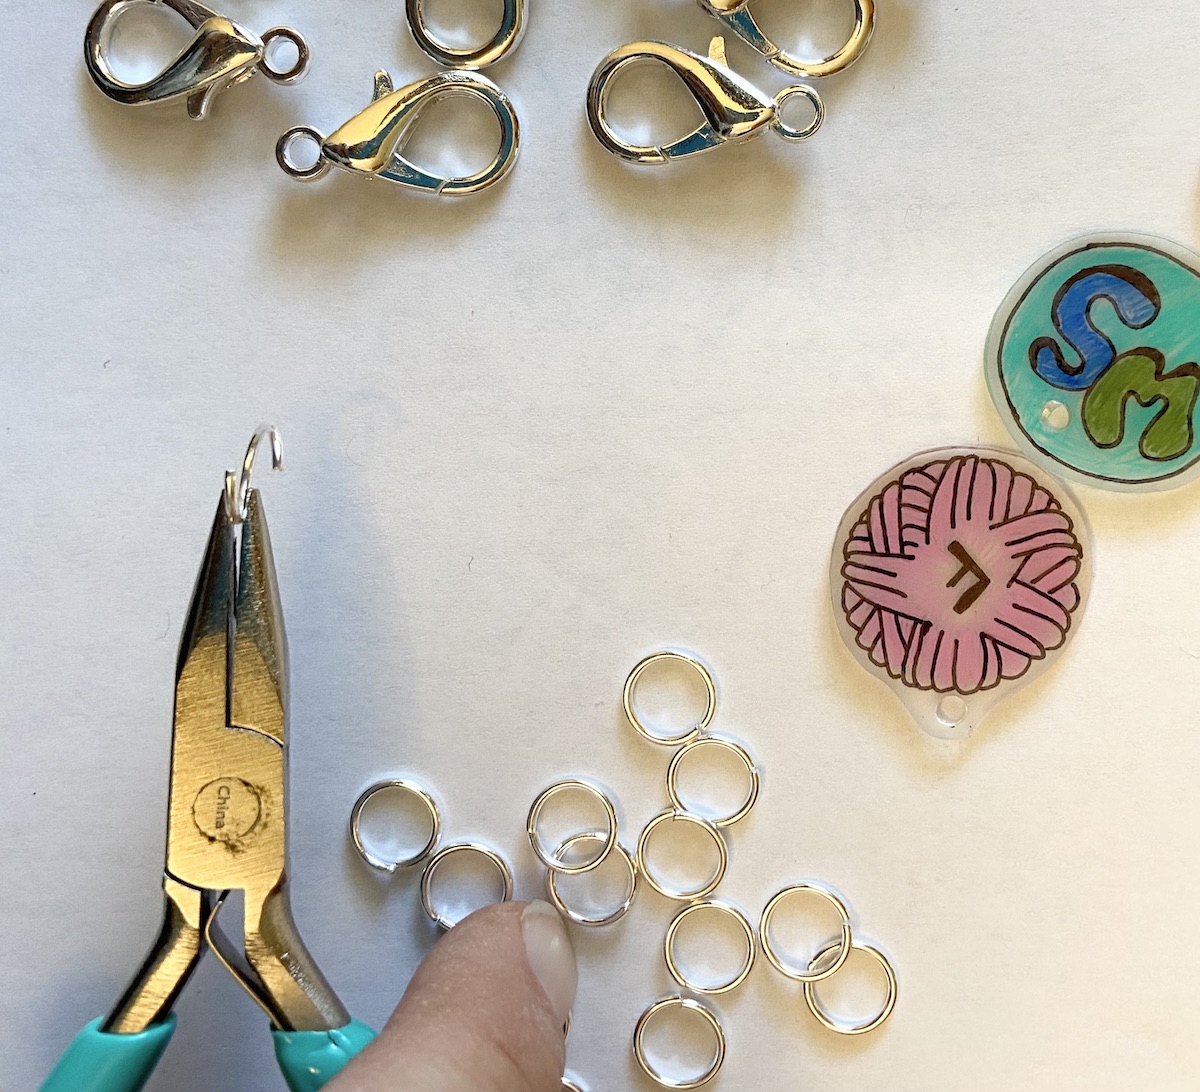
6) Open a jump ring by twisting the ends apart with pliers as shown, then add your plastic charm and lobster claw clasp before closing.
You’re done! Now with your super adorable stitch markers, you’ll never have to wonder which hook you were using or how many stitches you had when you left off.
These stitch markers also make great gifts for fellow fiber-lovers, but they’re so cute it might be hard to give them away without making some for yourself too!
If you try this project, remember to post your pictures showing off your handmade stitch markers on our social media! Share your photos in our Facebook group or tag @CreativeCrochetCorner on Instagram. We love admiring our community’s creativity!
Thank you
It looks so easy to make stitch markers. Thanks!
Thank you for this idea! I found some inexpensive shrinky sheets on amazon and they came yesterday. I traced mine with micron pen and tried the Sharpie. The Sharpie doesn't smear like the micron pen, but the Sharpie isn't as dark. I used prisma colors and baked like you instructed because my sheets didn't come with a temperature or time. Thank you for all the cute templates!
Thank you for5he template! I’ve been meaning to make some of these.
What a clever fun idea. I just happen to have some unused shrink paper and I’m going to make some of these tomorrow!