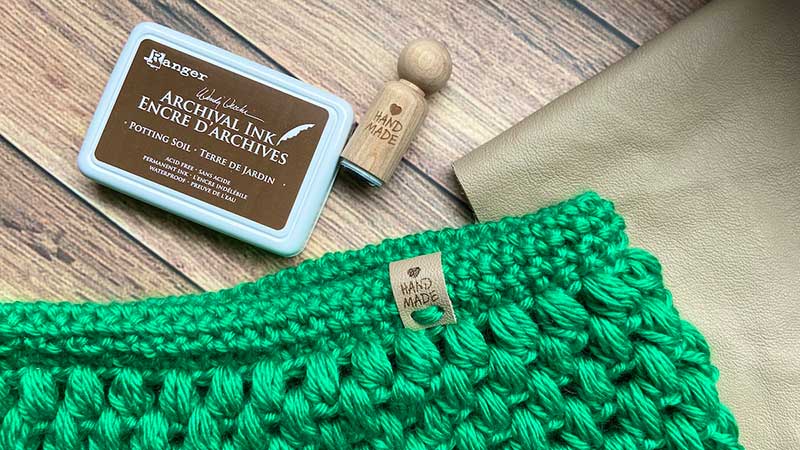
Everywhere you look, makers are adding those cute little leather tags to their handmade crocheted items! This is a really fun and easy way to personalize your crochet projects. If you like to give handmade crocheted gifts, sewing these labels on will remind the recipient how much you care and show that you took the time to make something with your own two hands!
But if you can order some cute labels from Etsy or Amazon, why would you make your own? Because you are a crafter! We don’t need to tell you how great it is to have the ability to make exactly what you want! If you make your own labels, you can choose everything from the image/words on your tag, the color and material, and the shape and size of the label.
Points to consider before making your own labels:
Washability
If you plan to wash your crocheted item, you’ll need to be sure that the tag will withstand the washing as well. I tested the two brands of ink listed above on synthetic and leather scraps, and I washed them in a washing machine on warm with detergent.
I found that after only two washes, the stamps on the synthetic leather had started to fade, particularly the Ranger brand (the StazOn brand did fade as well, just not as much). The stamps on the leather surprisingly did not seem to fade. Even though typically you are not supposed to machine-wash genuine leather or synthetic leather, both materials held up well after being washed. However, I expect that over time they would dry out and possibly crack. It is likely that the ink on the leather would begin to fade at some point as well.
I did another test to see how hand washing would affect the tags. I hand washed both kinds of ink on each material in lukewarm water with a mild detergent (dish soap) and found that it did not seem to fade. The materials seemed to hold up well. This seems to be a better option for cleaning, so for items that would only be washed infrequently and by hand, these tags should hold up well. It is impossible to be certain for each possible material/ink combination, so I would recommend testing the tags yourself.
Cost
If you’re on a tight budget, keep an eye out for a leather purse, wallet, jacket, etc. at your local thrift store. Many fabric stores or leather shops also sell leather scraps at a discount. If you plan to make only a few tags, it might be more cost-effective to order premade tags. However, keep in mind that once you make the initial investment in the ink, stamp, and a scrap of leather, you can make many tags with the materials that you have.
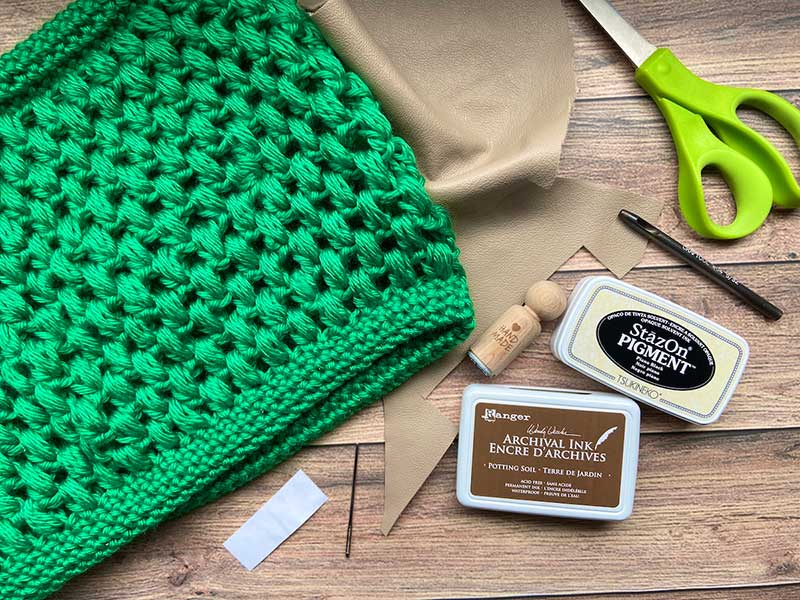
Directions for Making Your Own Labels
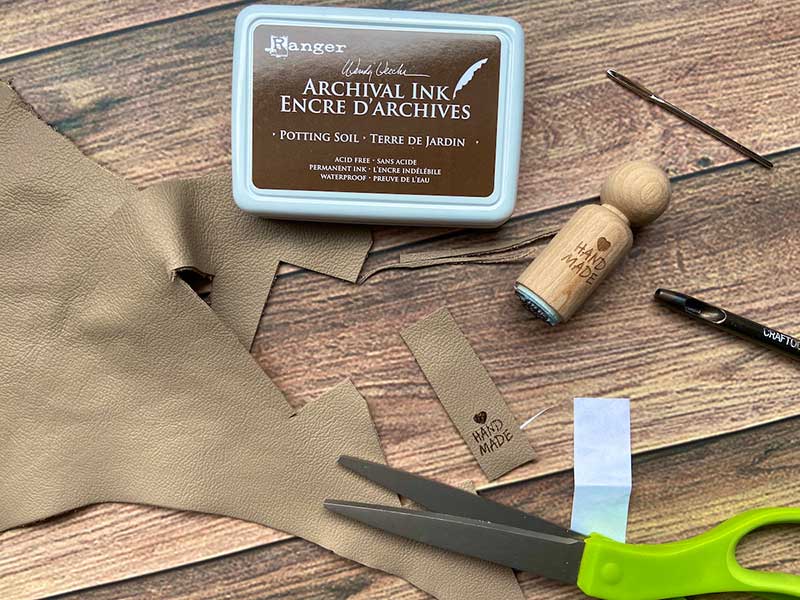
Supplies:- • Paper and pencil for making a pattern
- • Sharp scissors
- • Small scraps of genuine leather, PU leather (synthetic leather), or micro-suede
- • Permanent ink stamp pad such as StazOn or Ranger Archival Ink
- • Rubber stamp—I used this one in the photos, but you can also order custom stamps with your own name or logo like these or this one. Just be sure to think about the scale of your design/logo/tag before you order it.
- • Something to punch holes in the tag—I used a craft punch similar to this one, but a leather punch like this one would work well too. You could also use a sewing awl or a hand-sewing leather needle as well.
- • Yarn needle and extra matching yarn (or embroidery floss) in a coordinating color
Instructions:
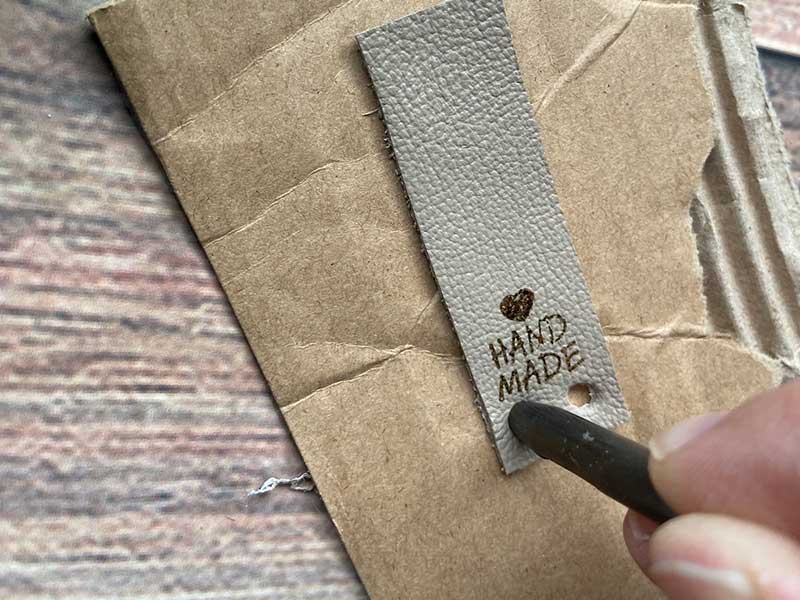
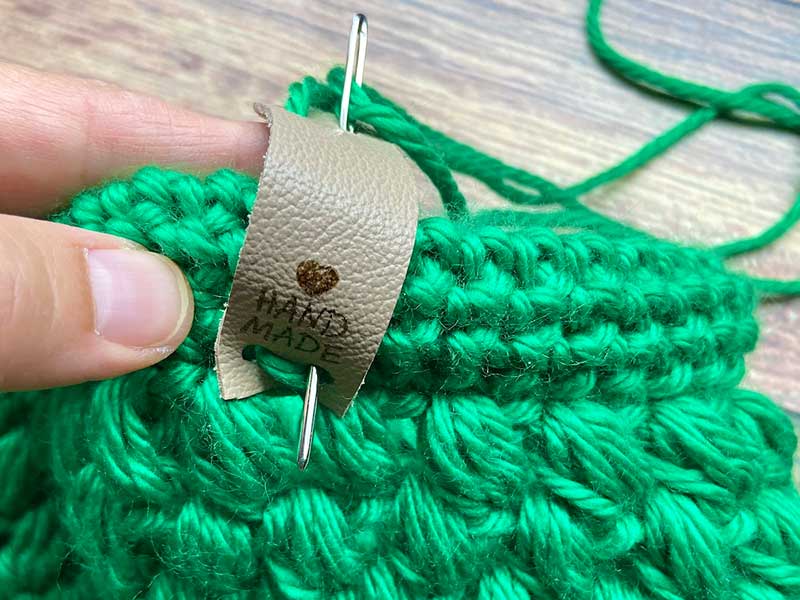
- First, use a piece of paper, pencil, and scissors to cut out a little pattern piece. This might seem silly, but it will really help you to determine the size and shape of the tag as well as the placement of the stamp on the tag. You can stamp your pattern piece to check placement and make sure that there will be enough room on the ends to create holes for sewing.
- Stamp the leather, leaving enough room around it for the rest of the tag. Sometimes it is difficult to see exactly how the stamp is oriented, so I would recommend stamping the leather first, then cutting it out. Make sure you think about whether the stamp should go near the top or bottom of the tag if you plan to fold it.
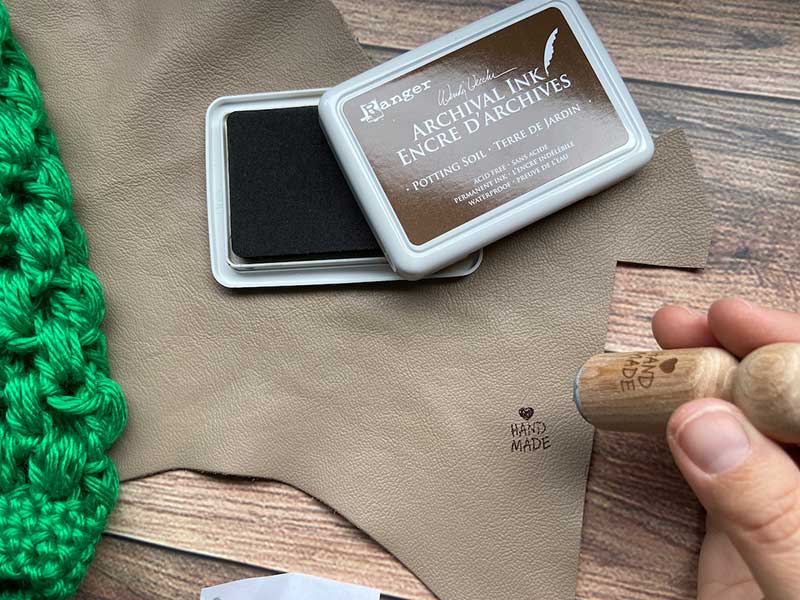
- Lay pattern piece on top of the stamped leather and cut around it with sharp scissors.
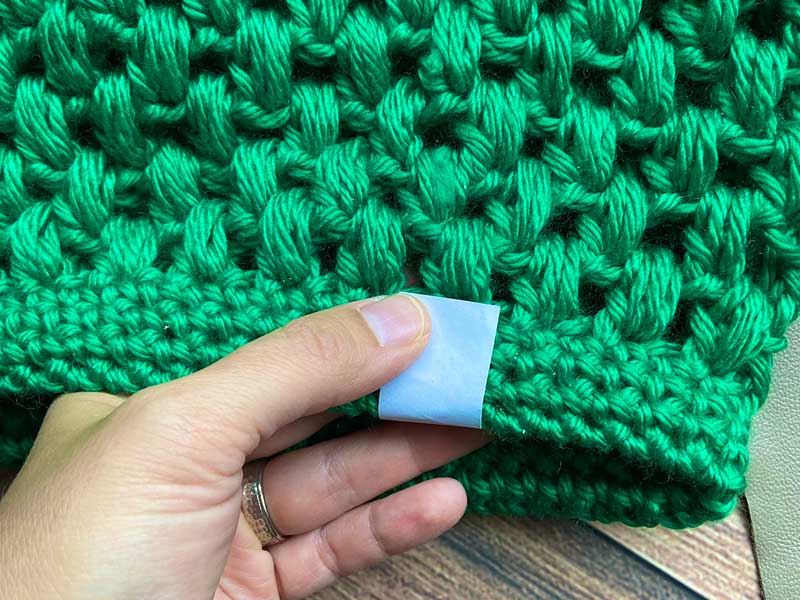
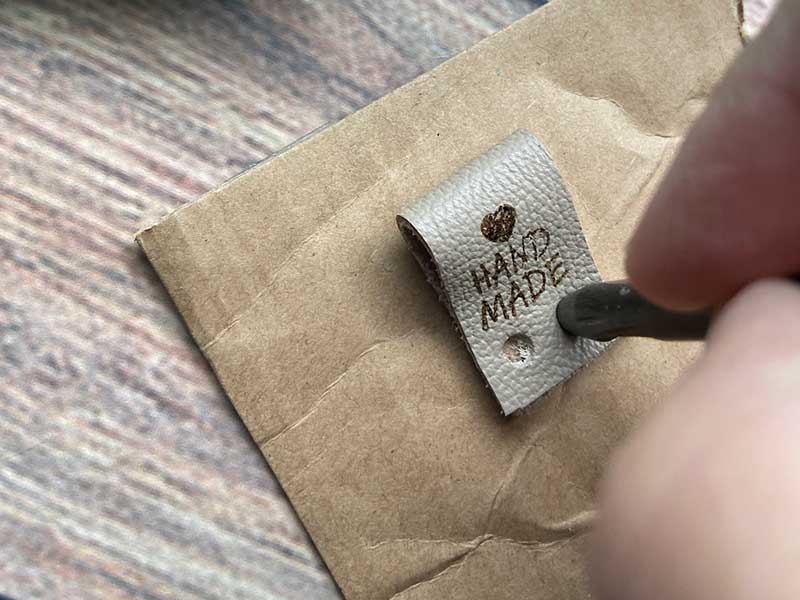
- Add the holes for sewing by making two holes on one end, then fold the tag to see where to make the holes on the opposite end. You can use the first two holes as a guide to make the second set of holes.
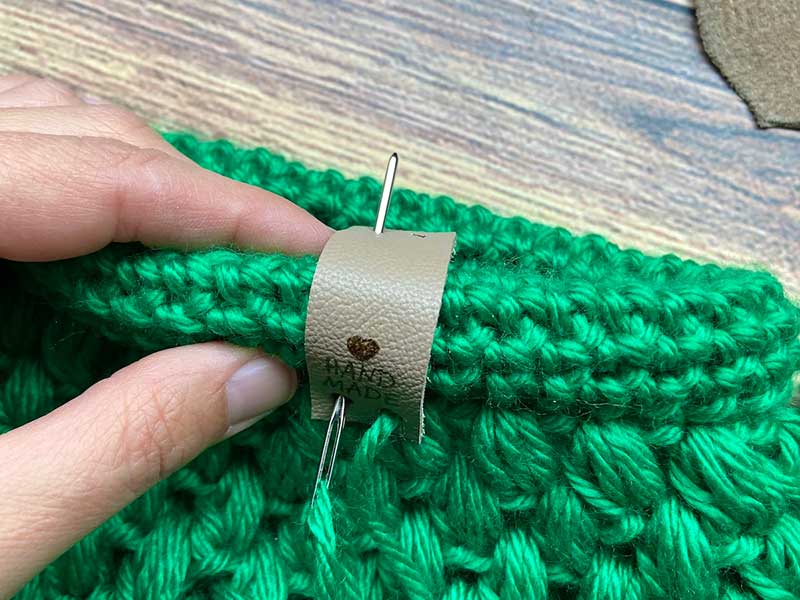
- Using yarn and yarn needle, or embroidery floss and embroidery needle, sew the tag to your handmade item.
See? This cowl just got WAY cuter, didn’t it? By the way, if you are interested in making the Puff Love Cowl you see in this article, there is a video tutorial here, or you can download the free crochet pattern here.
If you’ve tried this project, don’t forget to share your photos with us in our Facebook group or tag us on Instagram! We love seeing what our crochet community is making.
Great idea for those who are planning to make Crochet a business! Is Creative Crochet Corner Part of Craftsy?
How do I order a custom stamp?
You can actually send away for little cloth tags that say “Hand made by “___________” with your name. They are cute and tell who made the item.
How do I order a custom stamp? Thanks Jean
Get