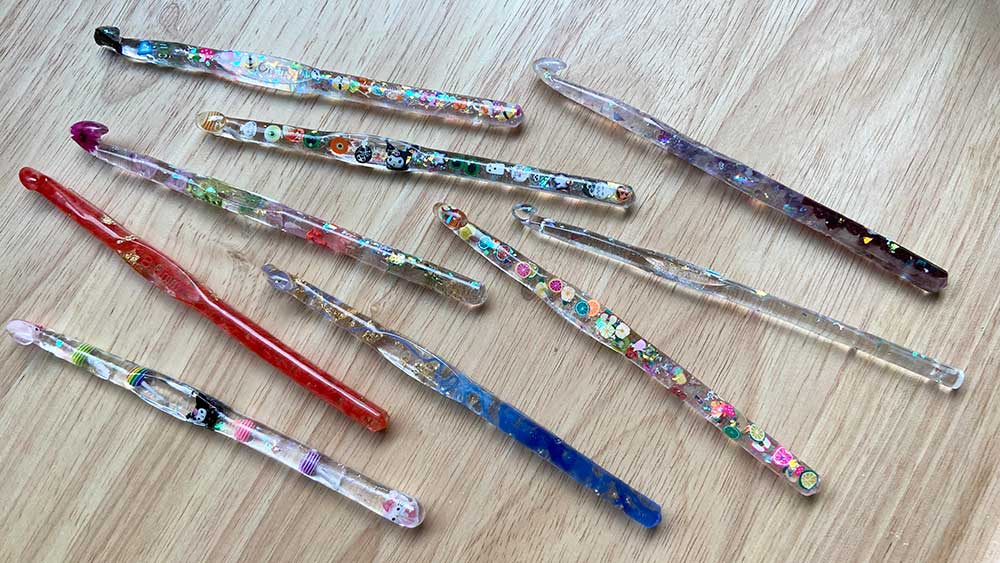
Making custom crochet hooks does take a bit of patience, but you don’t need prior resin experience to give this DIY project a try!
You will need the following supplies:
- • Epoxy resin
- Look for a brand that is low-odor and non-toxic/odorless after curing. I used this one. This quantity is enough for many hooks.
- • Protective gloves
- This is recommended to prevent skin irritation. I would recommend using tight-fitting latex or nitrile gloves. Anything baggy or loose will make it very difficult to work with small pieces.
- • Silicone crochet hook molds
- I bought this set, but there are quite a few vendors on Amazon and Etsy that carry these same molds: Here is a set of 10, another set of 10, and here are some on Etsy.
- • Disposable pipettes for adding resin to the molds
- • Wood craft sticks for stirring
- Often these will come with your resin kit, but having some extras won’t hurt.
- • Small disposable plastic cups
- You’ll use these for measuring and mixing your resin. This will likely come in your resin kit, but medicine cups work well too.
- • Toothpicks or tweezers to place decorations or charms
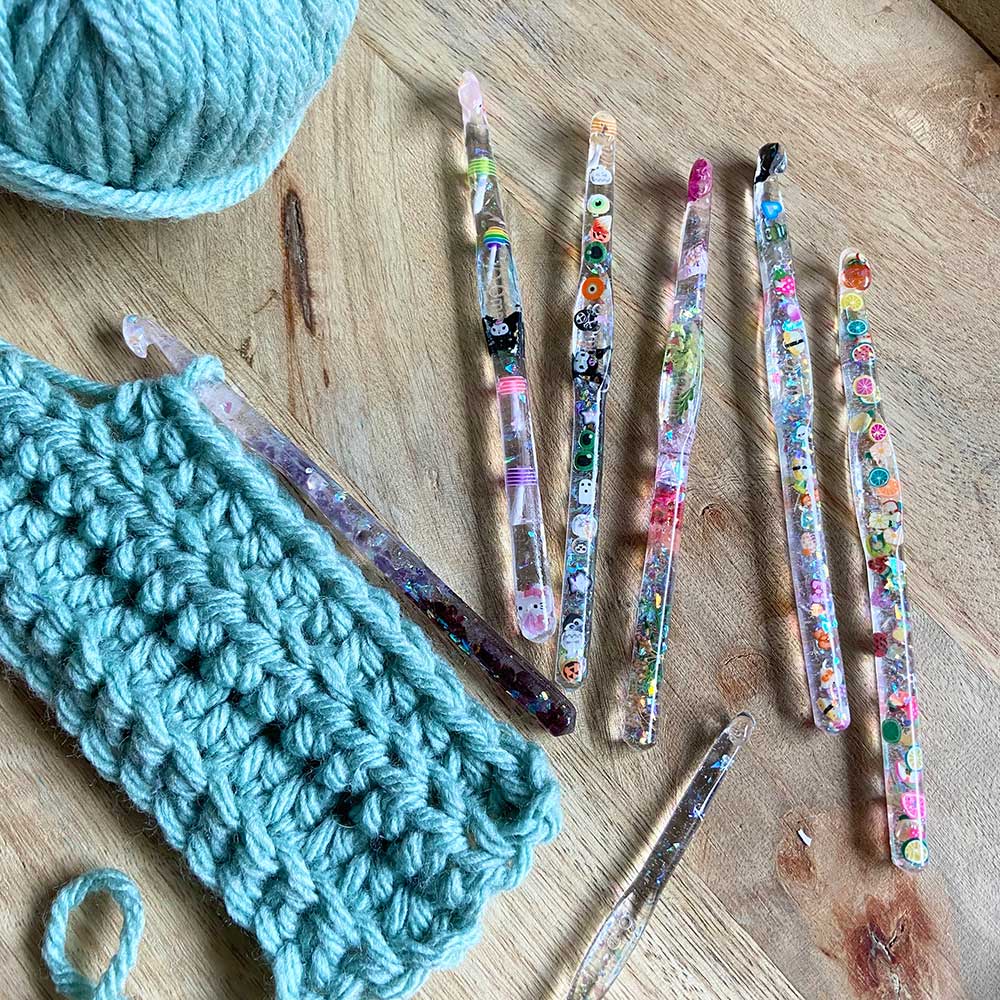
- • Optional: Decorations and charms to add to your resin
- Glitter, gold foil (these came with my resin kit), polymer clay slices are nice because they look good from both sides and are incredibly tiny. This collection has a very wide variety of themes.
- Acrylic resin candy nail charms. Note: The wrapped candies didn’t show up very well as they are mostly a clear piece with a colored backing. While this looks great alone, when you submerge it in a clear resin, the 3D shape of the candy disappears. I loved the lollipops, but they are a bit large and will only fit in 9mm or 10mm hooks.
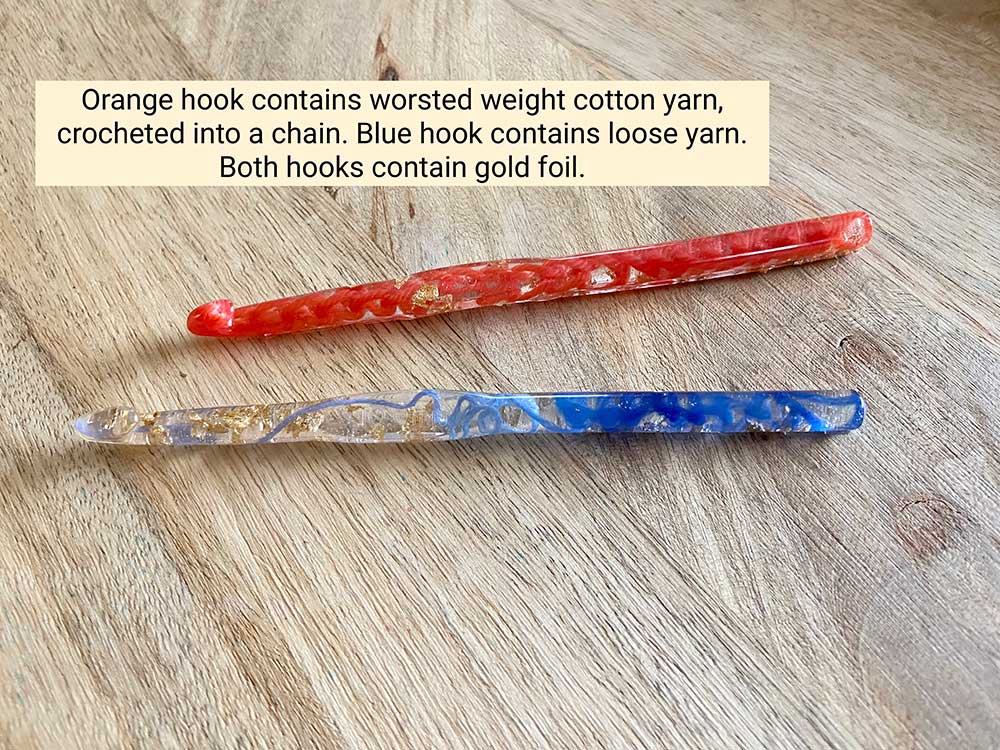
- Small pieces of yarn, crocheted in a chain, or just loose to imbed into the resin.
- Small dried flowers such as this pack used for nail art.
- • Optional: Resin dye
- I did not use this in my samples, but it’s next on my list to try!
- • Parchment paper
- Lay this out to protect your work surface. I also used a plastic tray to work on so I could move the whole tray to a safe place for curing when I was done.
- • Sandpaper
- I used 150-grit because that was what I had on hand, but you could definitely go coarser than that.
- • Particulate respirator to be used when sanding
- • A small disposable paintbrush for applying a final, thin coat of resin
- • 2 plastic cups taped together at their bottom surfaces
- This was used to hang the hooks from as the final coat of resin cured.
- • Soap/water for cleanup
- I found that Dawn dish detergent worked best for removing the stickiness from my hands.
Notes/tips:
- • I would not recommend making thinner hooks with this process. I would stick to sizes at or above 6.5mm. I found that the thinner hooks did not seem very sturdy, I was even able to snap them with my hands. I also noticed that if there was too much “filler” in the thinner hooks, they became even weaker. Thin hooks are also difficult to make without creating a wavy or bent shape.
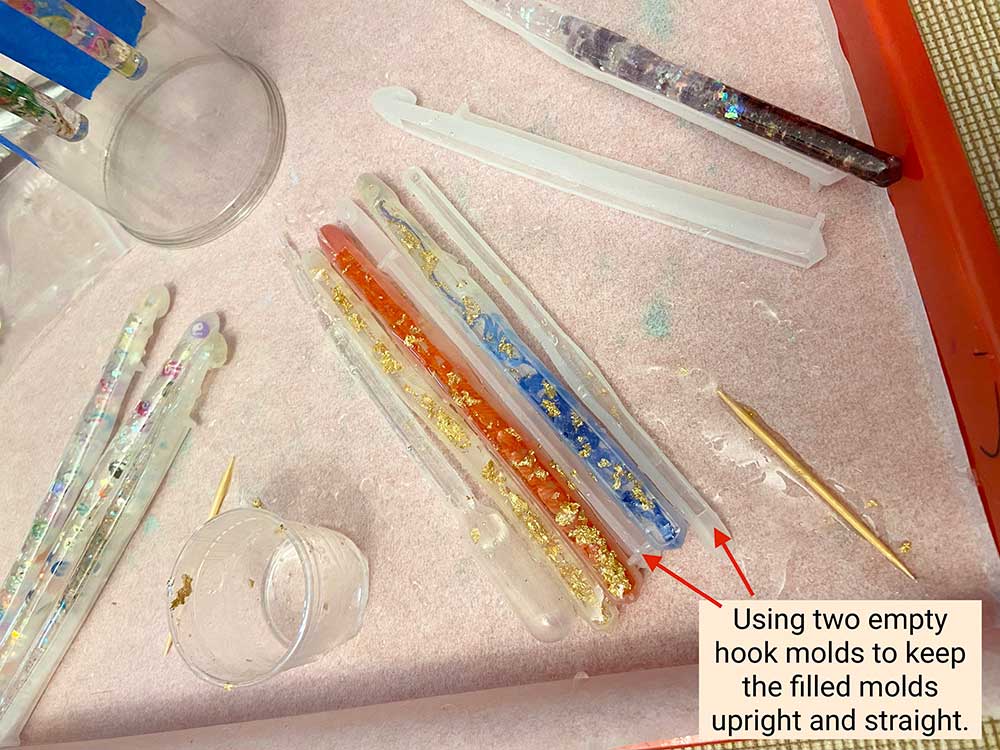
- • Regardless of hook size, it helps to have something to place on each side of the hook as it cures to straighten them and to keep them from tipping to the side. Because I was not using the thinner hook molds to create hooks, I used these empty molds to keep the filled molds from misshaping during the curing process.
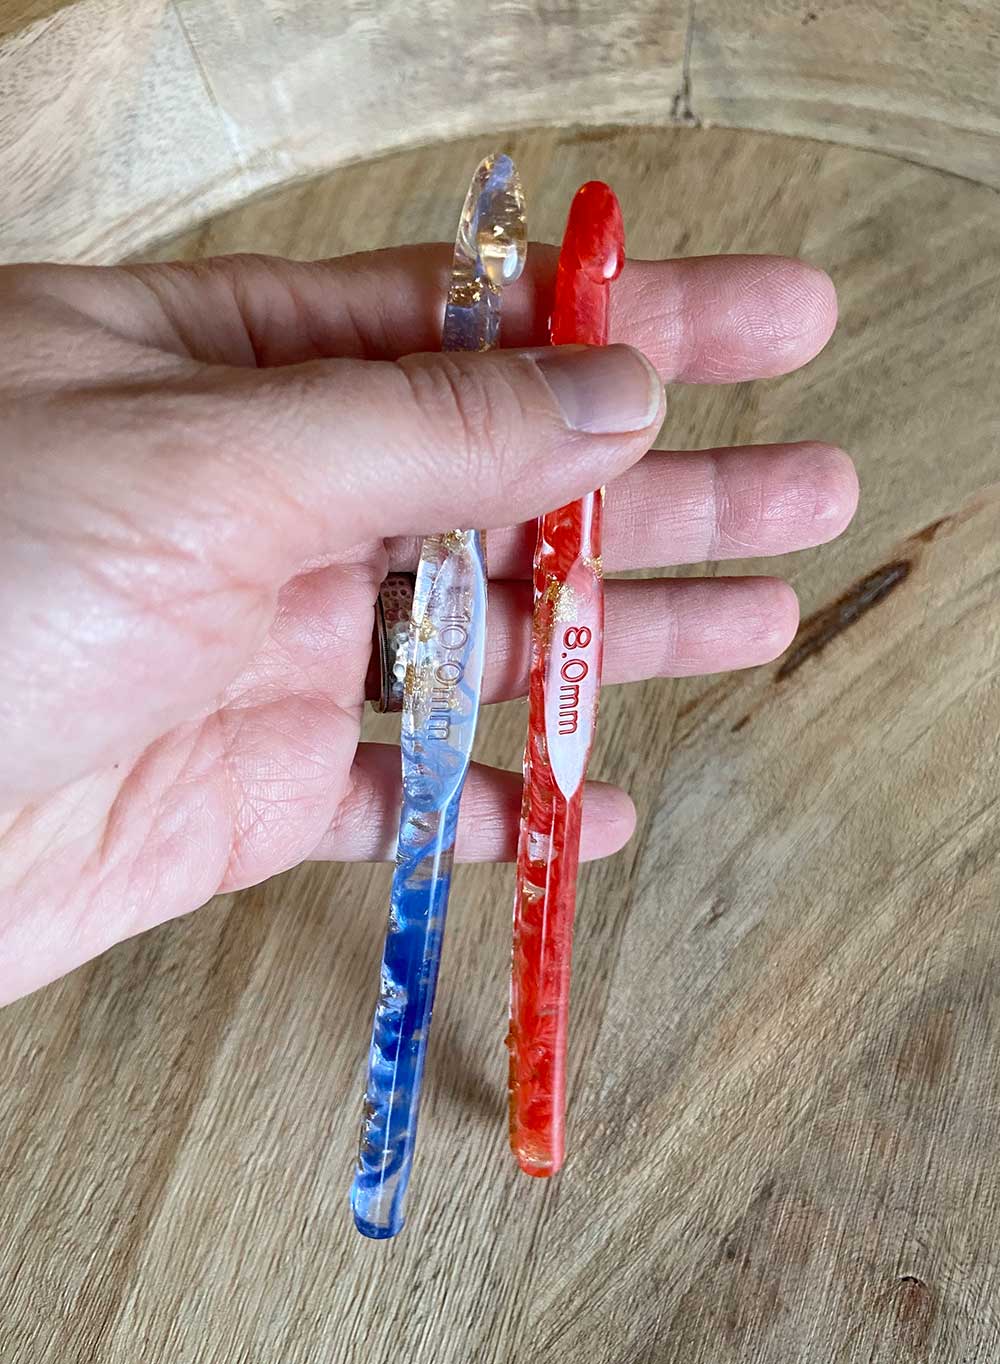
- • These molds will leave an etched label with the size in mm on the thumb rest of the hook.
- • Do not try to squeeze a large charm or decoration into your hook if it results in a distorted hook shape. The thumb rest area is the largest, so that is your best bet.
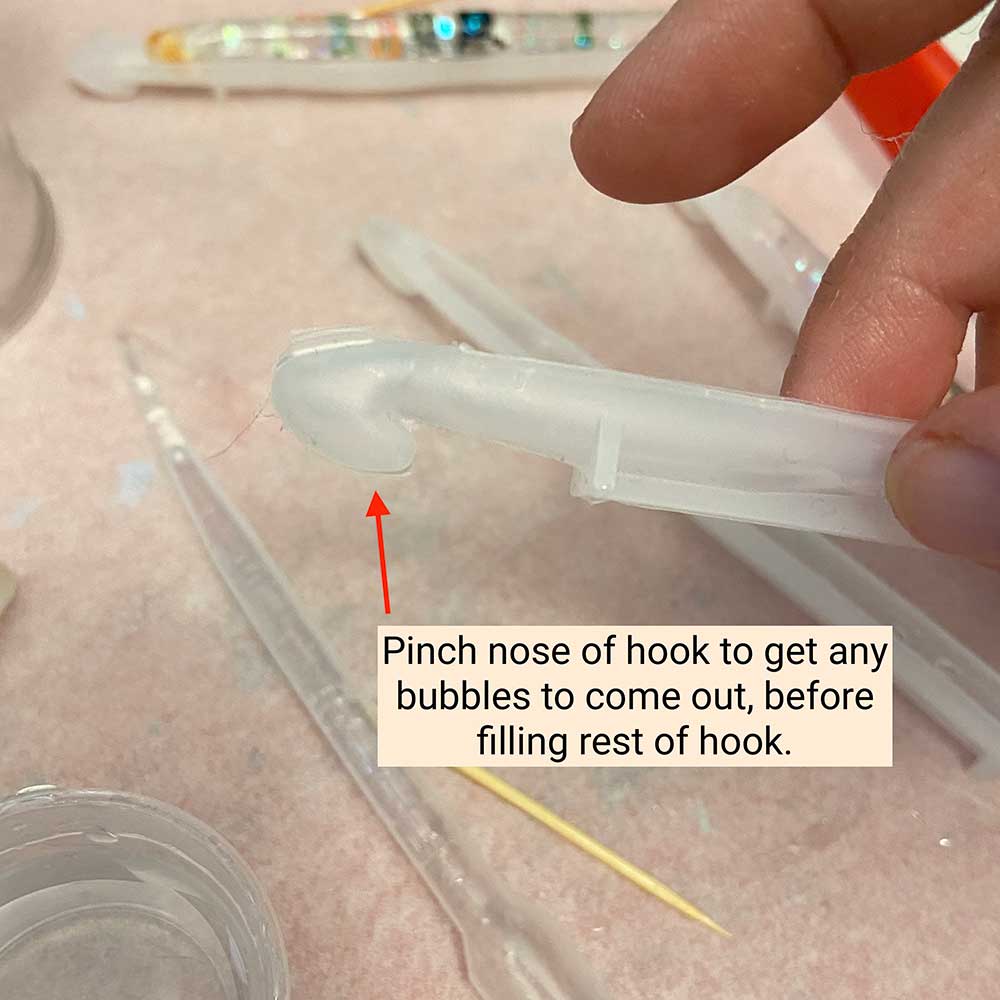
- • Take extra time to squeeze the air bubbles out as you add the resin, especially in the head/nose of the hook.
- • It may help to soak some decorative pieces in the resin before adding to the mold. For example, I added the yarn pieces to a cup of resin to allow them to soak up the resin and get rid of any air bubbles before adding to the hook mold.
- • Mix up small amounts of resin at a time so that you don’t feel rushed to get the molds filled before it starts to thicken. It is harder to get the bubbles out of thicker resin.
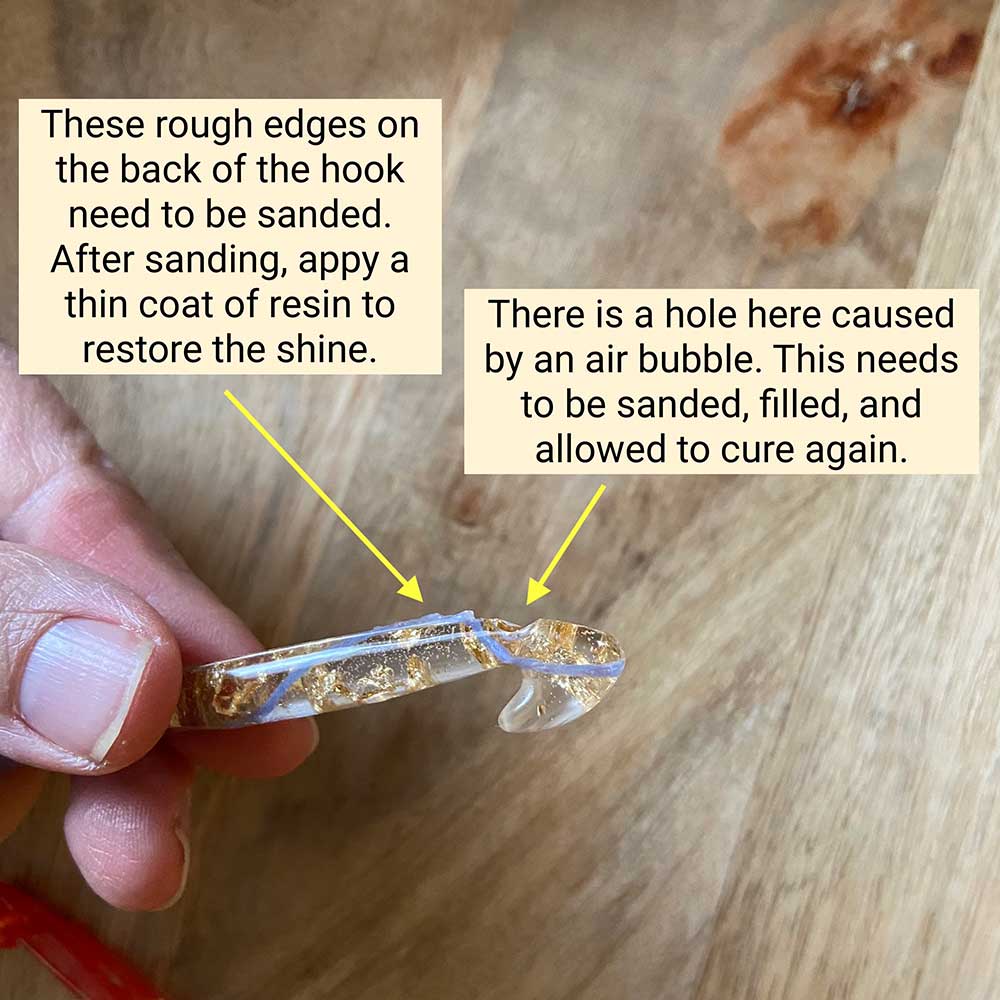
- • If your hook cures with air bubbles at or near the surface, you can sand your hook to open up the bubble, add a bit of extra resin to the mold, and place the hook back into the mold.
- • After the hook has cured, you will need to sand off any rough edges. Use a thin coat of resin to shine up the sanded sections.
- • Make an extra hook or two so you can practice the sanding/touch-up process, or any other tests you may want to perform on these extra hooks.
- • Even if using a low-odor resin, work in a well-ventilated area.
Instructions:
- Prep your work surface. I used a plastic craft tray with a sheet of parchment paper to line it.
- Have all your materials organized and ready to go. Once you mix the resin, you don’t want to be spending your time opening packages or sorting nail art pieces.
- Mix the resin according to the package directions. The resin I used was mixed in a 1:1 ratio. I usually mix up about 30-40ml at a time, so I have enough time to work with the resin before it gets too thick.
- If you are using glitter or dye, add this to the resin next.
- Use a pipette to fill the head of the hook and be sure to squeeze out any air bubbles. If you are making more than one hook at a time, fill the heads of all the hooks first. The resin will be thinner at this point which makes it easier to get the bubbles out.
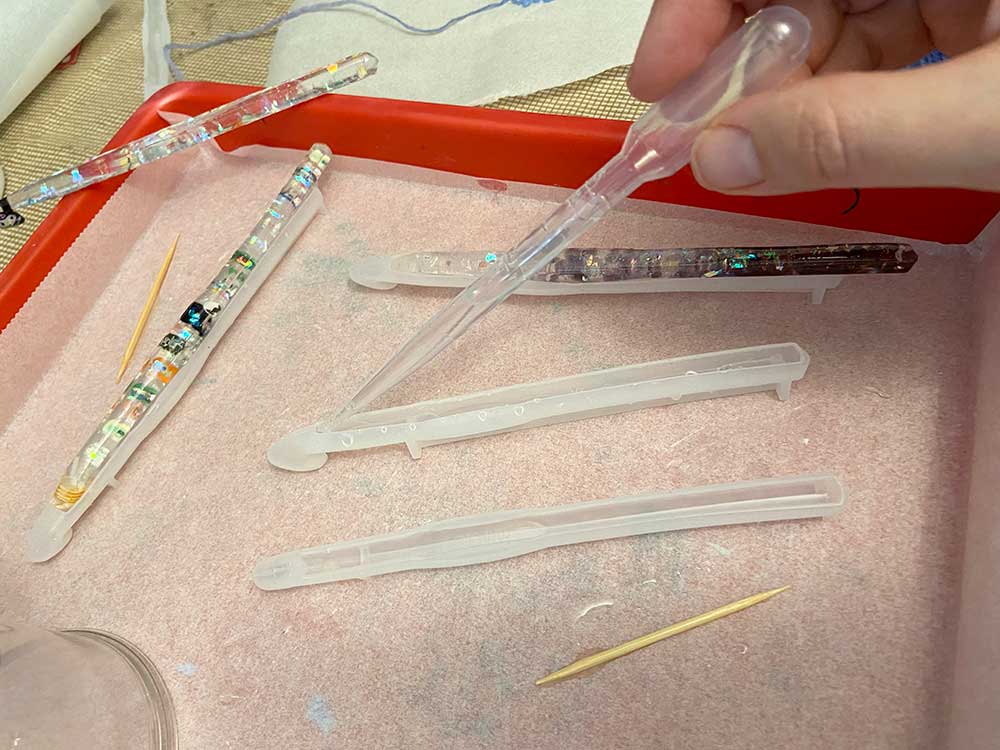
- Next, add resin to the rest of the hook. If you plan to add decorative pieces to the hook, only fill the molds partway before placing the decorative pieces into the hook. Then fill the mold the rest of the way.
- Place empty hook molds (or other objects that will not stick to the resin) next to the filled molds to keep them upright and straight.
- Allow the resin to cure according to package directions. My resin took about 32 hours to fully cure.
- Remove hooks from molds. Begin by peeling the bottom of the hook out of the mold first. Take your time when removing the head of the hook. The molds I used were surprisingly stretchy and strong and although they have each been used to make a dozen hooks, none of them have ripped yet. I have seen that some people who have purchased these molds have had trouble with their molds ripping though, so be careful.
- Your hook will have some rough edges, particularly on the back of the hook. Sand these down with sandpaper until they feel smooth. Wet your sandpaper with water to reduce dust in the air and use a respirator for safety. Try not to sand under the nose of the hook, as you will need to hang the hook by its nose after step 12. If your hook had any air bubbles near the surface, see notes above.
- Tape the bottoms of two plastic cups together. This will make an hourglass shape. You will use the top edge of the top cup as a place to hang the hooks while they dry after the next step.
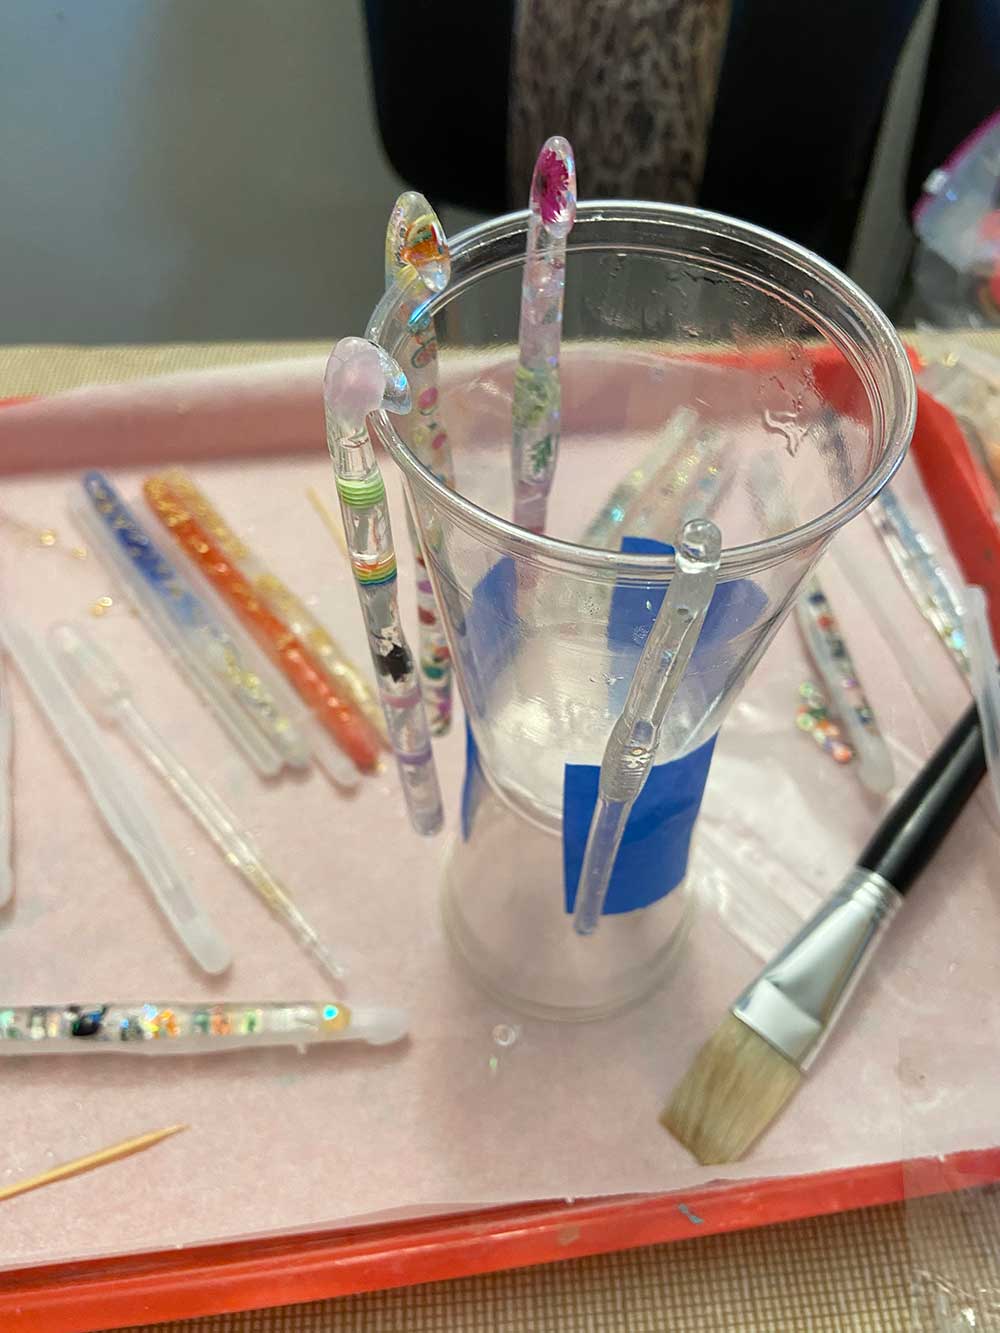
- Mix up a small amount of resin for painting onto the sanded parts of the hooks. Using a disposable paintbrush, paint a thin coat of resin over the sanded parts of the hook. Hang the hook on the edge of the top cup and allow it to cure.

This is such a great tutorial, thank you! I'm really excited to give this a try!