
Can you tell the difference between these two circular pieces? They are crocheted with the same yarn, same hook, same number of stitches, same number of increases, and both are made in single crochet. So what’s the difference? The swatch on the left looks like a hexagon rather than a circle. But why is that? Let's go over how you can crochet a perfect circle.
The faceted appearance of the piece on the left is due to the placement of the increases. There are the same number of increases per round in each of the samples, but the way they are distributed within each round is what is causing the piece on the left to look more like a hexagon.
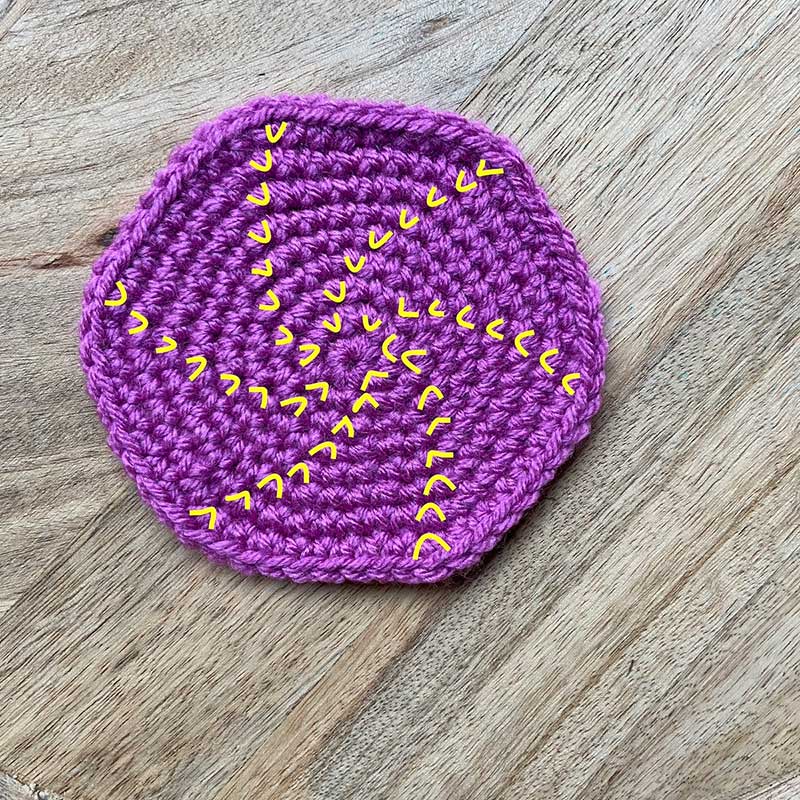
Let’s take a closer look at each swatch. The swatch below is the most common way to make a flat single crochet circle. We begin with six stitches in the round at the center, then make six increases per round as we crochet in a spiral, placing each increase at the beginning of each stitch repeat. The increases are marked in yellow below. You can see that the increases are stacking up in vertical columns with each round. Because the extra stitches are concentrated in these six points around the circle, they create the six pointed corners along the outer edge.
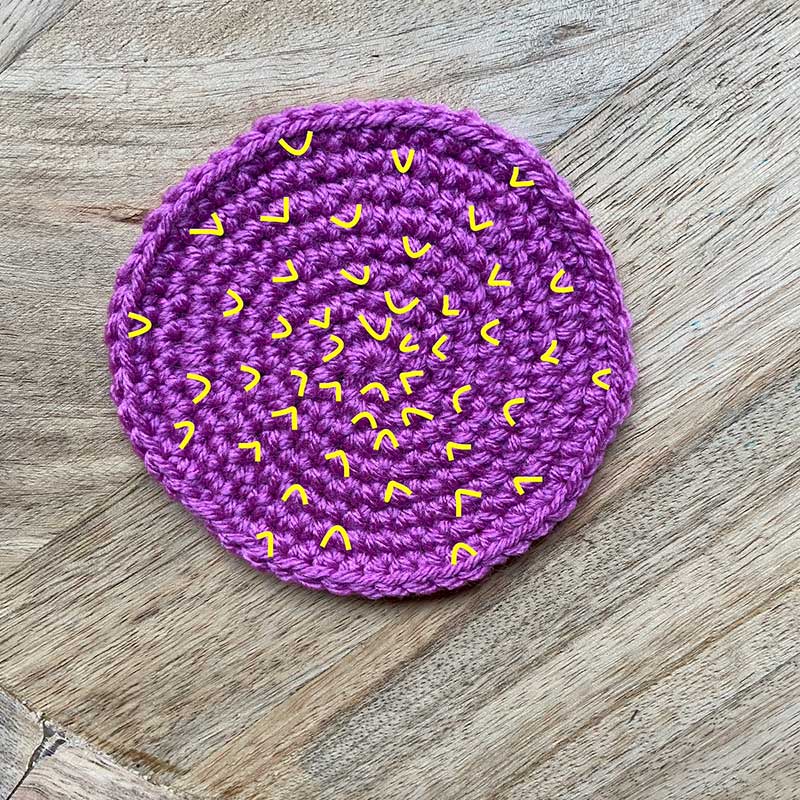
Now take a look at the sample below. Again, the increases are marked in yellow. We can see that after the first few rounds, the increases are not worked into the increases from the previous round. Because the points where the increases happen are in a different location within each round, they do not create those corners, and are therefore less visible.
Both of these methods are useful and result in a circular shape that will lie flat. The first method is simpler because you always place the increase in the first stitch of each repeat around the circle. The second method results in a much smoother circle where the increases are not very noticeable. It may take a bit more effort because you will need to keep shifting those increases in each round, but if you try the following method, you will see that it isn’t difficult to do. You just need to pay attention to your stitches for the first six rounds and after that, no more counting — I promise!
Circle (worked in continuous rounds)
Note: You will need six stitch markers, and one of these must be in a contrasting color or shape.
Rnd 1: Make a magic ring (adjustable loop), 6 SC into ring, pull on beginning yarn tail to tighten ring. 6 sts. Do not join and begin working in continuous rnds. Use contrasting stitch marker to keep track of the first stitch of each round.
Rnd 2: 2 SC into each stitch around. 12 sts.
Rnd 3: [2 SC in next st, 1 SC in next st] 6 times. 18 sts.
Rnd 4: [1 SC into each of the next 2 sts, 2 SC in next st] 6 times. 24 sts.
Rnd 5: [1 SC into next st, 2 SC into next st, 1 SC in each of next 2 sts] 6 times. 30 sts.
Rnd 6: [2 SC in next st, 1 SC in each of next 4 sts] 6 times, placing a stitch marker in the first st of each repeat. 36 sts.
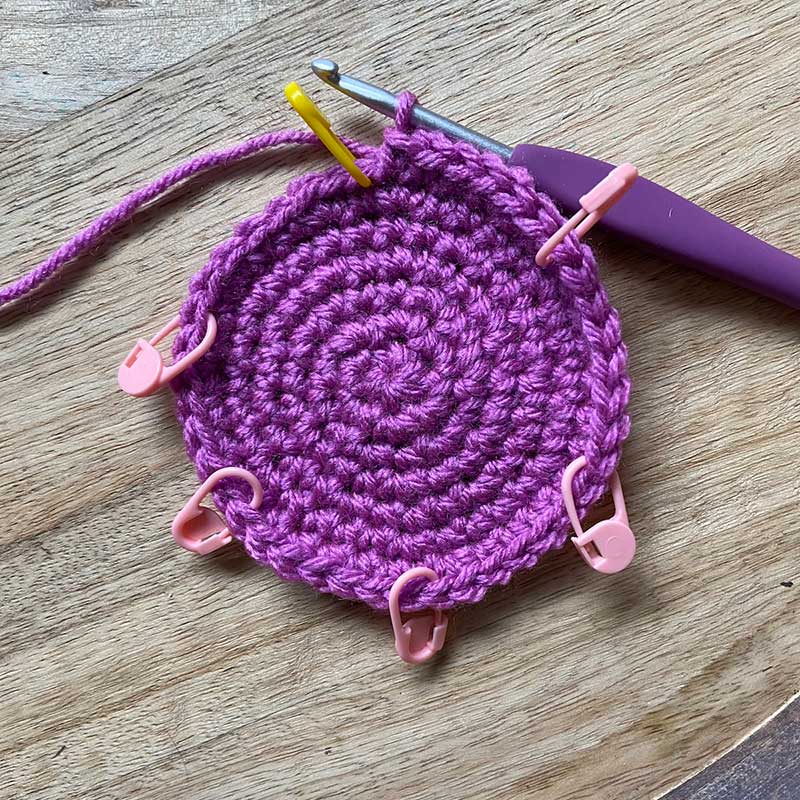
Continue working in the round, making one increase between each set of stitch markers. An increase just means that you will place 2 SC into one st. Place increases in a different location between markers in each round. In other words, avoid placing an increase into an increase from the previous round.
You can continue using this method for as many rounds as you like. If you keep shifting your increases around, your circle will look nice and round!
To ensure the outer edge of your circle is nice and smooth after fastening off, try an invisible join for a flawless finish!


HELP It's still turning into a cup shape ToT
Clear explanation, thank you
This is really good to know. Thanks 🙏
How do you keep the center for forming a cone shape?
This is one of the best tips I have seen. Great advice and what a difference. Thank you for making my crocheting experience more rewarding and joyful.
How do you make the starting magic circle?
Great tip!!!
Yes, I have a beginner's question on the construction of this "magic ring". What and how does one do this "magic Ring'? I thought I knew how to form a beginning circle, but now I am not sure I do!! Thank you. #45746