We’ve all been there—time is running out before the holidays, but you still need to find a few meaningful gifts for your loved ones. Here are two very quick options that you can make for a heartfelt holiday. Both of these designs are reimagined projects from Creative Crochet Corner that have been adapted for the festive season!
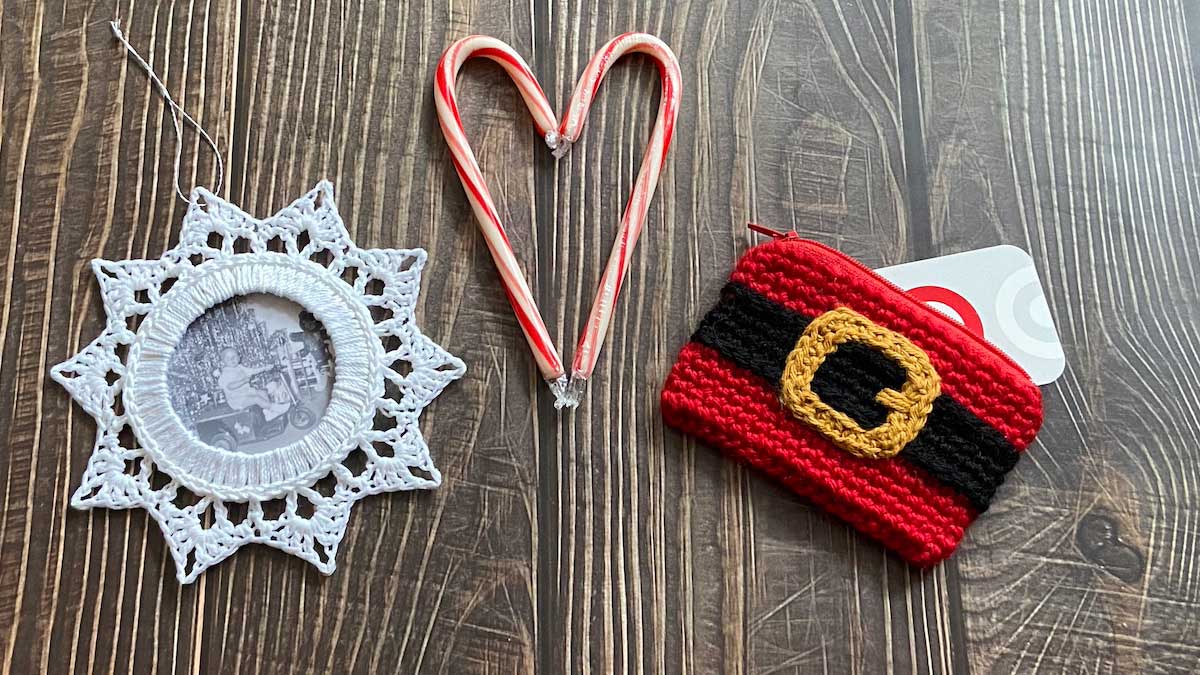
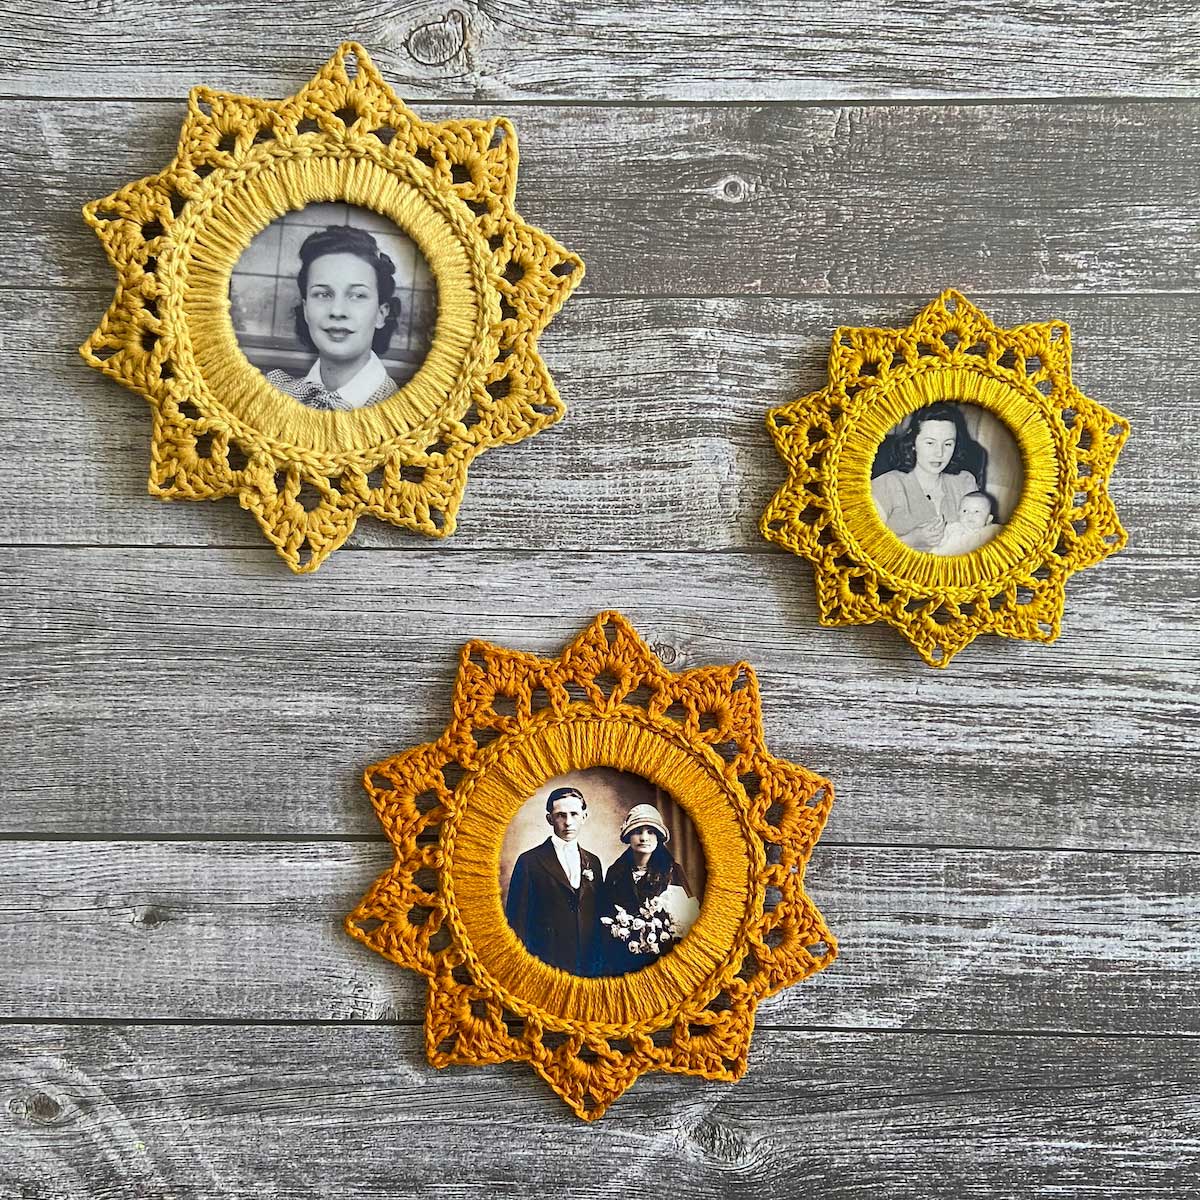
This beautiful snowflake ornament displays a treasured holiday photo for all to see! The project was originally designed as a golden yellow, sunshine-themed photo frame to hang on the wall.
Crocheted all-in-white, this snowy version was made to hang on a Christmas tree, but another option would be to attach a magnet to the back so you can deck the fridge with holiday cheer! To make this sample, I followed the original directions from the free pattern, using a size 3 crochet thread. This time around, I blocked the points a bit more aggressively to help them really stand out. I waited to stiffen the points of my frame until after it was completely assembled.
This meant that I needed to be very careful not to drip any fabric stiffener on the photo itself, but I wanted to try this method to see if it would work for me. It worked great, but if you are not willing to take that chance of accidentally spilling on your photo, I’d recommend sticking with the original directions for stiffening the front before attaching all of the pieces together.
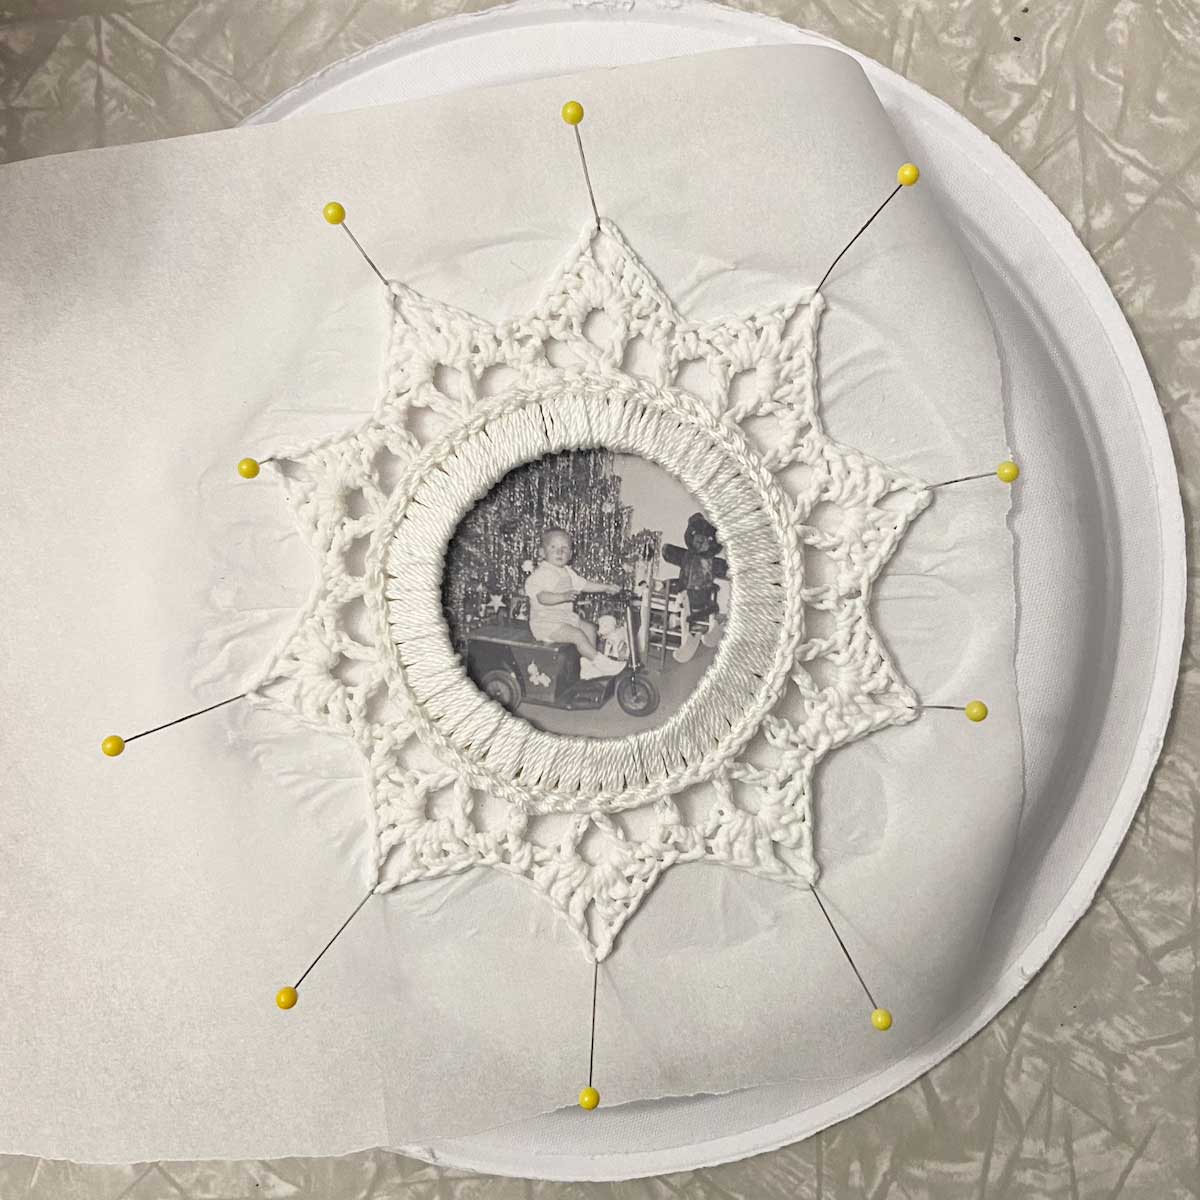
I placed the frame on a piece of parchment and used a paintbrush to push the fabric stiffener into the points of the frame. After saturating the points, I flipped the parchment paper over onto on the back side of a paper plate, then I placed the still-wet project on top of the parchment. I used quilter’s pins to pin out all of the points, stretching each point just a bit. The upside-down plate allowed me to push the pins securely in place.
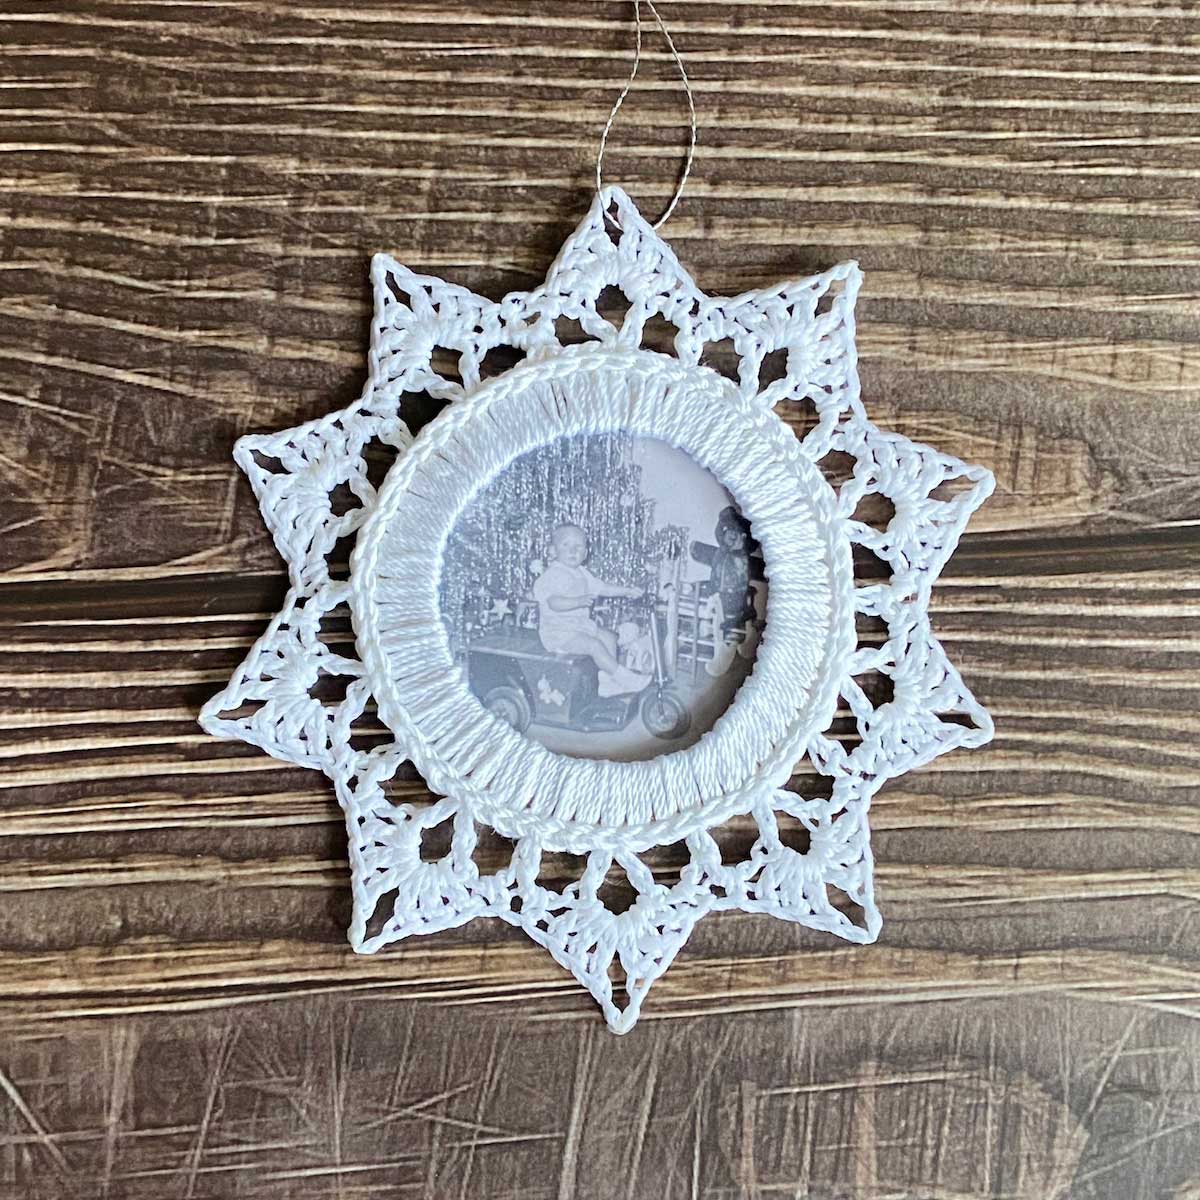
After the ornament was completely dry, I pulled out the pins and added a hanging loop using metallic silver thread.
If you would like a mini version of this ornament, follow the directions with a size 10 crochet thread and a small steel hook (any size that makes a firm fabric).
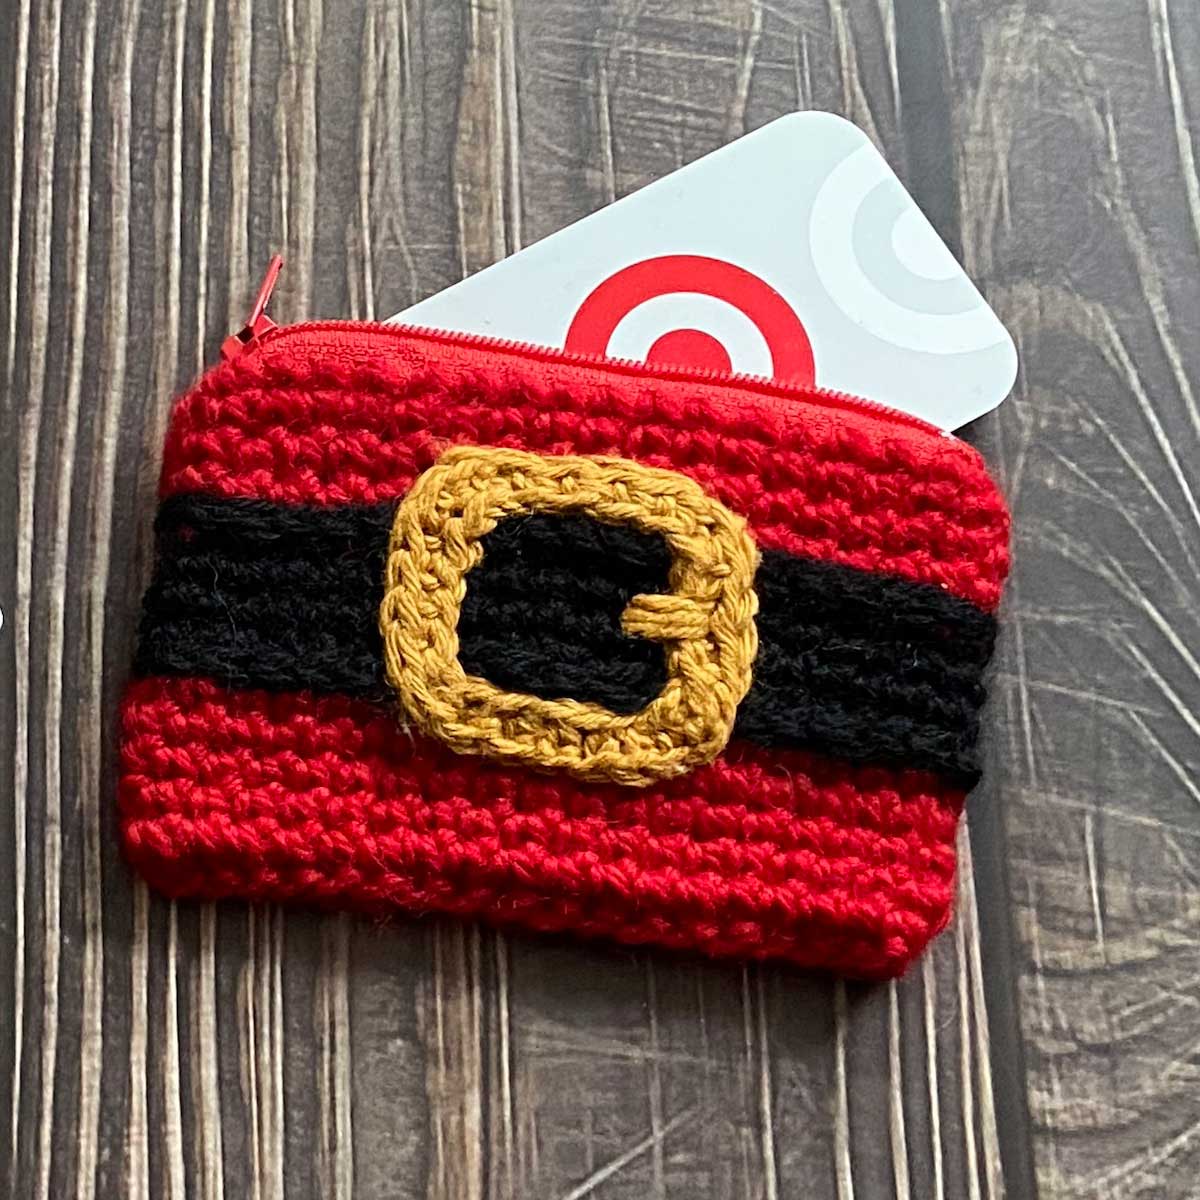
This cute Santa-themed zippered pouch makes the perfect gift card holder! It would also be a great way to “wrap” any small gift.
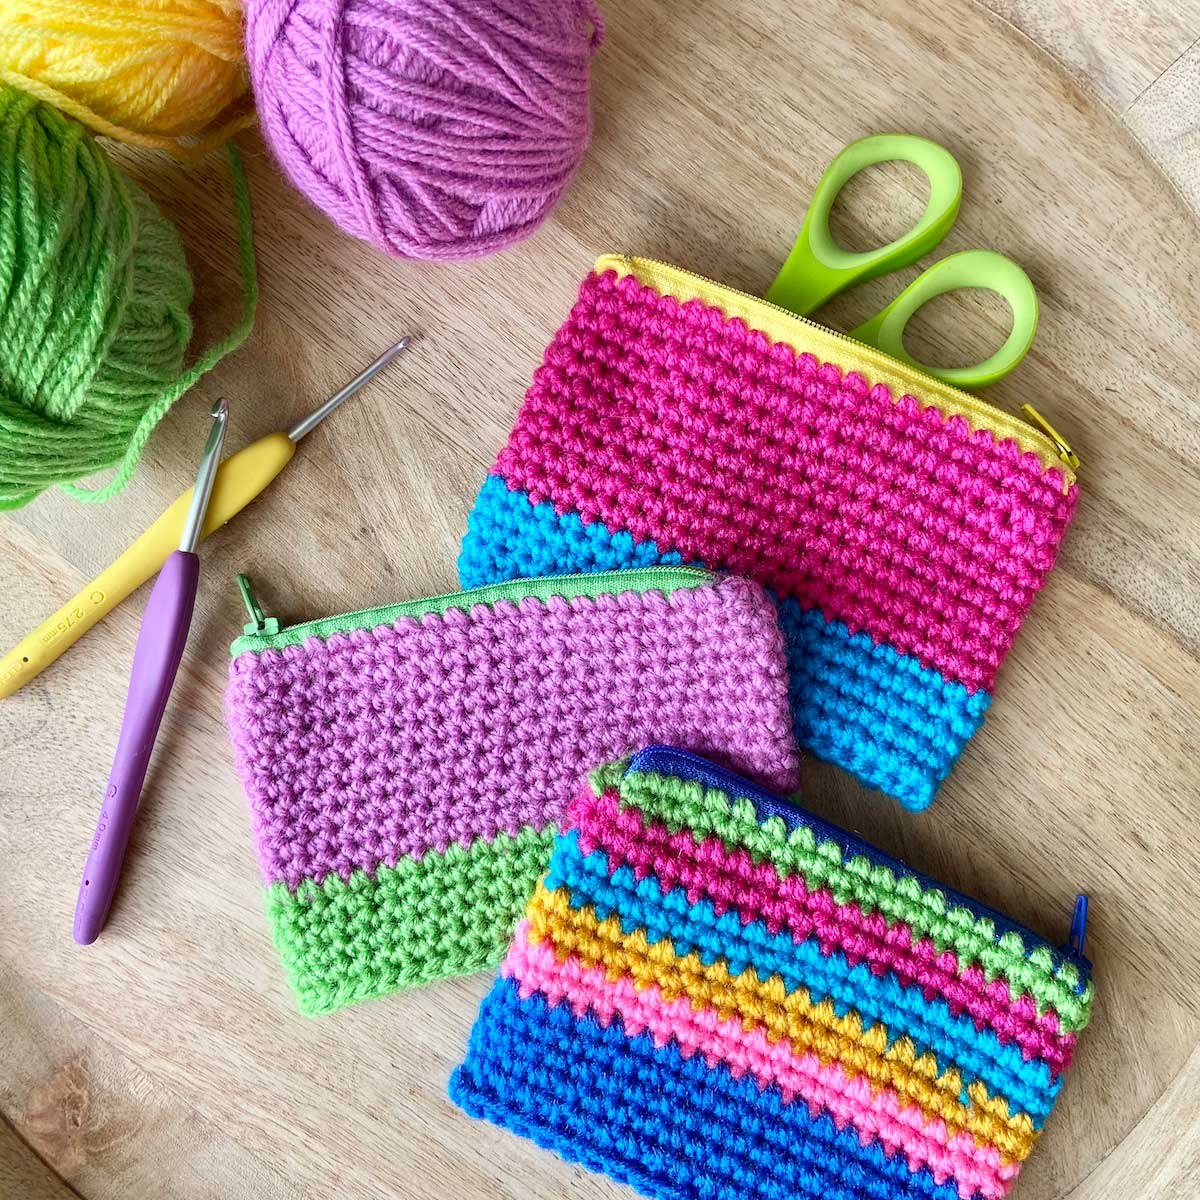
This pouch was made following the no-sew method that was demonstrated in this video here on Creative Crochet Corner. There is no pattern, but you don’t even need one! And best of all you can make this to any dimensions.
The original zipper pouches that were made featured bright colors of leftover yarn. If you are looking for a gift to be used all-year round, consider choosing the recipient’s favorite colors.
For the Santa version, watch the video to learn how to construct the pouch, but make the following modifications to the process:
Use a red zipper and red yarn to begin. After working the first few rounds with red yarn, change to black along the folded edge, by making your last yarn-over with black instead of red. Make one round of slip stitches in black. On the next round (continuing with black), work behind the slip stitches (do not work into them) making single crochet stitches into the previous round of single crochet stitches.
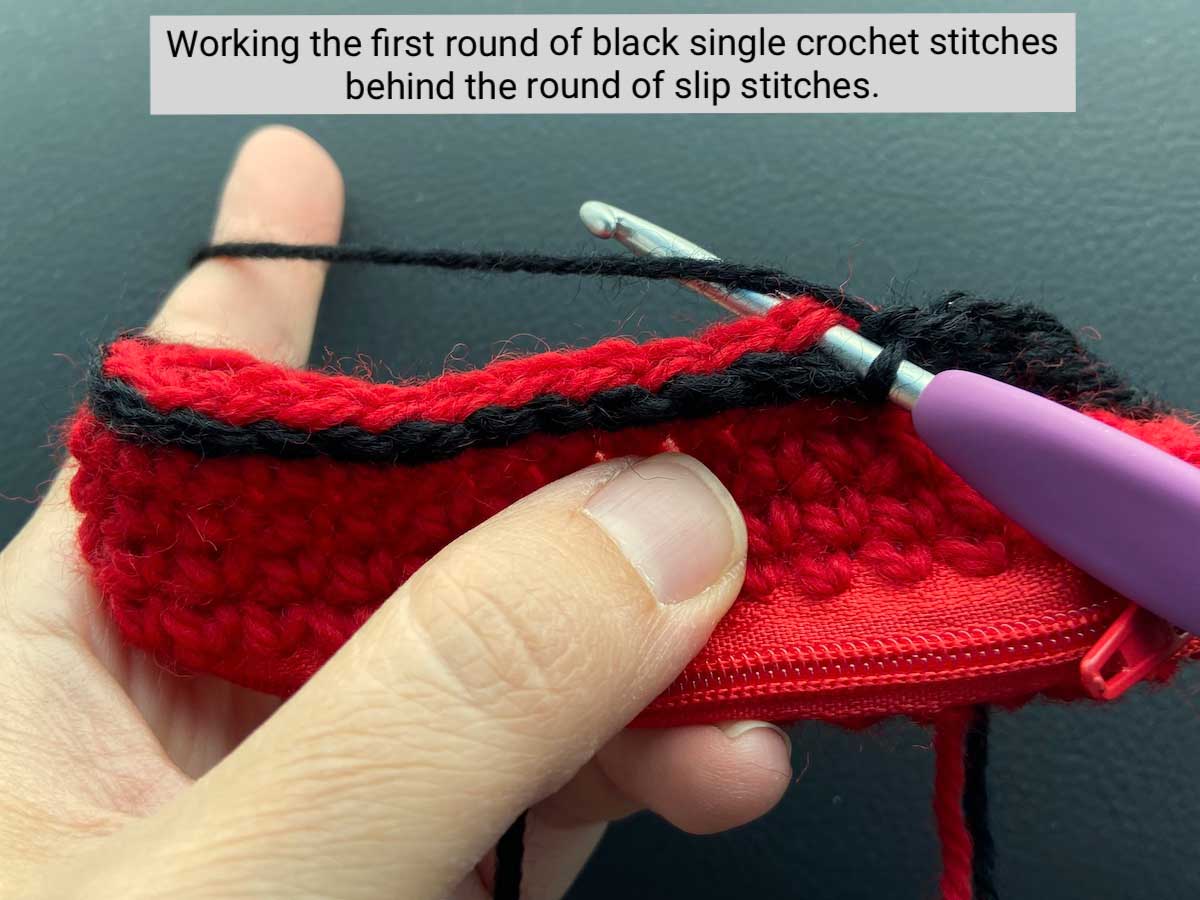
After working about 3-4 rounds (or more for a wider belt), slip stitch into each stitch around with black. Change back to red by making a yarn over with red, then pulling on the black ending tail until the last black loop disappears. On the next round (continuing with red), work behind the slip stitches (do not work into them) making single crochet stitches into the previous round of single crochet stitches. Continue working in the round until your bag reaches the desired size.
To make the buckle, use a gold colored yarn and chain enough stitches to make a strip that is long enough to shape into a rectangle and fit above and below the edges of the belt. Add a couple extra chains to this length because it will likely shrink a bit when the next row is added.
Beginning with the second chain from the hook, and working into the bottom of the chain, make one single crochet into each stitch across. Fasten off leaving long tail for sewing.
Using yarn tail, sew the short ends of the rectangle together. Place buckle on one side of the pouch, shaping it into a rectangle and pin in place (use photo for guidance). Using yarn tail, sew buckle to pouch. Stitch along the outer shape of the buckle as well as the inner shape. Use gold yarn to make a few stitches at one side of the buckle to make the prong.
Need more last-minute gift options? Check out the free patterns available here at Creative Crochet Corner!

I cannot find the pattern for the snowflake ornament that has the photo in the middle.
I made one of those cute zipper purses. Every time I zip it the yarn gets caught in the zipper. Anyone else have this problem? Is there a fix for it. I’d like to make more.
How fun! Thank you.