Crocheted Kitty Cat Hat
Brenda K.B. Anderson
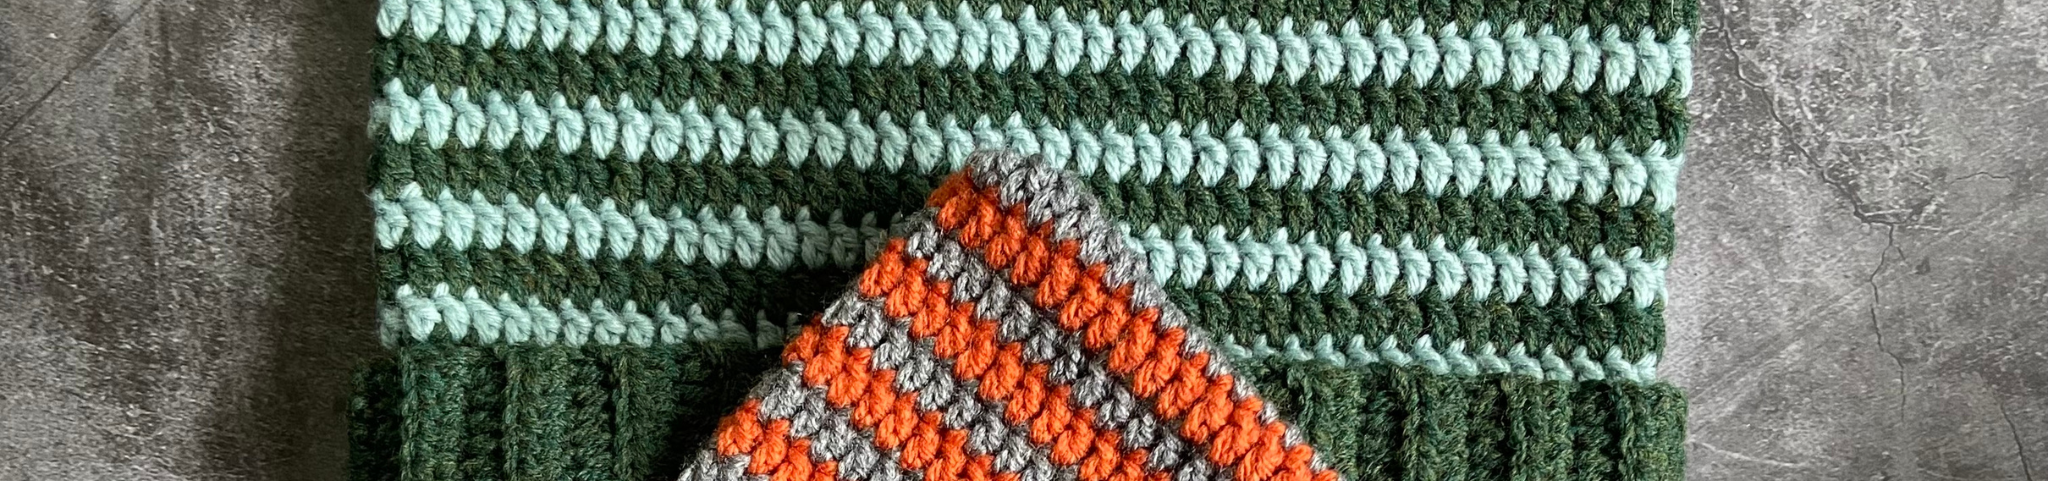
Crochet this Y2K inspired Kitty Cat hat for a tween, teen, or any young at heart cat lover. This hat is super simple, it uses basic stitches and absolutely no shaping whatsoever. The cute pointy ears magically appear when you put the hat on your head! This is a fantastic project for those new to crochet, or anyone looking for some quirky, fashion-forward fun!
Hey everybody, welcome to our live event. My name is Brenda KP Anderson. I'm a crochet designer and instructor, and today I am gonna be showing you how to make the crochet kitty cat hat that you see here. This is a super duper simple project. Uh, this is great for total beginners.
So when I do this tutorial, I'm going to show you from beginning to end how to make this hat, um, and I'm going to be, um, you know, kind of slowing it down a little bit in case there are some of you out there who are very new to crochet or brand new to crochet so that you can make this hat too. Um, so I have been noticing recently that these little kitty cat hats with the little square corners, they've become popular again. I remember when, like, probably about 20 years ago or so, um, the first time around that I ever noticed these hats, I remember wearing one back then and then recently I've been seeing these again at my kid's school. The kids are wearing them. I've seen them at Hot Topic, at Zumiez, at like other stores at the mall, and I was like, you know what, these are so easy to make, and these are such a great beginner project.
I think I wanna show people how to make these so they can make their own, and then you can choose your own colors. You can choose your own fiber content. Um, that's one of the great things about crochet, is that, you know, you have total control over, you know, what your project is going to look like, right? So. Um, yeah, I'm excited that you guys are here today.
So if you guys have any questions about what I'm doing, if you have any comments, if you have suggestions for future events, um, I have a few things that are underway now because of other people's suggestions, so look for those in the future, um, then let me know. Let's see. Laurie says, why did you choose a political activism symbol to bring the crafting community together or divide us further? Um, this hat is just based on my, um, the kitty cat hats that we were wearing like in maybe like 20 years ago or so. Um, if it means something to you politically, then you can choose to make it or not make it, um, because of that, but that was not my reason.
for making this project. So I hope that, you know, because people have different opinions about this type of thing, um, I don't wanna do something that's polarizing us further. I wanna bring us together, so I'm hoping that um that yarn and this cute hat can do that for us. Right, so alright, let's get started. Um, first we wanna talk about the materials that we're gonna be needing.
Um, so this hat, I wanted to make this hat, um. Let's see, I want to make this hat in a way that I can explain um how to kind of uh tailor it to your own preferences as you go. So this is something that uh you could be using a worsted weight yarn for. That's what I'm gonna be showing you in this video, um, but you can use a different yarn weight if you like. Just one moment.
And hello, Bobby. Good morning to you as well. Thank you for joining us. OK. Um, so, your materials you're gonna be using, you can choose whatever you have in your stash, um, or, you know, you can go out and find colors that you, you like.
And I'm going to be working this up in like, uh, a sort of a dusty green and an off-white color. Um, and this is the worsted weight yarn. One of the yarns in here has, uh, I think about 20% wool and 80% acrylic. The other yarn in here has, uh, 100% acrylic, and, um, I'm gonna be mixing them together, but I just wanted to like, you know, let you guys know that this is a great stash buster project. This is something that you can just kind of make do with what you have or find colors that you already have in your stash, um, if you don't want to go out and spend the money on it.
You can also hold thinner yarns together to make up the weight of a worsted yarn if you don't have enough of two different colors in those in the worsted weight uh thickness, but or you know, if you have a chunky weight yarn that you want to use, you can absolutely use that too, and I'll be talking about that as we're going through this project just to let you know like the kind of um. Ways that you can kind of alter it to fit your yarn yarn thickness. Um, so when I worked on this project, I really wanted my hat to be warm because I live in a place that's very cold and um. And so I'm crocheting this up at a fairly firm gauge, much firmer than I would for like a garment, uh, and I'm, I'm gonna be using an F hook, which is a 3.75 millimeter hook. And, uh, with the worsted weight yarn, and that's normally I use like an H or an I with worsted weight yarn just to give you guys an idea because I know everybody crochets, you know, a little bit differently.
Um, so, and you might have an idea of what you normally grab when you are working with the worsted weight yarn. So I would go down a couple of hook sizes from what you normally use to make this hat. And even though it's probably going to seem like it's a little bit stiff at first, like this hat has this sort of extra, um. Like a little stiffness you can probably see here that it just doesn't have a lot of drape here. Once we block this later, it will have a lot more drape, and I would rather have it be a little bit stiff at the beginning and then have to steam it or wet block it in order to give it the drape that we would like, um.
Instead of having holes in my hat because of where I live, but you may be just making this for a fashion statement or for whatever, you know, whatever reason you want to be making this hat, um, and so you could use a larger hook size compared to the yarn if that feels better to you, and then have those holes between your stitches if that, you know, seems fine. Like maybe you live in Florida and you wanna wear this hat, um, then you could definitely do that. So this is just kind of like I just wanted to let you know I'm definitely, you know, it's cold here so I'm using a smaller hook size to make my gauge nice and firm. All right. OK, so to start out, we are going to be actually let me just tell you kind of the, the general plan of where we're going here with this hat.
So the ribbing is made back and forth and turned rows in a long strip and we're going to be working that through the back loop. Then we're gonna join that together to make a tube shape, and then we're gonna start crocheting around the top of the tube, um, around and around in joined rounds and I want to show you how I'm gonna be joining that, um. So that you can see, actually, if you take a look right here, this is where my joins are so you can see when I, when I join those together, um, the stripe will continue all the way across. So I want to, uh, I have a special little technique that I'm using, Um, which you can decide if you want to use it or not. And I'm going to be talking a little bit about that as well.
And then we're going to talk about finishing and blocking at the end. All right, so to the end, we are going to grab whatever color you want to use for the ribbing. I'm going to be starting out with this darker green color. And, oh, and by the way, there is a download available for you if you'd like to follow along. It also has a little picture tutorial in here on how I am going to be doing.
Um, the special little technique that I'm gonna show you later about how to kind of keep that color going across that joint and make it look a little bit, little bit less noticeable. So I do have like a little picture tutorial in here as well. Um, the complete instructions are here and also some hints on how to customize it. You know, for different yarn weights. All right, so, and this can be made to any, to fit any size so this.
As we're making this, we're gonna be taking some measurements. Um, but I do have suggested sizes as far as like, you know, like. Uh, the circumference and also the height of the hat if you need that to follow along, like if you're making it for someone else. OK, actually, before we start with our stitch pattern, let's talk about measuring just for a second, um, just in case you guys have never done this before. Uh, when we measure things for, you know, something that's gonna fit us like a garment or hat or something like that, we're gonna be using a flexible tape measure.
But if you don't have that, you can use a piece of yarn and you can just put that around your head like this. And then you can cut it off or just pinch it with your fingers and pull it away from your head and then, and then cut it off or mark it or something so that you know the circumference of your head. So when when you measure the circumference measure just basically around your head fairly evenly, you know, about where you're gonna be wearing your hat, like just above your eyes, like kind of at your eyebrow level just measure that around your head. Um, this one measures 20 inches here. So if we were making a hat to fit this person's head.
Then we would make something that would measure smaller than that 20 inches because we actually want to have to stretch in order to fit the head. It stays on better. It will get a little bit stretched out over time, like all crochet or knit hats do. Um, you can block them to kind of fix the shape a little bit as you're going, but, um, you know, you just, if you make it to the size of the head, and then um it ends up getting just a little bigger as you're working the double crochets, which tends to happen. We'll get into that a little bit more.
Um, but as you're working through that, then it's going to end up just a little bit bigger than the head, and then it doesn't end up with these really cute little ears that just happen when you pull it onto your head. So. Um, and we'll talk a little bit more about that later as we're working up the sides of the hat, and I'll show you how that's fitting. All right, so to start, we are going to make a slipknot and place that on our hook. And we're gonna go ahead and chain 15, so.
If you are using a thicker yarn, you could probably chain less, um, a couple stitches less, maybe like 12. If you're using a very thin yarn, you may want to chain some extra, and I'll show you once I get that chain how to know about, um, what width you want here. So we've got 3. 456789, 10, 11, whoops, 12, 13, 14, and 15. All right.
So we've got 15 chains here. Um, this is normally what I start out with for worsted weight yarn, and this should be about 3 inches. Let me just double-check here. OK, so closer, about 3.5 inches, um, wide. So anywhere from a little over 3 to about 4 inches seems like a good width to me because as you're making this hat.
One of the things that is very forgiving about this hat is you've got this ribbed brim, and then you're gonna fold that up like this. Onto your hat, and you can use that to, um, use that extra ribbing, you can fold it more or fold it less just to get the, the, um, the height on the hat that you really want. The thing that happens when you're, when you're making this hat, if the hat is too tall on your head, let's see, or too big, let me show you on this head. This one's a little smaller than the form that it was on. So, if you do that, then it just sort of makes this boxy shape, um, which doesn't bring the ears in and make them stick out as much.
And I really like my kitty ear hats to have the pointy ears that stick out. So when you are, when you are um when you're putting this on your head, you do have a little extra wiggle room with the height of the hat because you can fold up that ribbing higher or lower just depending on and to be able to really bring this down onto your head. If the top of this hat is sitting above your head, then the line that connects the ears is pretty much just straight across and it doesn't kind of dip in and make the little kitty ears that stick out like that, um, so you really need to be pulling that down snug onto the top of your head, but. The ribbing is going to help you with that to get that all fine tuned, um, you know, you can fold it up more or less just depending, um, you know, to make it fit your head. All right, so we've got 15 chains here and I'm going to begin working across the bottoms of the chains.
So if you take a look at all these little chains all stacked up in little V's, you roll them over onto the table, and then you have all these little horizontal dashes on the back. And I'm going to insert my hook underneath the second chain from the hook, working into the bottom of that chain. And when I do that, I'm going to be making a half double crochet. So to do that, we're going to yarn over first, and we're going to insert our hook underneath that second chain. So not, not this one right here, but this one right here into that little dash.
And yarn over, bring up a loop, yarn over, and bring through all three loops. That's our first half double crochet, and the top of the stitch is located over here. I'm going to put a stitch marker in that to keep track of my, you know, where the ends of my rows are because that's a really easy thing to kind of get mixed up if you're newer to crocheting. So I would recommend you use a stitch marker or a safety pin or bobby pin or something to mark that very first stitch if you're newer to crochet. And now we're going to continue making half double crochets into each of these chains.
So we're gonna yarn over, insert underneath the next horizontal bar, yarn over, pull up a loop, yarn over, and pull through 3. You aren't over and search. You're over, pull up a loop, you're over, and pull through 3. So we're just going to continue making these half double crochets all the way across our chain. And this will feel a little bit tight because we are using a smaller hook than we normally do.
Um, you know, the, the, it will feel a little bit stiff. That's normal. Stiff. That's normal. But if you're newer to crochet and you're really having a hard time getting your hook through, if you really are like having to push, push, push, and dig around in there a lot, then it's okay to just pull that out and do it again with a larger hook, and then you can switch to a smaller hook to get into that very first row there.
Okay. So, when we get to the end of your row, this is what your piece looks like, and we're going to make two turning chains, that's going to be how we turn every single time we make a new row in this ribbing. So we're going to make two tight turning chains. So there's one and two, and we're going to turn. Turn our piece like we're turning a page in a book, and then we're going to work across the next row, and we're going to make a half double crochet into the back loop of each stitch across.
Okay, so when we make those two turning chains, they're right here. Those are just going to count as turning chains. Um, they're not going to be worked into ever, so you can make them nice and tight and it makes a neater edge if they're kind of tight. Um, or you can just make one turning chain there if you prefer, and then we're going to yarn over and we're gonna insert underneath the back loop. So normally when we make our crochet stitches, normally we work underneath both loops here or both, both sides of that stitch.
If you see that V on the top of your work, that is a stitch, and normally we work underneath both legs of that V. Like this, but because we want to do a ribbing, we want to allow it to stretch, we want it to have that sort of groove um appearance. We're going to place our hook in between them and come out the back like that. And we're going to yarn over, pull up a loop, yarn over, and pull through three. So, there's our first half double crochet.
And we're gonna continue doing that all the way across the row. So we're gonna yarn over, insert, yarn over, pull up a loop, yarn over, pull through three. All right, we're just gonna keep on going, making those half double crochets. Working through the back loop. And so we worked each stitch across, and we'll have a total of 14 half-double crochets.
And you can see there's our stitch marker right there. That's reminding us that that is our very last stitch. So we're gonna work into that stitch right there. And we'll pull the stitch marker out, and we're going to replace that. Actually, we could have put one here in our very first half double crochet that we did of that row.
That's really the best way to keep track. As soon as you do the first stitch of the row, you put the stitch marker in. So we'll do that here. So we're going to change to, we're going to turn our work like we're turning a page in a book like that. We're going to skip over that turning chain, and we're going to make our first half double crochet right there working again through that back loop.
Ok, so there's the top of our stitch. We'll put a stitch marker in there. And then we're gonna do a half double crochet into the back loop of each stitch across. It's like this. all right.
So I've got 2 more. Half double crochets here. I'm gonna remove my stitch marker when I get to it. Make my half double crochet in the back loop. and chain 2, like you're um doing a tight little turning chain there, and then we're gonna turn our work like you're turning a page in a book and continue.
So you're just gonna keep doing this for quite a ways until your piece is about 2 or 3 inches shorter than the. Measurement that we took that went around your head. So for me, my head is 22 inches so I worked up my piece until it was about 19, 19.5ish, somewhere in the middle there, um, and then I checked to make sure I had an even number of rows and there's an easy way to know that, um, and the reason you need an even number of rows is just because it makes it look a little bit neater when you, uh, make that seam in the ribbing. It's a little less obvious where your seam is there. So, if we take a look at this piece, we can, we can see this is where I had started.
There's our beginning tail. and every time you see the sort of groove here, like you can see that there's a ridge here and then you can see that there's like a little sunken-in groove right there. So this would be a row, and this is another row. Here's a row, here's a row, and that's how you count up your half double crochets. You can count them in groups of two.
To me that seems, um, it's visually easy to see, so if we count 2, 4, 6, 8, 10, 12, 14, 16, 18, 20, 22, 24, 26, 28, 30, 32, 34, 36, 38, 40, OK, so now we, we know we have an odd number of rows. We want to have an even number. So if this piece is, you know, about the right size, you can decide if you want to take away one row or if you wanna add one row, and this is a pretty stretchy fabric, so I usually, if I'm sitting on the fence, I usually will just take one row away, um, and continue that way. Usually I don't add that extra row, but if you were already like, 'Oh, I don't know if this is gonna fit,' you know, then you can just go ahead and add that row. Up to you.
Um, and I should mention to you, as you're working up, as you're working up this, after you've worked a number of rows, you can see if your stitches are about the same width as when you first started. That's just something to check because sometimes when you do those first couple of rows, then your gauge changes. So that's just something to monitor. If it got a little narrower, you may want to just undo a few rows and then start over, um, just, you know, with a different hook size to make it the width that you really want it to be. But if it's somewhere around like between 3 1/4 and 4.25 inches wide, I, I would just leave it as long as you're happy with that.
I, I, I would just continue, um, but you know if you switch to a larger, if you're using, uh, you know, a chunky weight yarn or a super bulky or fingering weight or some other weight of yarn that's, that's, you know, pretty different than a number 4, which is worsted weight. Then you're gonna want to just pay a little more attention to that and make sure your piece is the width that you want it to be because this is, you know, after this we're gonna start working the rest of the hat, and you're not really gonna be able to fix the brim. We're not gonna sew this piece on, it's all worked as one. All right, so I'm gonna do one more row. So I've already done my turning chain here.
And I'm gonna do one more row of working those half double crochets through the back loop. And I'll have my 14 stitches across, and then we'll be able to do a little slip stitch seam. In a second here. If you prefer to do a sewn seam, you can do that, and then you can, you'll have to rejoin your yarn for the next round. Um, but the reason that I like to do the slip stitch seam is because it's quick, it's easy, um, and then your yarn is still, still there ready for you to work with it.
OK, so I've just finished working all the way across. I'm going to chain one. I'm gonna turn my work just like I'm going to work another row. OK, so. Um, and also I should just mention this is not, this is not gonna fit me.
This is gonna be too small. I just wanted to do a slightly smaller hat here so you don't have to watch me do repetitive stitching quite as much. Um, so this is not actually measured out to be 3 inches smaller than my head or 2 inches, 2 or 3 inches smaller than the head that I measured over here. So just in case you were wondering if it looks a little small, it is a little small, but the process is the same. OK.
So we're going to bring that foundation chain edge up right in front of that last row we worked. OK. So here's the last row we worked. We're ready to work another row. We're going to bring that foundation chain edge right up in front, and we're going to slip stitch these two edges together by going underneath the back loop.
Of the row in front and the back loop of the row and back. OK? So we'll just bring that, um, stitch through as, as, uh, as a slip stitch. Let me do that one more time. So we're going to go through the back loop of the row in front, the back loop of the row and back.
We're going to grab that yarn, pull through both, and pull through the loop on our hook. Let's do that one more time. So back loop of the row in front, back loop of the row and back, grab that yarn, pull through both layers and through the loop on our hook. OK, so in this way, we're joining these two edges together to create this tube. Well, we've got lots of hellos.
Thank you guys for weighing in here and saying hello, hello to Naughty Creations and Sarah and Hannah B. Um, well, lots of hellos. Sandy and Felicia. And Molly. And magic frog crochet.
We got lots of hellos, uh, oh, and thanks for the compliment about my bonita bag. That was very nice. I'm glad. Oh, you're making them as gifts for Christmas. Thank you for saying that.
OK, um, that's really awesome. OK, so we're gonna go through the back loops all the way across till we get to the end here. And if, if you feel like your stitches are getting really tight, you'll notice that this edge is kind of drawing in if that's if that's the case, you can always switch to a larger hook for this part. I know that. As crocheters, a lot of times we tend to make slip stitches tighter than our other stitches.
I think it's just because there isn't that yarn over or extra motions to stop it from um kind of cinching in. So you know, feel free to switch to a different, uh, a larger hook for that little section. OK, so we've done our slip stitch the let me show you what that looks like here. And it's sticking out just a little bit here with blocking that's going to flatten out and I do like to keep that on the outside of my work because it looks a little bit better on the inside here and this side, like you can almost not even see it here, this side is actually going to end up showing because we're going to work the hat around here. Here and then later we're going to be folding that brim up um and that's gonna cover up that slip stitch seam.
So I just leave that sitting on the outside there and now we're gonna start working in the round and we're gonna work in a double crochet stitch pattern, all right? So so far we've done the half double crochet through the back loop only. Now we're gonna be working in double crochet and to start. Um, I like to do, and I'll do this a couple of times as I work my way around, but I like to start with this kind of a, an alternative to the, the beginning turning chain. So normally when we start, we're going to chain 2 or sometimes people chain 3 and then we start with the double crochet, OK?
And I, we're gonna start with our first stitch in this ridge right here. So we would do our double crochet right here, and I'll show you how to do that again in just a minute. Um, so we have these two stitches kind of coming together. Sometimes people count this as a stitch, which you could, um, if that's the way you want to do it, you, you can count that as a stitch, and then what that means is that stands for a stitch. If you count it as a stitch, then when you come around, you'll work into it as a stitch.
OK, but it has to take the place of a stitch. So if that makes sense, um. If it doesn't count as a stitch, what that means is you make your turning chain, and then your first stitch is really right here. So when you come all the way around, this will make a little more sense when we get all the way around here. I'll talk about this again, then you would slip stitch to the top of your double crochet instead of slip stitching to the top of your chain and treating that as it's a stitch.
OK? Now, having said all that, these are definitely, you know, you can, you can choose either one of these ways as long as you're consistent and you always count it as a stitch, and you work into it as a stitch and count it as a stitch. That's fine. Or you can just count this as a turning chain or a beginning chain, um, and it's not actually counted as a stitch. You will not work into it.
You will not join into it. You will join into the top of the stitch. You can do it either way, or what I want to show you this way, I, I've been doing this lately, and I feel like it blends in really well. Um, instead of a turning chain, I just elongate that working loop. So it's about the height of a double crochet, and so that will be, you know, like for this, actually, since you haven't done a double crochet yet, you could just look at the width of one of your half double crochets.
It's gonna be pretty close to that, actually. It's not really that much different. So about that width, that's what I'm looking at here. So you'll just pull up your loop, make it a little bit longer, and then you're going to, you can place your finger on your loop. Duck your hook underneath your loop, and just, I'm holding that with my finger, then we're gonna grab this yarn and pull it around.
So that's gonna take the place of a yarn over, okay? I'm gonna show you that one more time. So we just pull up our loop. I'm gonna place my finger on this working loop, and I'm gonna go under here. And grab that yarn and pull it up, so that counts as a yarn over.
Then we're going to go into the first stitch, which is at the top of this ridge here. So it could be here or it could be here. Either way, we're going to grab that yarn, pull up a loop, then we're going to yarn over, pull through two. Yarn over, pull through two. And so that's combining that loop together with that first double crochet.
Now here it looks a little bit weird because this is such a big width between this, um, slip stitch and where we started our first stitch. But in successive rounds I wanna show you this again and you'll see how this really blends in really well. So, um, keep that in mind you can do it whichever way you like. Any of those options are fine, um, however you normally like to do it, but basically you have to start with a double crochet in this first ridge here. Now we're gonna be working.
Two double crochets into the valleys. So that would be right here, right here, anywhere where it kind of recesses and goes in. So, two here, two here, two here, and one in the top of each ridge. So, there's a ridge here, there's a ridge here, there's a ridge here. All right, so we've got a double crochet.
So to do it, just a regular double crochet. We're gonna yarn over, insert, and you can put your hook wherever you need to. It's not going in a very specific spot, um, but I like to look for a place that's a fairly tight fit. Because that tends to not stretch it out and make a hole there. So I'm, you, you'll do a yarn over, insert your hook, yarn over, pull up a loop, yarn over, pull through two, and yarn over, pull through two.
That's just a regular double crochet. I'm going to mark the top of this very first stitch that I made. Um, and in this pattern, I think I call that a beginning double crochet. What did I abbreviate that as? Let's see, oh yeah, beginning double crochet.
That's what I call that when I pull up that loop and make my double crochet that way. Um, I'll show you that again also, cause I know that might be newer to some of you guys. OK, so we're going to do another double crochet into this valley. So yarn over, insert, yarn over, pull up a loop, yarn over, pull through 2, yarn over, pull through 2. And now we're going to do one double crochet into this ridge here.
So yarn over, insert, yarn over, pull up a loop, yarn over, pull through 2, yarn over, pull through 2. All right. So here's a little valley. So we're gonna do 2 double crochets there. So, there's the first one, and here's the second one.
And here's a ridge. And there's our double crochet in the top of that ridge. And now we're gonna do, that was just one. So now we're gonna do two in this valley here. So one.
And two. One in this ridge. And two in this valley, so we're gonna just keep repeating this all the way around. The reason that we're doing two in the valley and one in the ridge, um, it could really be vice versa. It doesn't really matter which way you go, but what we're trying to do is we're trying to do, you know, we need more than one stitch per end of row in order to be the correct circumference as we're going around.
Because the height of a half double crochet is taller than one of these double crochets is wide. So that's why we're adding two stitches into one row and one stitch into the next row. So here's our two double crochets. And one on the ridge. OK?
We're just gonna do this all the way around. And as you're working on this, you know, because everyone crochets a little bit differently, um, you may find that your double crochets, maybe you make those a little bit looser in proportion to your half double crochets than I do. You know, everybody, everybody, like I said, everyone crochets differently. So this is an area where you just kind of have to look at how your fabric is turning out and if you see something like it's if this starts to ripple here, that means you, you need to have fewer stitches in here. So maybe you only want to do two in the valley on every other valley or something like that, um.
Chances are I've had a few people make this hat already, and they seem to have, you know, similar proportions to what I had when I was working up. So that's why I'm recommending two in the valley, one in the ridge, um, you know, just to kind of get you around. But you know it is possible that you may end up needing fewer stitches around here or you may need more stitches as well. So feel free, you can add more stitches if you feel like this double crochet row is pulling, it would look like it's pulling this in a little bit here. It would be tight across here and your ribbing would be kind of spreading out.
what you're looking for as you're working, you know, the first couple rounds is you're looking for something that's fairly straight up; it will, or it could come out just ever so slightly, but you don't want it to be, you know, an extreme shape change here. You don't want it to flare out or um angle in. so these are, you know, when you're making something and you're, you're doing it made to measure, it's great because you have all this freedom; you can make it out of whatever thickness you want, whatever hook that tends to go, you know, whatever hook is giving you a good fabric, um, with that yarn thickness, but you do have to be more aware of how your stitches are working out because, you know, you didn't make a gauge swatch, you don't know. That for sure the way that you're gonna stitch things up is gonna be like whoever wrote up the directions or whoever is showing you how to do it. So you just have to be a little more vigilant about, look like, you know, stopping and looking at your piece and saying, does that look right?
Ok, it looks pretty good and then continuing. All right. So I am just continuing with the two double crochets in the valley, like here, and then one double crochet in the ridge. Until we get around, um, to where we started, and then I will show you how to do a joint. Let me know if you guys have any questions about anything I'm doing.
We've got a bunch more hellos. Looks like there are a couple more hellos. Has anybody started working on holiday presents yet? I'm just curious. I know it's like barely October and I'm wondering.
About something that's happening in two months, but I, I know that there are a lot of people who like to play on these things ahead of time because crochet takes a while. I'm not very good at, uh, planning out my Christmas presents or my holiday presents too, too much in advance. But I'm trying to be better about that. All right, I just have a couple more. stitches left.
Oh, and part of the reason I wanted to teach this kitty hat now was because I thought it could make a really cute Halloween costume too, you know, a black cat or, and do it in Halloween colors, it would be really cute. OK, so I have come around to the end. I just want to show you this because it looks a little different. So we've got this valley right here. We're still putting two double crochets into that valley.
And we've completed all of our rounds here, or all of our row ends, sorry. And I'm just removing the stitch marker. There was the very, top of the first stitch is right here. So we're just going to insert our hook into the top of that stitch just underneath the V, and we're going to grab that yarn, pull it through the stitch, and, and then we're going to pull it through the loop on our hook, and that's going to join it. But the other thing, um, in this hat I like to switch back and forth every other round to do a different color to make those stripes.
If you wanted to do a solid color, you would do your join just like that and then you could continue by pulling up your loop and making your first, um, beginning double crochet or you could start with your beginning chain where you chain 2 or chain 3 depending on your preference, um, and continue in that way. But because I'm switching to another color, I am actually going to be doing that very last slip stitch join with the new color. So I'm going to remove that little join there. So this is, I've just completed the very last double crochet, and I'm gonna grab my new color here and get that ready. Um, OK.
So, we're going to place our hook into the top of that very first stitch. That's where we had marked it. I'm gonna drop this yarn to the back, so that means you just kind of let it hang out there, and then I'm going to leave about 6 inches or so, just enough so you can weave that in later. And I'm going to place that strand of yarn on top of my hook like this, and I'm going to bring it through that very first stitch of the round, and I'm going to bring it through that loop on my hook like that to change color and also to make that joint. Now if you find that this is kind of gapping here, there's a hole or that loop's getting bigger, you can pull on that ending yarn tail.
I'm going to pull on the green a little bit to tighten that up and I can pull on Um, both loops of this lighter color to tighten that up. See how that just kind of cinched it right in? OK, and so now we are going to start on our next round. So you can choose if you're going to be doing that beginning chain, you can do, you can go ahead and just chain 2 or chain 3, whatever you like, and then you're going to do your first double crochet in that very same stitch where we did our join. So that's the same place where we inserted our hook at the end of the last round right there.
So you would do a yarn over, insert yarn over, pull up a loop, yarn over, pull through 2, yarn over, pull through 2, OK? So then when you come around and join, you're either going to be joining to the top of that stitch if this does not count as a stitch, or if this is going to count as a stitch right here, that means if you did your your beginning chain, if that counts as a stitch, that means your very next stitch, your next double crochet needs to be over here into this stitch, OK? Because when we say something counts as a stitch or doesn't count as a stitch, I know that can be very confusing, especially to new crocheters. What that means is this turning chain is going to be counting as though you did a double crochet, and you worked, you already worked into this stitch here when you did your slip stitch. And so this stitch, think of this as growing out of that very first stitch of the round.
So you don't need to work into it a second time, otherwise that means you're increasing, you're adding more stitches, and we don't want to do that. So that's how you know you got to move to the next stitch right there for your double crochet. All right, so I'm gonna undo this because I'm gonna be doing that beginning double crochet. I'll show you how that how that looks again. So we just pull up our loop to about the height of our double crochets from the previous row.
Right here, previous round. So bring that up and I'm going to place my finger on that loop, duck my my hook underneath, grab that yarn and pull that up. So that's just like the first yarn over that we make in a double crochet. And then we're going to go in here into that very same stitch where we joined. We're gonna grab that yarn, pull it up.
Now we've got 3 loops on our hook. We're gonna yarn over, pull through 2, yarn over, and pull through 2. All right. So that's our very first stitch. That's that beginning double crochet.
We worked it into that stitch, so we're gonna move on to the next stitch and make a double crochet there. And we're going to make a double crochet into each stitch around. So I was showing one of my kids how to make a hat because she really wanted to make her own and um she wanted her stripes to be thicker so what she did was she's um she did the first round in the same color as the ribbing which really looks the best because when you're working that first round it can look kind of because you're not actually stitching into the top of a stitch you're stitching into the sides of those ends of the rows. It can look a little bit messy if you switched colors. On that very first round.
So I always suggest that you keep with that same color for that very first round and then after that you can switch whenever you feel like it. So for her, she wanted wider stripes. She so she did two rounds of double crochet before switching to the next color. And you don't if you're planning on going back to the same color, like if you're doing every other you know stripe a stripe of green and then white and then green and then white um you're just gonna leave those yarn tails hanging out at the back because we can just keep, you know, picking them up and putting them down and we don't have to cut them at the end of the round because then we're gonna end up with all these ends to weave in. And who likes doing that?
Not me, I'll tell you. So, um, I just let it hang out on the back and then I carry it up on the inside. You just have to make sure you drop it to the wrong side of your work. And I'll explain that just a little bit more as we get there. Cause I know if you've never done this before, that might not might not be easy to visualize it, but I'll show you.
All right, we just have a few more to go and then I'll show you that join one more time, and the color change. And I would recommend, you know, after the 2nd round that you do, just take a second and look at your piece and make sure, you know, just lay it flat on the table. And make sure these edges on the sides are fairly even. You just don't want them to be flaring out or rippling along, that means you have too many stitches there, or you need to go down a hook size or something because this is too wide and it's gonna be much larger than you want it to be because you want this to be, you want this to have to stretch a little bit when you put it on your head, you know, at least one inch I feel like. In order for it to get that really cute kitty ear shape.
All right, so here's my very last double crochet. Just finished it there, and here is the very top of my beginning double crochet. So I'm going to insert my hook here and remember if you are using a beginning chain and you're not counting that as a stitch, OK, meaning you worked your first stitch into this ridge, OK, so you have a beginning chain, you're not counting as a stitch, you worked your first stitch here. That means that you are going to be making you're skipping over your turning chain and making that join into the very first actual double crochet that you made, if that makes sense. All right, so here is the top of my beginning double crochet.
I'm going to make my slip stitch here like that. If I was going to continue with this color, I would keep going. Or if I wanted to switch colors at this point, I would insert my hook here, drop the color that I've been using, and I'm going to pick up the color that I had dropped because I'm going back to that color. And just allow that to kind of reach from that stripe up to here. Don't pull too tight.
When you bring that through both those loops there. So, you're going to see this little strand connecting the green from down here to the green that you're about to work, and that's OK. If you pull too tight on it, then it kind of cinches that area where all the joints are, and you're going to be able to see it a little bit. So just allow it to be nice and long back there. OK, so now we're going to start with our beginning double crochet.
So we're going to draw up our loop a little bit, place our finger on that loop. Duck under, grab that new strand, go into that same stitch where we did our join. Grab a strand of yarn. Now, we've got 3 loops on our hook, yarn over, pull through 2, yarn over, and pull through 2. And so, you can see how it, you know, this, this is pretty close to what a double crochet looks like.
It's just got a little extra down here like it kind of sits over to the side. Like if you look at a double crochet, it really comes together at a point. This has a little extra coming from that side, but it does, it looks a lot more like a double crochet than, if you do a turning chain or if you have a turning chain next to a double crochet. So that's why I've been liking to do this beginning double crochet lately just because it blends in a little bit better, but you know. That's just one of those things if you're new to crochet and you're getting frustrated with doing that, then you can absolutely do that beginning chain and not even worry about this.
This is kind of more for those of you who have been crocheting for a while and you're looking for a new, a new way to make those joints and keep the, the jog from being too noticeable in your stripes. All right, so you're just going to continue switching back and forth and back and forth until the hat is the height that you want it to be. And so if you are making it for yourself, you can absolutely just try it on. You could safety pin or use stitch markers to kind of pin along the top edge to see if it makes that sort of little dip in the top like right here and the little pointy ears, and you can fold this up however much you need to. So I would just, you know, if you're making it for your own head, definitely just try it on and make sure that it's doing what you want it to be doing to get you those cute little kitty ears.
Um, if you're making it for someone else and you really don't know how tall it needs to be, I do have suggestions for the different circumferences, um, about what the heights of your hat should be measured from the bottom fold up to that top edge. So let me just take a look in here. So that. It's actually within the directions, let's see here. Um, after round 3, you just kind of continue switching back and forth, working, you know, alternating to make those stripes, and then here is this paragraph here, this is where it's telling you, you know, giving you suggestions on how tall this should be from the bottom of the folded edge to the top of the hat.
So you know, just for example, if you were. Um, working up a hat for a child or someone who has a smaller head that was between 17 to 19 inches, that's their head circumference. OK, it's not the hat circumference, it's their head circumference, um, then you would want it to be like 6 or 6.5 inches tall from the fold up to the top. Uh, you know, everybody's got differently proportioned and shaped heads, so it's really best to try it on the best you can, but also remember that this, that's why I made the, that's why I designed this hat with the ribbing that could be folded up more or less so that way you could get that nice snug fit. So you do have a lot of wiggle room there.
You can really just go by these, um, these numbers if you like, but if you're making it for yourself, why not try it on and make sure it's exactly what you want. All right, so this hat, I am just finishing up here with this last row, or round, I should say. I just have a few more stitches to do, and then I'm gonna show you how to seam it closed. So I've just got a couple more double crochets here. Here is my last one.
And there's the beginning of my round, that beginning double crochet. I'm gonna slip stitch there, and I'm not changing color because I am just gonna go ahead and fasten off. Um, after, after I've steamed this, sorry, I'm not fastening off right now. Um, I, I just want to use the same color for steaming all the way across. OK?
So, I, I'm gonna do a slip stitch seam, but I really like to have my seam on the inside of the hat. Let me bring this hat in here so you can see what I'm talking about. I thought I did. I've done this a couple different ways, and I did this slip stitch seam on the outside, which gives you a little bit of a ridge that kind of sticks out on the top, and it looked fine, it looked cute, but I really liked how kind of cuddly and poofy it made the ears look when I did my seam, um, on the inside of the hat and then turned it right side out. So what you're looking at here, this is the inside, uh, sorry, this is what is held to the inside when I do that seam.
So I turned my hat. So, it was wrong side out. And then I did my slip stitch seam across, so you can see, actually, I just want to show you this too. This is where I carried my yarn up. You can see those little strands there.
Um, I did my slip stitch as the hat was inside out, then I turned it right side out and I did steam block it a little bit, especially up in the tips of the ears to make them stick out, but I really liked how this was looking on the top of the head. It just, for me, it looked cuter, um, but I'm sure there will be other people who disagree and want to do it a different way, and that is completely fine. Like, you know, the beauty of crochet is you can do things the way that you want to, can customize it to your tastes. All right, so we're going to turn this hat right side out. So I'm just gonna flip this like that.
And here is my. Working loop, your working loop should just be adjusted so that it's off at the side. I'm gonna pull my ball of yarn through here. Like that. And now we're ready to do our slip stitch seams.
So this is going to be similar to when we did our slip stitch seam in the ribbing. Um, but we're going to be working underneath just the loops that are touching each other. So when you take a look at the, the top edges, when they're kind of held together here, you've got V's going in this direction on the front and V's going in this direction in the back. We're going to be placing our hook underneath the back loop of the edge in front and the front loop of the edge in back. And the reason that I'm doing that is because I really only wanted to use one loop from each edge because it allowed it to have a little more stretch and it wasn't quite as bulky of a.
Seam. Um, so that's why I'm using one loop from each. And also when I flip it so that it's right side out, you don't see one of these edges of the loops. OK, so they're hidden on the inside. So we're going to grab that yarn, pull through both layers.
Pull through the loop on our hook, and we're going to continue that across. So we're gonna go underneath the back loop of the edge and front. Front loop of the edge and back, grab that yarn, pull through both loops. And through the loop on your hook. All right?
So, we're just gonna continue working our way across. Connecting these two together, and like I said before, uh, you know, oftentimes when we're doing a slip stitch we do those tighter than we would do our our other stitches so it ends up kind of restricting, or, um, you know, constricting the constricting the top of the hat or restricting the stretch at the top of the hat. So I, um, you know, I would suggest either intentionally trying to keep it loose and relaxed, or if that's difficult, then, um, grab a larger hook, and you can do your slip stitch seam with a larger hook. To keep that from happening. You could, you know, alternatively do a whip stitch here.
And that would be absolutely fine. All right, so let me know if you guys have any questions or suggestions or anything like that. Um, we're gonna wrap this up in just a little bit. I'm going to be the next step I'm gonna be showing you is how to block your hat. And I know for, for some people, especially if you're new to crochet, you're probably wondering what the heck I'm talking about.
Um, blocking. Or even if you've been crocheting for a while, maybe you've never blocked anything before. I know that it took me years of crocheting before I actually bothered to block anything because I just thought my stitches look fine. I'm not worried about it and that's that's OK, but there are certain situations that blocking can really change the look of your piece. It can give it a lot more drape and softness.
And um, so that is one of the big reasons that I block pretty much everything that I make now. It can also even out your stitches and really it doesn't, you know, if you already have a little area where you could steam something if you already own an iron or if you're lucky enough to have a steamer already, Then it really doesn't take much effort. You just have to kind of heat that up as you're doing your very last finishing, you're weaving in your ends or whatever it is that you're doing, and then you'll be all ready to go and it just takes about two minutes. So for me it's totally worth it. All right, I just got a couple more.
Stitches to go through here. All right, we've made it to the opposite corner. I'm gonna cut my yarn and draw that through. Then I want to show you how to weave in ends because there might be some of you who are brand new and you've, um, you know, so someone just saying go ahead and weave in your ends, you might think, what the heck are they talking about? Um, so to weave in your ends, you're just going to thread your yarn tail, whatever you have left sticking out.
So like this one will need to weave in that and we'll need to weave in these two as well. Um, and this one here, so you just thread that onto a yarn needle, and then you're just gonna weave that into your stitches, weave it back and forth, and a couple things to think about. If something's going to get a lot of stretch in one direction, I usually try to weave it in the opposite direction, but here, even if this might get more stretch in this direction, I really want to keep my green yarn tails in the green. I don't want to weave them into the lighter color because they might show a little bit on the front. So what I'm gonna do is I'm just gonna come down here to see these little open edges.
These are really an easy place to just kind of weave through. Now you may not have something like that if you're weaving in something else. You can just kind of place your needle. What you're trying to do is you're you're just sort of running it through the center of those stitches. You want to make sure you're not making a big loop of a stitch on the outside of your work, so go ahead and check.
But if you're just going under one loop or splitting through a loop, then you should be just fine. So like that and I always weave in my end at least in two directions because that really helps hold it in and once you um once so I came out from underneath this loop. I want to go back under that loop again because it was easy um you could take a different path you could go down through here, but if you wanted to go through that loop again, you've got to go through another place first. So that you can go through that loop again, and it'll get caught on the other, um, that little loop up here, OK? So you don't want to just undo what you did.
And when you're pulling through, you just want to pull it until it feels like it's about to stop. You need to have a very light hand with this. You don't want it to be, you know, you don't want to go through and then pull through real hard like that because then that kind of gathers in your, in your fabric and it distorts your stitches. You know, you can always just kind of stretch that back out to get it to play nice after if you accidentally do that. That's OK.
All right, so you would go ahead and weave in all of your yarn tails. And then do the blocking last. So we're going to turn this right side out. Like that. And I'm gonna bring over my.
Iron so you guys can see what this looks like and I want you guys to see I'm I lately I've been feeling like I should show the blocking step more often um if it doesn't take too long because I want people to see what you know why you would bother with that because I know a lot of people don't really. Um, that's a, that's a step that a lot of people like to skip, and I know that I skip that step also, and it's, there's nothing wrong with that. You, you know, I don't want here to shame anybody about not blocking their pieces. I just want you to see, you know, what you're missing if you're not blocking it, OK? So right now this is what my piece looks like, you know, it has, uh, you can tell it's kind of stiff because I crocheted it up at a pretty tight gauge, um, and like I said, this is mostly acrylic one of the.
Yarns has I think 20% wool in it, but the rest of it is acrylic, um, so I like to to steam block my piece because acrylic or other synthetics really respond very, very well to the heat and the steam so you're not actually touching your iron to your work you're not gonna actually iron it. You don't wanna do that because you could melt your yarn or um, you know, make it look shiny or all all sorts of other things. You're just gonna kind of hold it above. Like this, and let the steam come out. And I like to kind of roll that out a little bit at the top because that little slip stitch Seam wants to stay indented, which isn't, I mean, it's not a big deal.
It doesn't look bad. It's just, I just wanted to lay a little bit more flat. All right. And I'm gonna flip it over to the other side. Even though that side, you know, it did get steam on it a little bit, but it didn't get, um, as much of the heat.
All right, so now you can see, look what happened here. We've got, it's just so much more flexible, but you know, because we crocheted this up at a tight gauge our stitches are really nice and close together so they're gonna keep, you know, somebody's head warm. And you've got that extra, but now you have that extra drape that we didn't before and it's so much softer, it just feels much softer, um, so another little step you could do if you already know where you want your ribbing to sit, you know, if you were gifting this to someone, I wouldn't bother blocking that into place, but if this is something that you're making for yourself and you've tried it on and you really like a certain, you know, you, you like it when the ribbing is folded up to this, this point here or whatever point you decide. Then you can give it a little bit of steam. Uh, where, when it's folded like on that folded edge, and then it's going to wanna fold.
And just let it cool off in place. All right, so let's try this on. I'm trying to remember what size I made this. I think we better put it on this guy here. So we'll try it on and you guys can see what it looks like.
There it is and then you can decide if you want to pinch your ears like that. Sometimes people will sew these ears in place. You could do a little stitch through, you know, I would stitch just in a little area and make sure you're coming out through the backside in the same color so you don't see a little stitching line, um, and you could stitch, make a little stitch here and here to make your ears always, you know, fold a certain way, but sometimes people like to, you know, wear them like this. My kids like to wear them like that. Um, so you can wear it however you like.
All right, well thank you guys so much for joining me for this live event. Oh, let me just peek over here. Oh, we've got lots more people saying hi and I missed. Oh, Molly said last year I made you pickle and Cardinal ornaments for gifts. Could you make a new ornament this year?
I was thinking about that. OK, um. It's likely if not this year, then for sure for the next season, but I think so. I think I can squeeze that one in. Usually I work a couple months ahead of time getting things ready, so, um, I, I will look at the schedule and see if I can, I think I can though.
Let's see. Oh, and thank you, Linda, for your compliments. That's very sweet. OK, if someone has a question in one of your videos, you were wearing a granny square cardigan. Will you be able to make a video of that cardigan and how we can make it.
Oh, I think I know which one. I think I only have one granny square cardigan. I actually, um, that one I won't be able to make a video of the exact same one. I maybe could do something like that in the future, um, but that cardigan actually, um. I, that was a freelance project that I did for a yarn company, so I won't be able to show a video of that, um but if you're interested in granny square sweaters, this is not a cardigan but just a pullover sweater.
I do have a video coming out, uh, a class actually coming out pretty soon, I think before the end of the year this year, um, that's how to basically make a freestyle, um, granny square pullover, like a just a, you know, it's not a cardigan, um, but it's really cute. All right. Oh, and we've got Belle. If you could think of a project for a tablet phone sleeve and yes it was me who suggested your not so recent project you aired this time I'm thinking of the one that goes around the tablet phone itself if you know what I mean, that would be great. OK, Belle, um, let me know, so Belle, are you talking about like, uh, a case around it when it's open if that's what you mean, um, because I did.
I did do one. Thank you for your compliments. I did do one that was like a make your own DIY um tablet or phone or laptop cover cozy where you drop it in and then there's like a little cord that goes around the bottom to keep it closed. I did do that recently on the Creative Crochet Corner website, um, so you can look for that, but. um, let's see.
But let me know if that's not the style you meant. Okay. All right. Okay, thank you guys so much for being here. Thanks for showing up in the comments and all your support.
I really appreciate you guys being here, um. Yeah, and I think, you know, keep those ideas coming. I love getting inspiration from you guys for my next projects, um, it always makes me think outside of, like, my norm, um, which I love. So thank you guys so much for being here. I really appreciate it.
Happy crocheting, everybody.

Share tips, start a discussion or ask other students a question. If you have a question for an expert, please click here.
Already a member? Sign in
No Responses to “Crocheted Kitty Cat Hat”