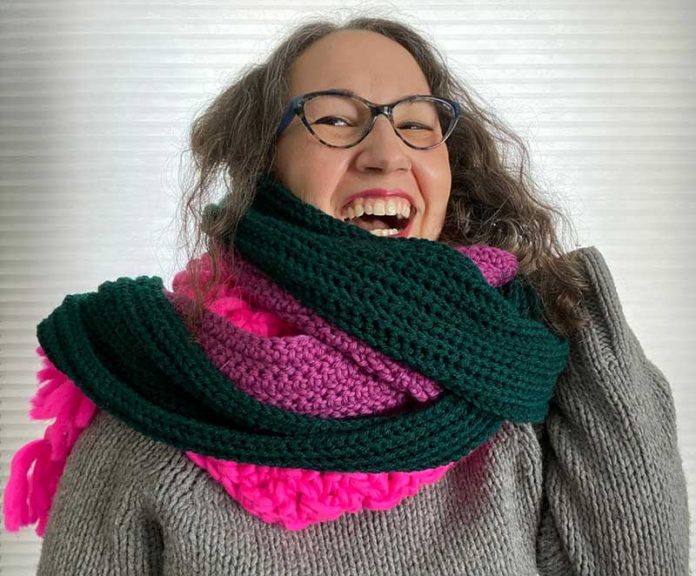
I love making scarves! They are great projects for learning a new stitch pattern or trying out a new yarn. Because scarves don’t require any shaping and don’t need to be made a certain size, they are often among our very first projects when learning to crochet.
It’s most common to make scarves in horizontal rows, which is usually how we first learn to make them. However, there are a few benefits to making them using vertical rows. In fact, this has become my favorite method!
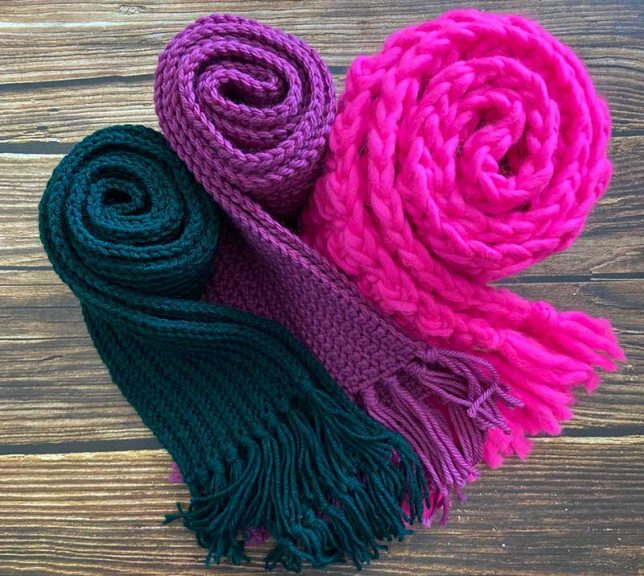
Continue reading to learn why I love making scarves the “sideways” way and discover a few tips for designing your own sideways scarf. Included at the end of this article are three patterns for scarves made sideways to get you started.
Why Make Them Sideways?
There are three main reasons that I like working my scarves sideways:
Many stitch patterns look great worked in a sideways direction. I love making ribbed scarves, which look particularly nice when the ridges are oriented vertically. Lots of other stitch patterns have strong horizontal lines which also look great when worked sideways.
I’m also a big fan of making striped scarves out of my small scraps of yarn. I work each row from a different color and then incorporate the beginning and ending yarn tails into the fringe so I don’t need to weave in a million ends!
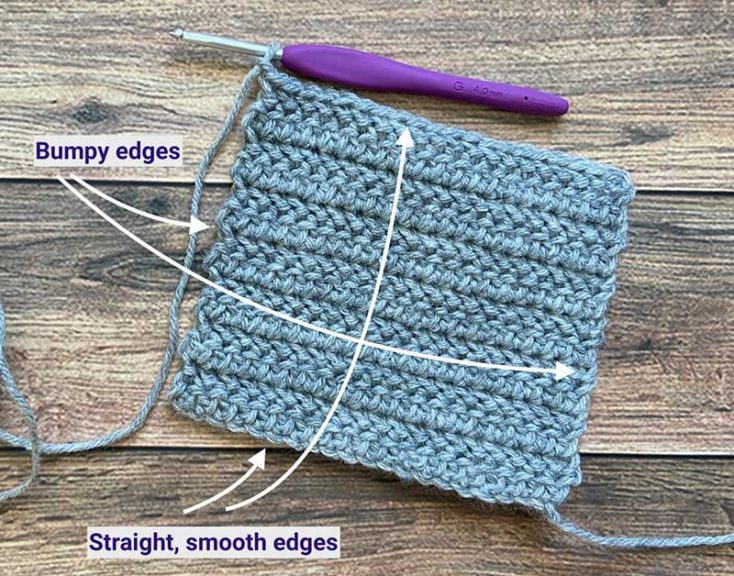
Working sideways will create a smooth tidy edge along each long side of the scarf (the bottom of the foundation row and the top of the last row worked). When crochet is worked back and forth in turned rows, it can be tricky to maintain neat edges at the beginning/end of each row. An uneven edge (at beginning/end of each row) can be easily covered up by adding fringe to each end.
When scarves are worked sideways, the finished length of the scarf is determined first (by the length of the foundation chain), and then the number of rows worked determines the width. This method is helpful if you are using up stash yarn and you don’t know how big you can make your scarf before you run out of yarn.
If a scarf isn’t long enough to wrap around your neck, it isn’t very useful, is it? It would be better to have a slightly narrower scarf that is actually long enough to wrap around the neck, right? If you’re worried about running out of yarn, you can determine the shortest that you’d want your scarf to be (but long enough to be comfortable) and make your foundation chain to that length. Then you can crochet back and forth until you run out of yarn.
Tips for Designing Your Own Sideways Scarf
Make a swatch first.
Catching issues before you are too far into the project will save a lot of time! You may find that you need a different size hook for working the foundation chain. For example, if the foundation edge appears wavy or stretched out compared to the rest of the fabric, try going down a size for just the foundation chain. Conversely, if the foundation edge seems constricted, you might try a larger hook for the foundation chain. Swatches will also help you determine the hook size needed to give your scarf just the right amount of drape.
Use a swatch to calculate the number of chains needed to begin your foundation edge.
Depending on the stitch pattern and the individual way that we each crochet, our foundation chains could have longer (or shorter) measurements before they are worked into. This means that just chaining to the length you want your scarf to be might not give you accurate results.
If the exact measurement is not important to you, then by all means, chain away! But if you would like to know that your scarf will measure a specific length when you are done, then be sure to make a swatch first. After you finish your swatch, measure its width and count the number of stitches across. Then divide the desired length of the scarf by the width of your swatch and multiply the result by the number of stitches in the swatch.
For example, say you wanted to make a scarf that measured 60” and your swatch measured 4” wide. 60 ÷ 4 = 15. And let’s say your swatch was made with 14 stitches across. Then 15 x 14 = 210. That means you would need to start with 210 stitches in your foundation chain (plus any extra added chains for the turning chain).
Manage your foundation chain. (Whoa! That is a huge number of chains!)
Because the foundation edge begins with such a large number of chains, you need a way to make sure you achieve the correct stitch count. Try placing a stitch marker in every 20th chain, then if you lose count, it will be much quicker to determine how many chains you’ve made. If you’ve reached the end of your chain and you aren’t totally sure if you’ve chained enough, you can add a few extra chains to be sure. On your next row, if you find there were too many chains, you can always unravel the extras.
Begin your scarf by working into the bottom of the foundation chain.
This is also sometimes called “working into the back of the chain.” This just means that when you make your first row, you will be working under the horizontal dashes that are on the bottom of the chain, instead of under the two loops that form the “v” shape on top of the chain. This technique is not only easy to do, but it creates a beautiful, tidy edge that looks just like the top edge of your rows (so each side edge of your scarf will look the same).
Consider making a reversible scarf.
Many people prefer a completely reversible scarf so it does not matter which side shows when you put it on. Look for stitch patterns that have a one-row repeat like the three patterns included below—these are all completely reversible!

Make your scarf the length you want—you decide!
There is no right or wrong size to make a scarf—it’s totally up to you! However, the following guidelines may help you determine where to start. Usually a scarf will measure about the same as your height, give or take a few inches. An average scarf measures around 60-65” [152-165 cm] long, a shorter scarf might be around 50-55” [127-140cm], and a longer scarf could be around 70-80” [178-203 cm]. If you are making an extra-wide scarf, you may want to consider adding a bit of extra length to accommodate the extra bulk as it wraps around the neck.
The Sideways Scarf Pattern Collection
Scroll down to the end of this article to see a helpful list of abbreviations.
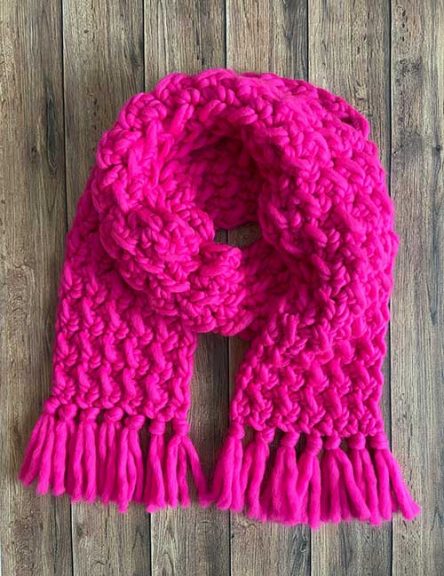
1. The Moss-Stitch Scarf
This lightning-fast scarf is made with a super bulky 1-ply yarn that really highlights the texture of this incredibly easy stitch.
Finished Measurements
Scarf measures approximately 64” [162.5 cm] long (excluding fringe) and 6.5” [16.5 cm] wide.
Materials
- Approximately 220 yds [201 m] of super bulky weight yarn (preferably wool, or a soft acrylic, or Wool/Acrylic blend)
- US P/Q [15.0 mm] crochet hook or size needed to obtain gauge
- Yarn needle
Yarn Used for Scarf Shown
We Crochet Tuff Puff (super bulky weight, 100% Wool; 44 yards [100 grams]: Pucker #26840, 5 skeins
Gauge
5.25 sts and 7 rows = 4” [10 cm]
Notes
Scarf is worked flat in turned rows. Turning chains do not count as a stitch. After the first row, all HDC sts are worked into sl sts from previous row, and conversely all sl sts are worked into HDC sts from previous row.
Instructions
Scarf:
Ch 85.
Row 1: Beginning with the 2nd ch from hook and working into the bottom of the chain, [1 HDC into next st, 1 sl st into next st] across. 84 sts.
Rows 2-11: Ch 1, turn, [HDC in next st, sl st in next st] across.
Fasten off.
Finishing
Weave in ends (or incorporate them into the fringe if they are along the short ends of the scarf). Block.
Fringe
Wrap yarn loosely around piece of 6.5” [16.5 cm] cardboard 28 times and cut once along bottom edge of cardboard for a total of 28 pieces of 13” [33 cm] yarn. Using crochet hook, attach two yarn strands of fringe held together as one through each corner stitch and knot each section together with an overhand knot near edge. There is now one tassel at each corner. Add 5 more sections of fringe (each made with 2 strands of fringe) as evenly as possible, between the corner tassels. Repeat for opposite edge of scarf. There should be 7 tassels on each end of scarf. Trim fringe if necessary for an even edge.
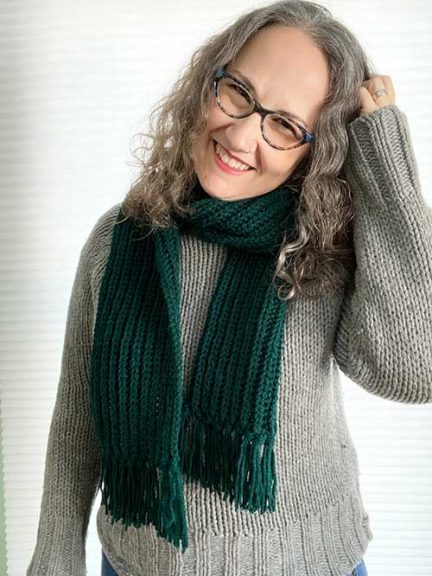
2. The Classic Ribbed Scarf
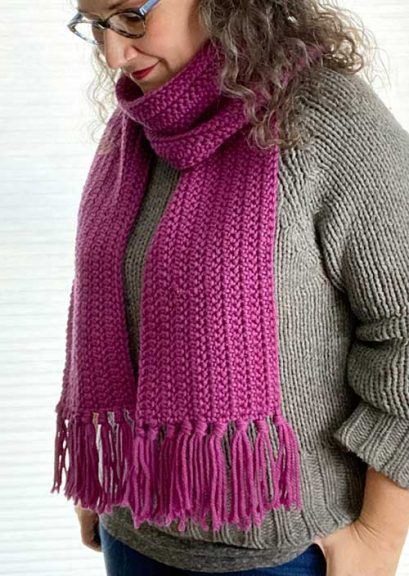
Any ribbed fabric looks great as a scarf, but I’m particularly fond of this stitch: the yarn-over slip stitch! It has such great drape, and looks so neat and tidy with its perfect little Vs all stacked up. Sometimes it can be difficult to crochet gifts for people who have simple, classic taste because anything too “original” is outside of their comfort zone. Yarn-over slip stitch to the rescue!
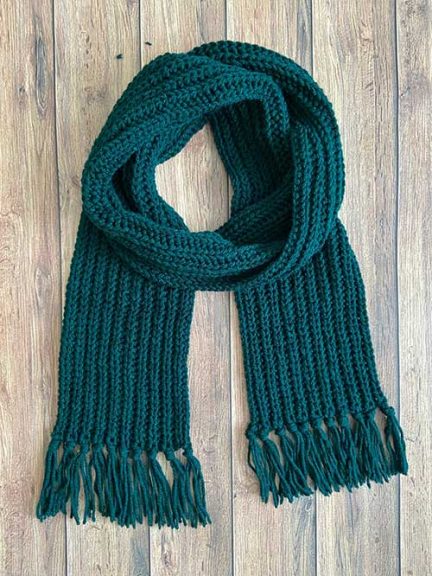
Finished Measurements
Scarf measures approximately 62” [157 cm] long (excluding fringe) and 5.5” [14 cm] wide.
Materials
- Approximately 436 yds [399 m] of worsted weight yarn (preferably wool, alpaca, or a soft acrylic)
- US I [5.5 mm] crochet hook or size needed to obtain gauge
- Yarn needle
- 2 removeable stitch markers (optional)
Yarn Used for Scarf Shown
We Crochet Brava (worsted weight, 100% Premium Acrylic; 218 yards [100 grams]: Hunter #-26435, 2 skeins
Gauge
14 sts and 14.5 rows = 4” [10 cm]
Notes
Scarf is worked flat in turned rows. Turning chains do not count as a stitch. You may find it useful to mark the first and last sts of each row with a removeable stitch marker to keep stitch count consistent.
Special Stitches
Yarn-over slip stitch (YOslst): Yo, insert hook into stitch, yo and pull up loop, continue to pull loop through both (all) loops on hook
Yarn-over slip stitch through back loop (YOslst blp): Stitch worked same as above but worked only through the back loop of stitch (not under both loops as normal)
Instructions
Scarf:
Ch 221.
Row 1: Beginning with the 2nd ch from hook and working into the bottom of the chain, 1 YOslst across. 220 sts.
Rows 2-20: Ch 1, turn, YOslst blp to end.
Fasten off.
Finishing
Weave in ends (or incorporate them into the fringe if they are along the short ends of the scarf). Block.
Fringe
Wrap yarn loosely around piece of 5.5” [14 cm] cardboard 66 times and cut once along bottom edge of cardboard for a total of 66 pieces of 11” [28 cm] yarn. Using crochet hook, attach three yarn strands of fringe held together as one through each corner stitch and knot each section together with an overhand knot near edge. There is now one tassel at each corner. Add 9 more sections of fringe (each made with 3 strands of fringe) every other row, between the corner tassels. Repeat for opposite edge of scarf. There should be 11 tassels on each end of scarf. Trim fringe if necessary for an even edge.
3. The Knotted Double Crochet Scarf
This simple variation on the double crochet makes a wonderful, flat fabric with lots of drape, but unlike regular double crochet, the holes between stitches are very small. Perfect for blocking the wind on a blustery day!
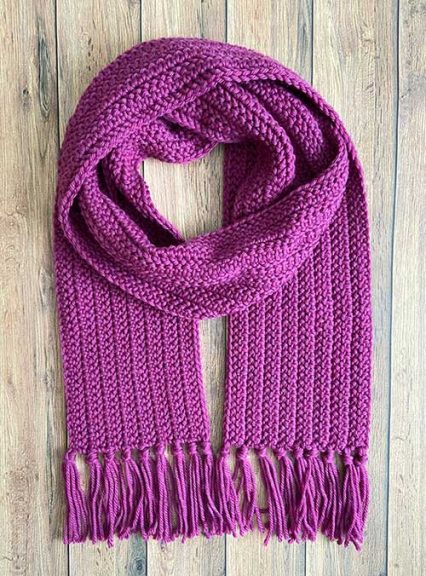
Finished Measurements
Scarf measures approximately 72” [183 cm] long (excluding fringe) and 6.5” [16.5 cm] wide
Materials
- Approximately 400 yds [366 m] of bulky weight yarn (preferably wool, alpaca, or a soft acrylic)
- US J [6.0 mm] crochet hook or size needed to obtain gauge
- Yarn needle
- 2 removeable stitch markers (optional)
Yarn Used for Scarf Shown
We Crochet Swish (bulky weight, 100% Fine Superwash Merino Wool; 137 yards [100 grams]: Karma Heather #28630, 3 skeins
Gauge
11 sts and 10 rows = 4” [10 cm]
Notes
Scarf is worked flat in turned rows. Turning chains do not count as a stitch. You may find it useful to mark the first and last sts of each row with a removeable stitch marker to keep stitch count consistent.
Special Stitches
Knotted Double Crochet (KDC): Worked as follows: yo, insert hook into next st and pull up loop, pull same loop through first loop on hook, yo, pull loop through both loops on hook.
Instructions
Scarf:
Ch 201.
Row 1: Beginning with the 2nd ch from hook and working into the bottom of the chain, 1 KDC into each of the next 200 sts. 200 sts.
Row 2-16: Ch 1, turn, KDC to end.
Fasten off.
Finishing
Weave in ends (or incorporate them into the fringe if they are along the short ends of the scarf). Block.
Fringe
Wrap yarn loosely around piece of 6.5” [16.5 cm] cardboard 54 times and cut for a total of 54 pieces of 13” [33 cm] yarn. Using crochet hook, attach three yarn strands of fringe held together as one through each corner stitch and knot each section together with an overhand knot near edge. There is now one tassel at each corner. Add 7 more sections of fringe (each made with 3 strands of fringe) every other row, between the corner tassels. Repeat for opposite edge of scarf. There should be 9 tassels on each end of scarf. Trim fringe if necessary for an even edge.
Crochet Abbreviations
Blp = back loopCh = chain
HDC = Half double crochet
KDC = knotted double crochet (see special stitches)
Sl st = slip stitch
St(s) = stitch(es)
YO = yarn over
YOslst = yarn-over slip stitch (see special stitches)
YOslst blp = yarn-over slip stitch (see special stitches)
Anxious to start crocheting something. Your patterns look beautiful.
Love to crochet blanket and scarf blanket and afghan
Thank you so much! These scarves are beautiful! I am a beginner crochet person and I am so excited to try these!
Hi - thanks so much for this information. I'm a weaver but taking a break as I wait for a new loom to arrive and started to crochet. My initial attempt was to make it 8 in wide and work my way up - but I didn't like the uneven edges. Do love the way the camel stitch and other stitches look but the edges are not the most attractive. So I see very neat edges with your style of working the entire length first! Hmm...interesting. I guess I can change the stitches in the middle of the scarf and then the last row back to KDC to make a even edge. Does this make sense??? Thanks for your expertise - I'm so excited about crocheting. Chrystal
How do I put this in my list of crochet projects?