I absolutely LOVE making things from scraps of yarn. I get so excited about combining colors together, and it’s such a thrill to make “something out of nothing.”
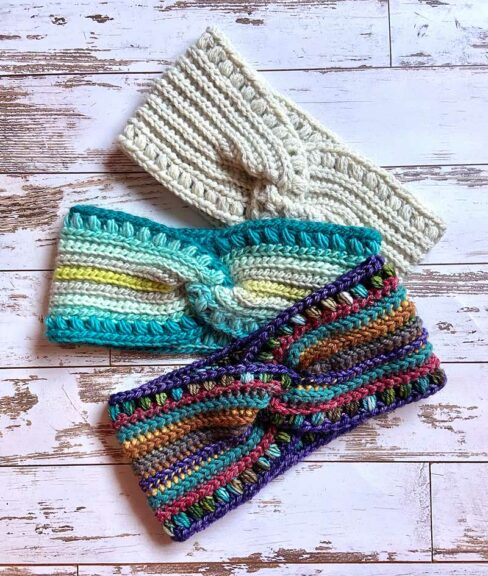
I’ve made many scrappy projects over the years. Sometimes I design a project specifically with scraps in mind such as the Merry and Bright Scarf, or the Bonita Project Bag. Other times, I design something, and then I like to re-make it using scraps, such as the Fall Harvest Cowl or the Bijou Headband.
Either way, I often get questions from people wondering how I chose my colors, or how I made decisions on color placement and proportion. This is always a hard question for me to answer because for me, color is very intuitive. In fact, I really don’t think about it much at all. I just put colors next to each other to see how it makes me feel, then I either use them together or look for something else.
This may work for some people, but for many people (particularly the people asking the question in the first place), this is very unhelpful advice! I’ve been exploring some ways of combining colors that follow some type of rules or formula so I can make helpful suggestions for those looking for more direction.
Let me share one simple way of combining a large number of colors together that has been working well for me. I call it the “harmony method” because I group my colors into two separate groups, and then combine those two groups together with pleasing results.
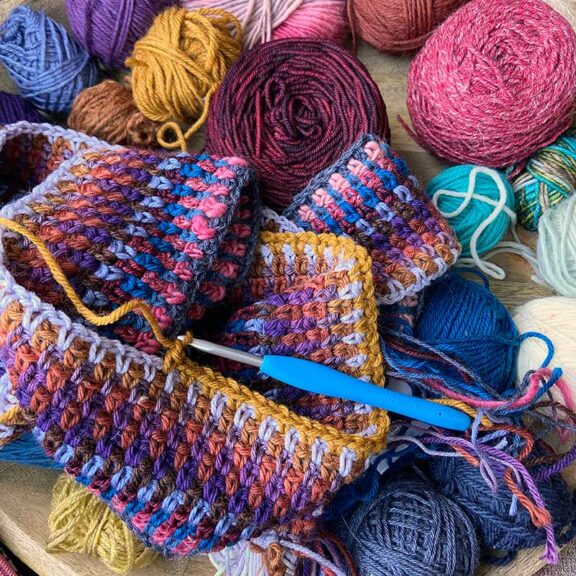
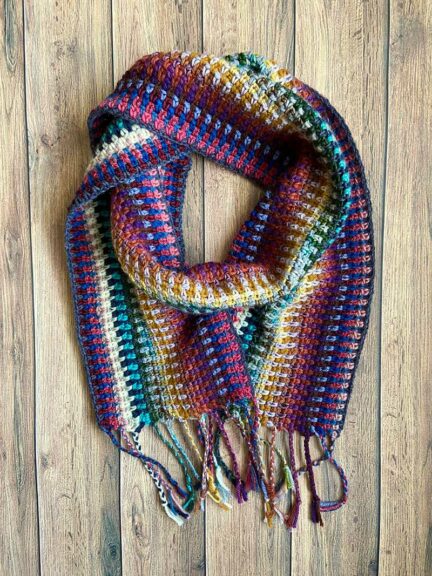
The linen stitch works particularly well for this color-combining method because it allows the colors to visually mix a bit instead of creating a solid stripe. This is the stitch pattern I used for the scarf pictured. Granny squares would have a very similar result since the stitch pattern allows for that “visual mixing” between rows as well, but feel free to try this out in other stitch patterns as well.
If you are interested in the specifics of how I made the sample “harmony method” scarf, the details are given at the end of this article.
Here’s how it works:
1. Make a pile of all of your yarn scraps. Do any of them stand out too much? It’s ok to have some accent colors that stand out more than the others, but if you want a more uniform look, you can remove any colors that jump out too much.
For example, the white ball of yarn stands out a bit more than all of the rest. If I had a chance to make my scarf over again, I might take that ball out of the mix. I left it in because I was curious about the end result. It doesn’t bother me too much, but I think it might look better without it.
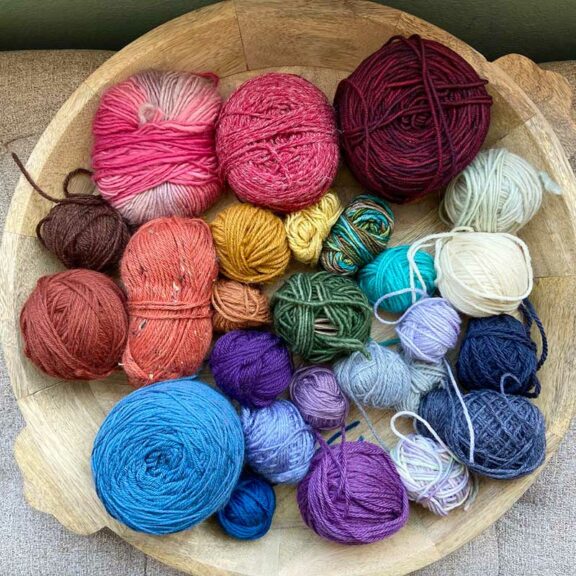
2. Arrange all of the balls in spectrum order as best as you can. Obviously not all colors are found in the rainbow, but try to arrange them so that they look as much like a gradient as possible. You can look at a color wheel for help. It’s okay if there are sections of the color wheel that are missing.
3. Count up your balls of yarn and divide the number in half. Place the second half of the lineup in line directly below the first half as pictured. If you are able, take a photo of your yarn arranged in this order in case things get moved around, or in case you want to put the yarn away later.
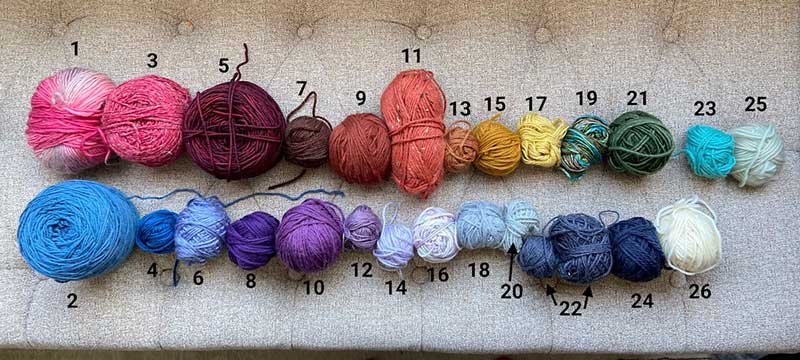
4. Number your balls of yarn as pictured above. Start with #1 from top row, #2 from bottom row, #3 from top row, #4 from bottom row, etc. If you don’t feel like labelling the actual yarn, you can label the photo. I found that I could just refer to my unlabeled photo and figure out which color I needed next so I didn’t even need to label the yarn.
5. Use the colors in numerical order.
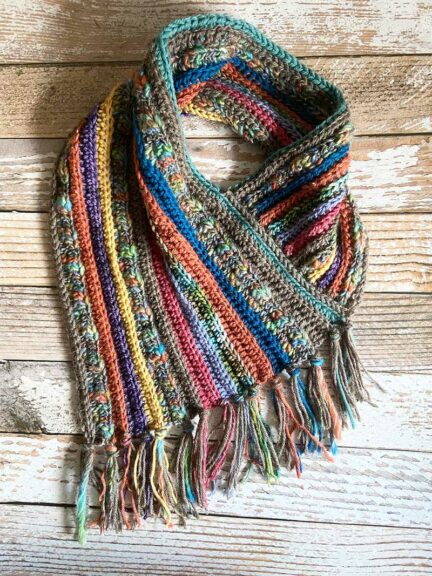
If you are interested in making a scarf like the one pictured, here are the details:
I used 26 different colors of yarn that ranged from fingering to heavy worsted weight (most of the yarn was a DK weight or a lighter worsted weight). Each row used about 16 yds [15m]. The entire scarf used about 540 yds [503m].
Scarf pictured measures 62” [157cm] long and about 6.75” [17cm] wide.
I used an H hook, which is the hook I use most often for DK or lighter worsted weight yarn. I wanted both edges of my scarf to be a darker color, so I began and ended with color #22. Other than that, I used the colors in order from #1 to #26, and then used colors #1–5 once more to make the scarf a bit wider, then ended with color #22.
My gauge for this project was 17.5 sts and 19.5 rows = 4” [10 cm] in linen stitch pattern.
This scarf was worked sideways as follows:
With color #22, and leaving a 6” [15cm] beginning tail, ch 270 sts.
Row 1: Working into the bottom (or back) of the chain, starting with the second ch from hook, [SC, skip one chain, ch 1] across until 1 st remains, SC in last st. Fasten off leaving a 6” [15cm] yarn tail. Turn. 269 sts.
Row 2: Leaving a 6” [15cm] beginning yarn tail, pull up a loop of color #1 in the first st, ch 1, SC in same st, [SC in ch-1 sp, ch 1, skip next SC] across until 2 sts remain, SC in ch-1 sp, SC in last st. Fasten off leaving 6” [15cm] yarn tail. Turn.
Row 3: Leaving a 6” [15cm] beginning yarn tail, pull up a loop of next color in the first st, ch 1, SC in same st, [ch 1, skip next st, SC in ch-1 sp] across until 1 st remains, SC in last st. Fasten off leaving 6” [15cm] yarn tail. Turn.
Row 4: Leaving a 6” [15cm] beginning yarn tail, pull up a loop of next color in the first st, ch 1, SC in same st, [SC in ch-1 sp, ch 1, skip next st] across until 2 sts remain, SC in ch-1 sp, SC in last st. Fasten off leaving 6” [15cm] yarn tail.
Repeat Rows 3 and 4 to desired width.
When my scarf was wide enough, I ended with one more row worked in color #22 (same color as foundation edge).
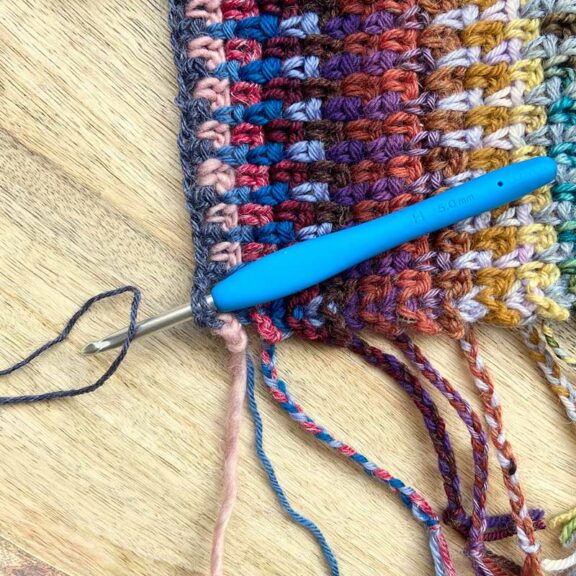
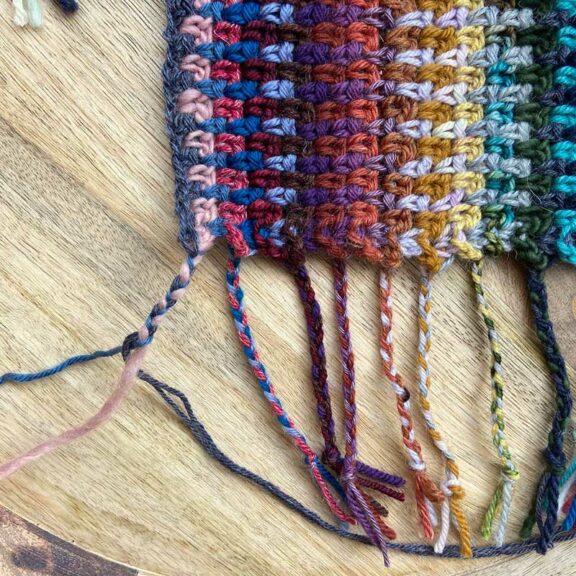
Using three strands of yarn tails at a time, braid them together until they are about 4” [10cm] long, tie an overhand knot, and trim ends. If the amount of yarn tails you end up with is not divisible by three, you can hold two strands together as one when making one or two of the braids.
Because the beginning of Row 1 does not have a yarn tail (the beginning and ending yarn tails end up at the other end of the scarf), add a strand of 12” [30cm] yarn through the corner stitch as shown using a crochet hook. Braid these together with the next 2 sts as shown.
Crocheting a striped scarf is a fantastic way to use up those little odds and ends that might otherwise get thrown away. It costs nothing, and what you get is far more valuable than the sum of its parts—a stunning, one-of-a-kind project!
Fabulous scarf. I love this.
lovely scarf. I have a question. If you are using different type yarn how do you get consistent width? won't there be inconsistent width because one yarn is thinner than the other? Thank you in advance for your answer.
Please include the metric crochet hook sizes along with whatever your letter system equivalent is! Thank you.
Gorgeous! I just finished a knitted linen stitch scrappy wrap in all fall colors! And I love yours. I'm not as proficient at crochet, but I think I will see if I can make similar! Thanks.
Looks interesting!
A very useful tip how to use leftover yarn. I have tons of such yarn and its time to use your advise - Thank you for sharing!