
What is tapestry crochet? Tapestry crochet is a method of crocheting with two or more colors at a time, changing back and forth between colors as you work each round. Usually this is worked in the round with the right side always facing as this creates smoother color changes. Let's explore some tapestry crochet patterns and tips for beginners.
How to Tapestry Crochet
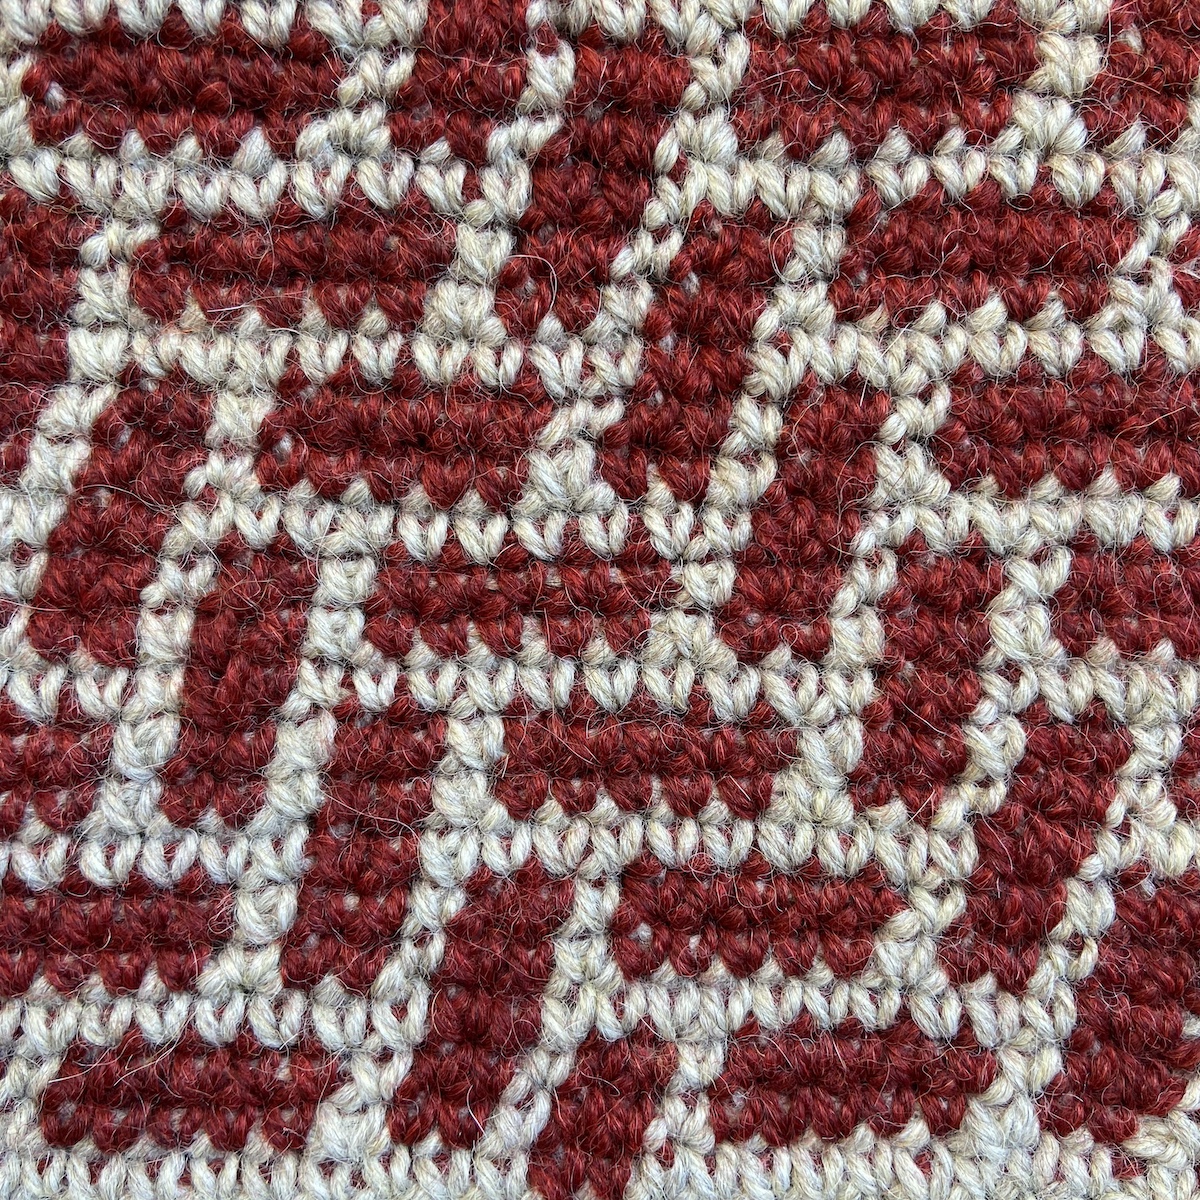
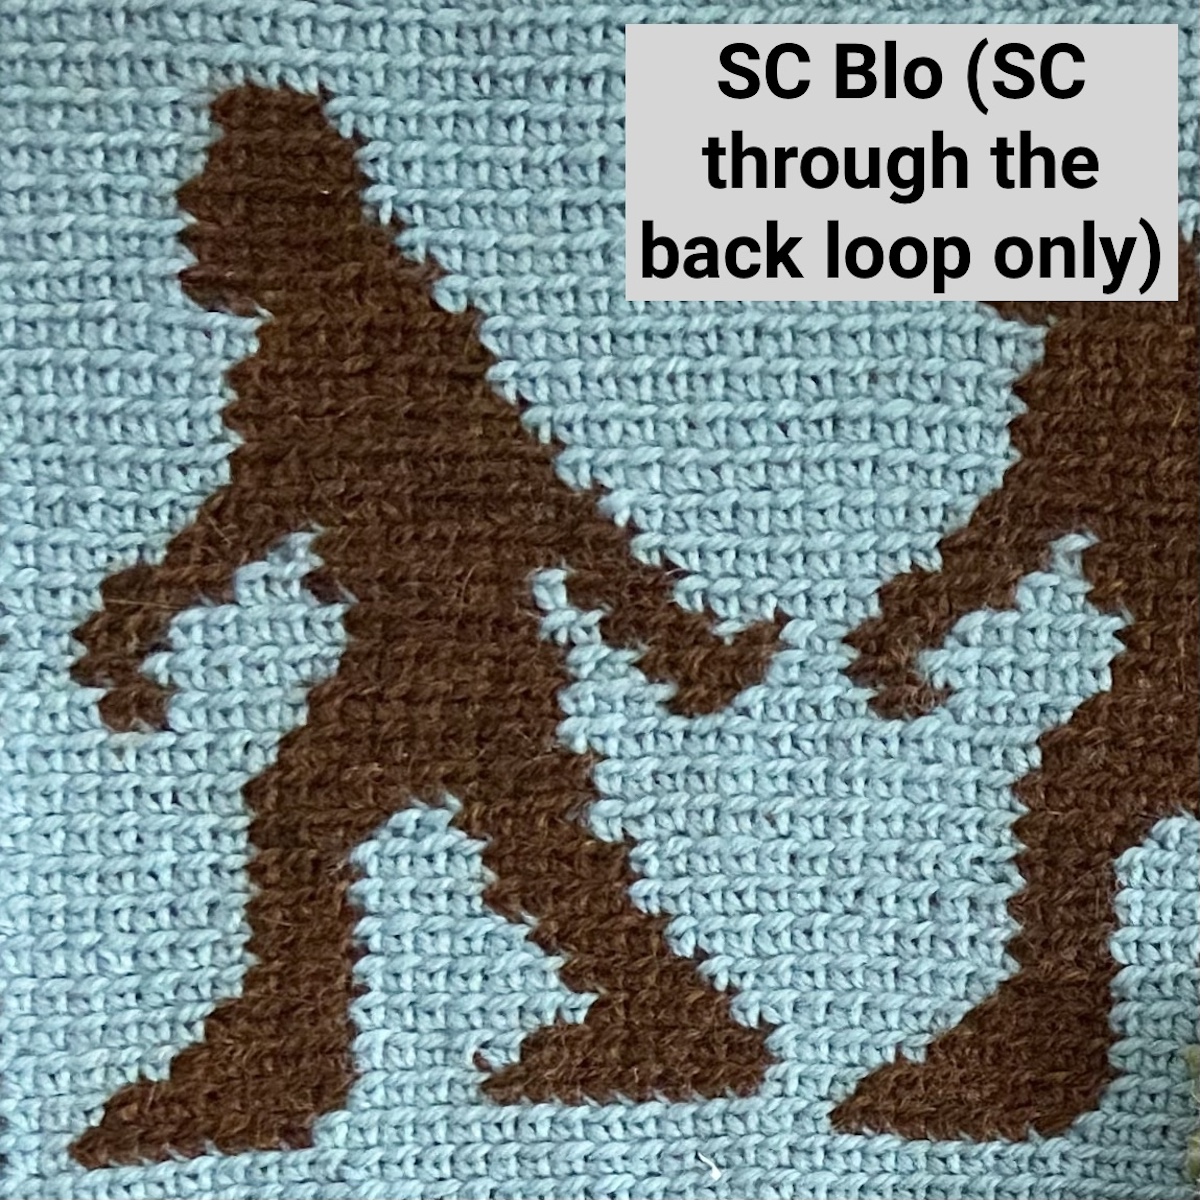
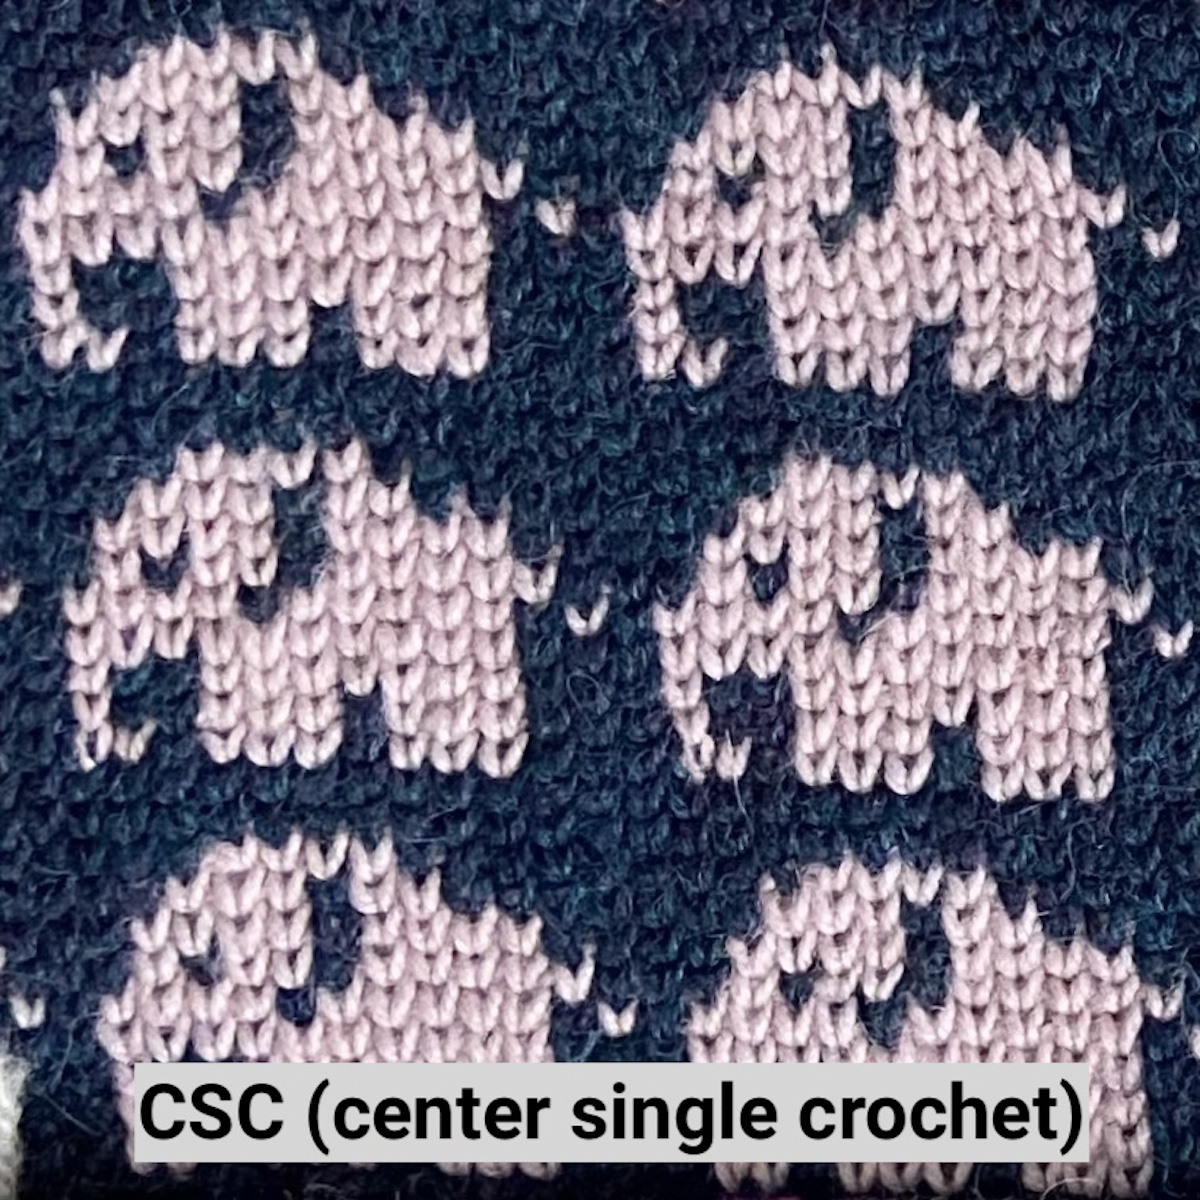
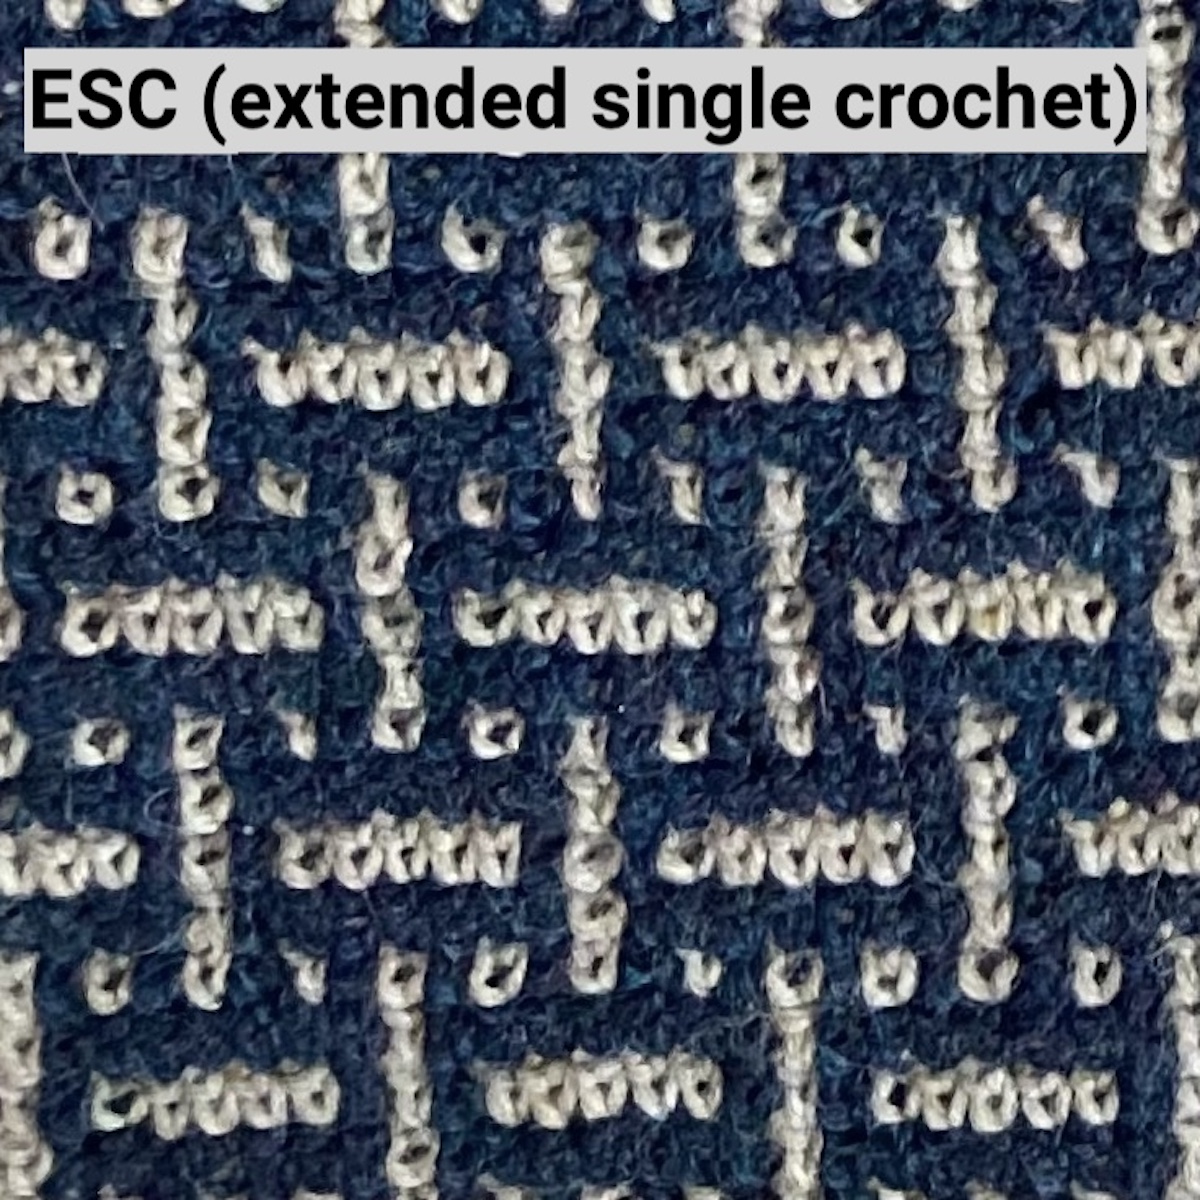
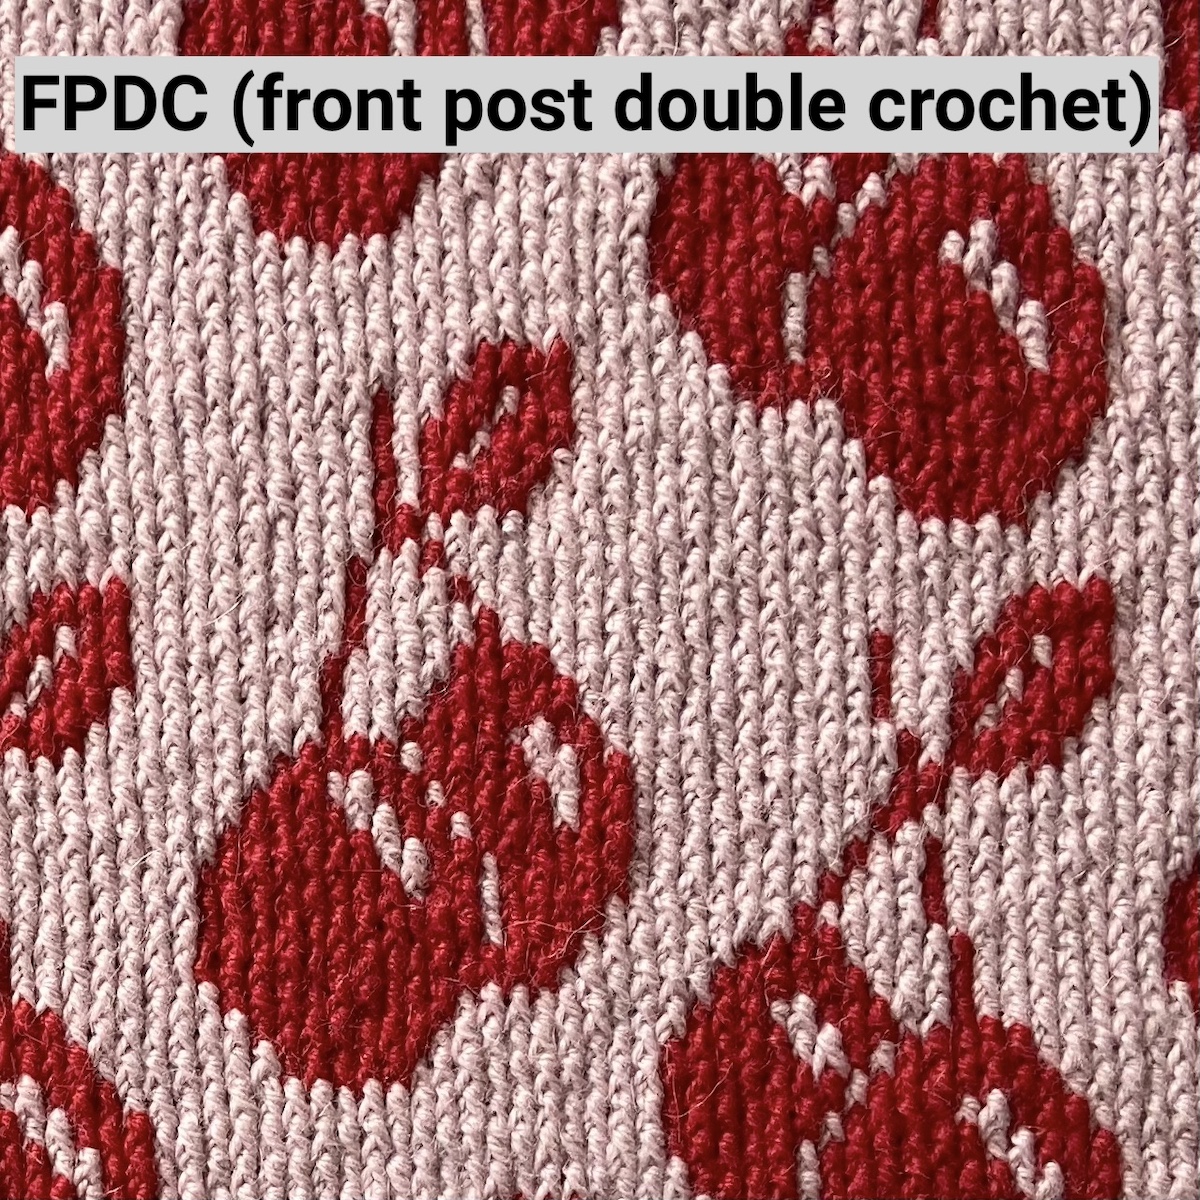
Tapestry crochet can be done using many different stitch-types including: single crochet, single crochet worked through the back loop, center single crochet (also called split single crochet or waistcoat stitch), front post double crochet, and extended single crochet.
We usually follow a chart for the color changes in tapestry crochet, as it would take up so much space to write out each color change, and actually seeing how to change the colors is much more straightforward.
When we follow a color chart, we begin at the bottom of the chart and work our way up to the top with each round we make. We often repeat sections of the chart until we get to the end of the round and then move up to the next line of the chart after completing a round of our project.
If you're right-handed, you'll work from right to left across each row of the chart. Most charts are written assuming that a right-handed crocheter will be using it.
If you're left-handed, you'll need to decide if you should work the chart as it is, from left to right each round, or if you should make a mirror image copy of the chart first, and then work across the chart from left to right.

Crochet stitches are almost never perfectly symmetrical from side to side, and they don't fit together in perfect little square blocks of color. When you work from left to right, the image might look slightly different than an image that was worked from right to left. If the colorwork has bilateral symmetry, then you don't need to worry—you can leave the chart as is and work from left to right.
However, if the shapes in the chart don't have bilateral symmetry, you should consider making a mirror image of your chart. Your resulting project will end up as a mirror image of a project that was made by a right-handed crocheter, but will otherwise look identical. In most cases, this is perfectly fine, however if you're crocheting a motif that includes words or symbols that shouldn't be reversed, it's better to work the chart as is (from left to right).
Another important thing to keep in mind is that certain stitch-types have more bilateral symmetry than others. Center single crochet (split single crochet, or waistcoat stitch) and front post double crochet have more bilateral symmetry compared to most other stitch-types, so these stitches will usually create a clear image whether you crochet left-handed or right-handed.
For clean color changes, you'll need to change to the new color on the last yarn-over of the last stitch in the old color. As you complete a stitch with that last yarn-over-pull-through, you're actually creating the top of the next stitch.
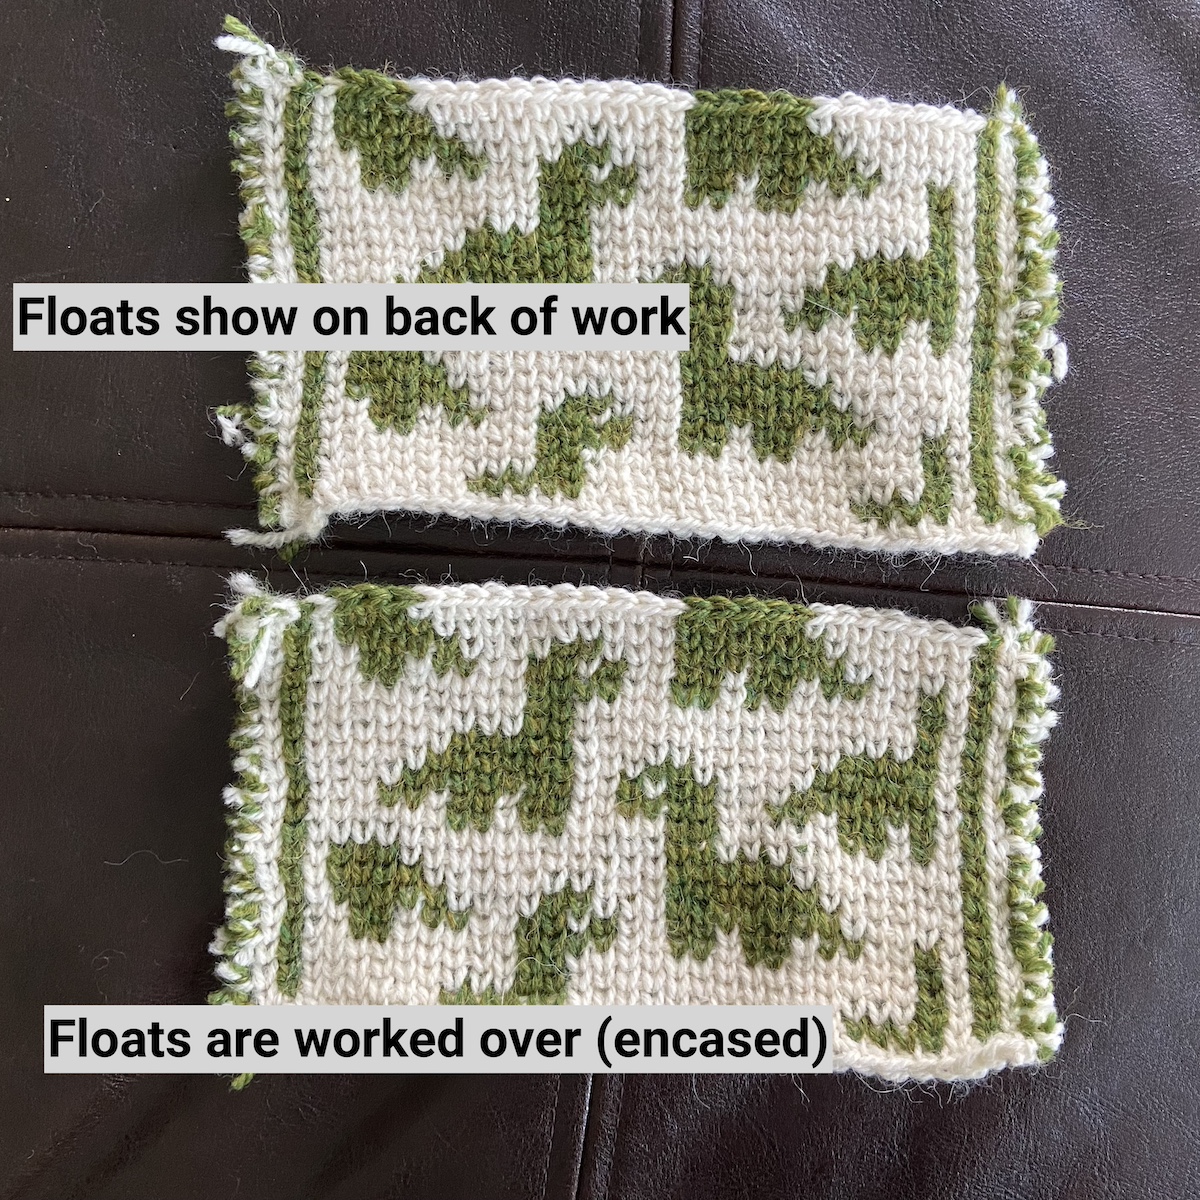
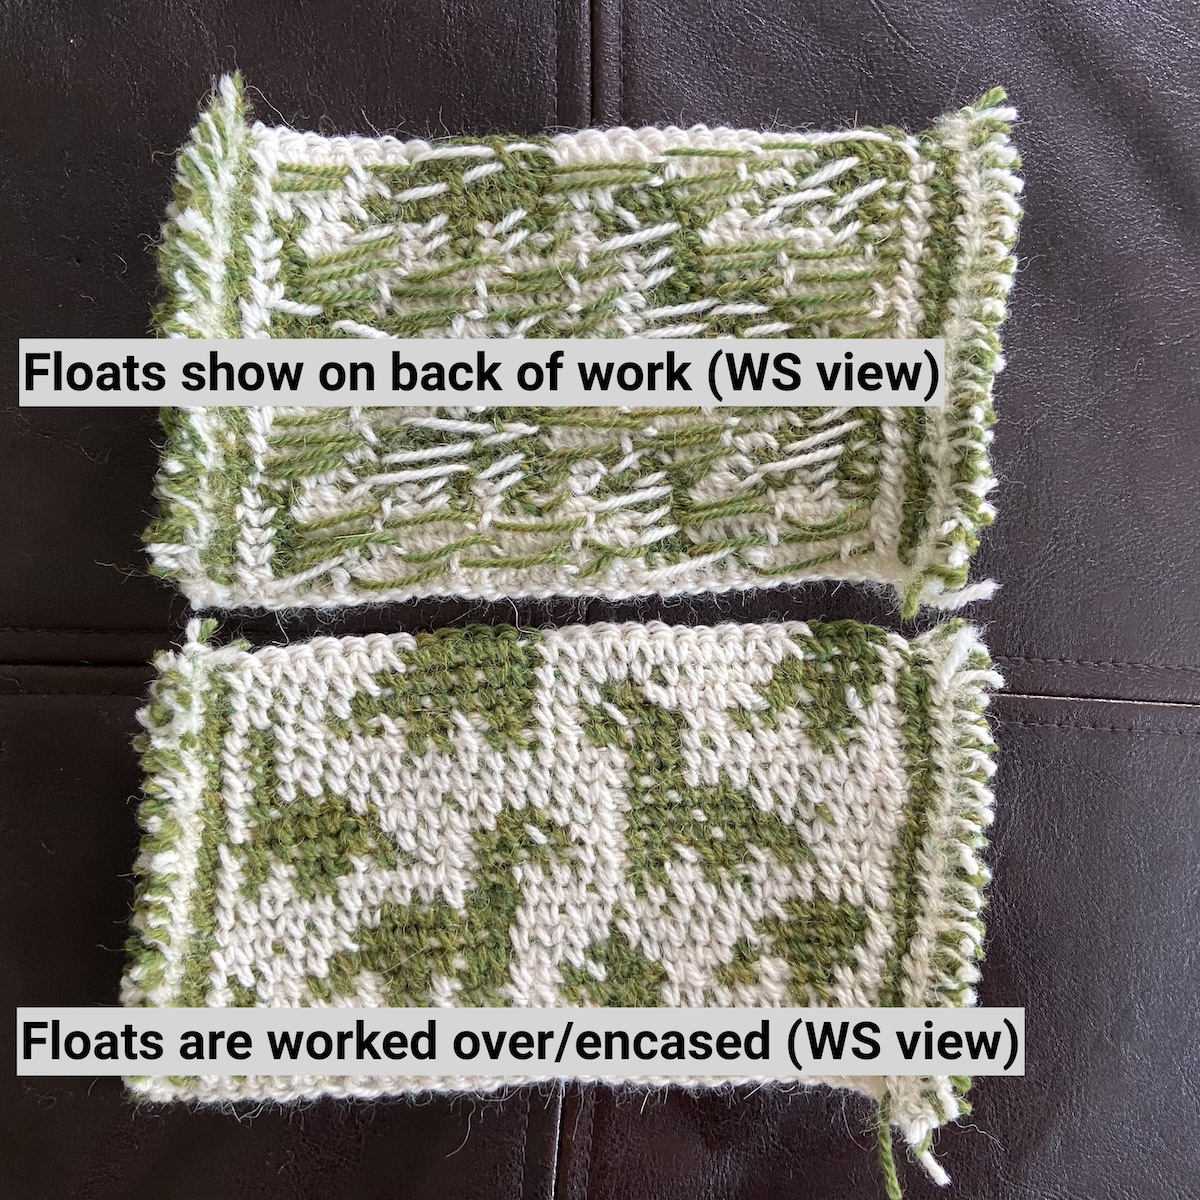
As you work across your rounds, you'll drop the old color and pick up the new color. The color that is dropped will be carried along your work and picked up later when you change back to that color again. This creates a longer strand of yarn that is connected from the last stitch where that color is used to the following stitch where the color is used again. This is called a “float”. When working in tapestry crochet, you'll need to decide whether you'll allow these floats to sit on the wrong side of your work, or if you'd like to encase them within your working stitches. (This is called “working over your floats”).
If you're making something where both sides will be seen, consider working over your floats. This will make the wrong side of your project look neater. Working over floats will also create a firmer fabric, and you can sometimes see just a hint of the color that you're working over between your stitches. If drape is very important, or if it bothers you to see that small amount of bleed through, consider allowing floats to be visible on the wrong side of your work.
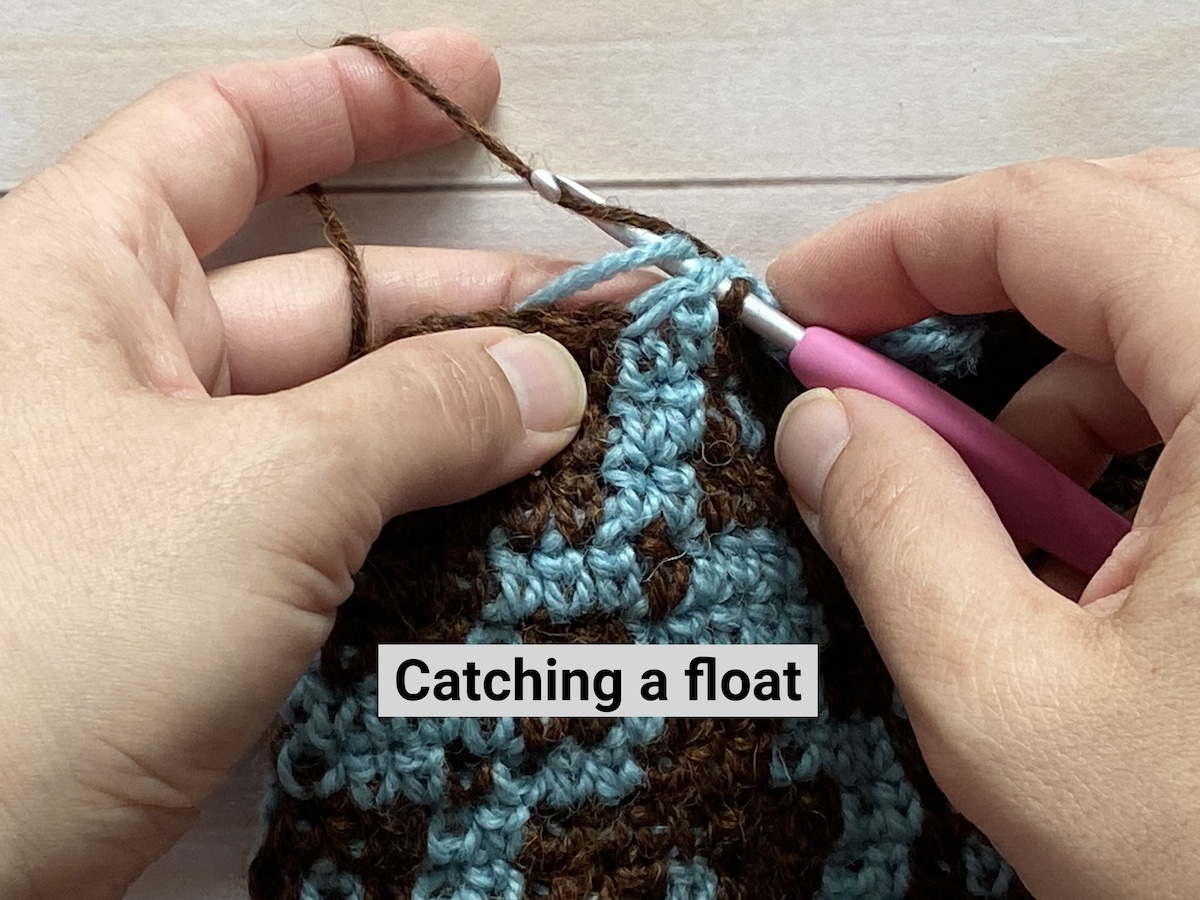
To work over your floats, simply hold the non-working yarn at the top edge of your work, and just slightly toward the back of the stitch and crochet around it when making your stitches in the working color. This traps the non-working color in place. Be sure to give that non-working strand a gentle tug right before you switch back to using that color so it isn’t too long and bunched up within your stitches because this could pop out between stitches later. Then pull on the fabric, as if to stretch it horizontally, to be sure that the non-working float isn’t too taut. You don’t want it to restrict the stretch of your project. This may seem awkward and time-consuming at first, but it will get easier as you practice, eventually becoming automatic.
As you continue switching back and forth between colors, your yarn might get twisted. This can be avoided by always setting down the darker color to the back of the strand you are picking up and setting down the lighter color to the front of the strand you are picking up.
Tapestry crochet is a very fun and fulfilling crochet technique. It takes a bit of practice to get quicker at switching between colors, so don’t expect to be able to breeze through your first tapestry crochet project. With practice, it will get much faster and the results will be so rewarding!
Tapestry Crochet Patterns
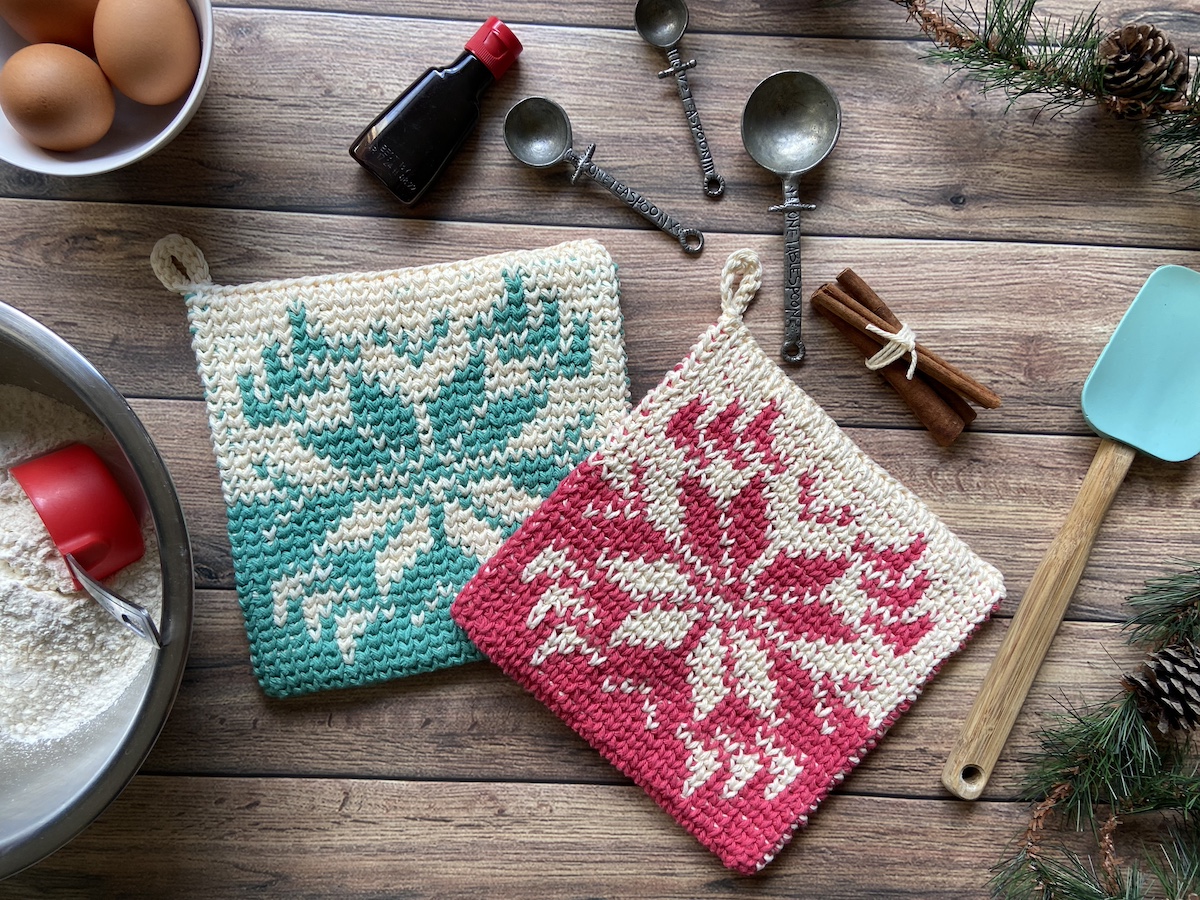
If you're interested in trying out tapestry crochet patterns, check out the full tutorial and pattern for this beautiful project available to our GOLD members: Winter Warmth Potholders
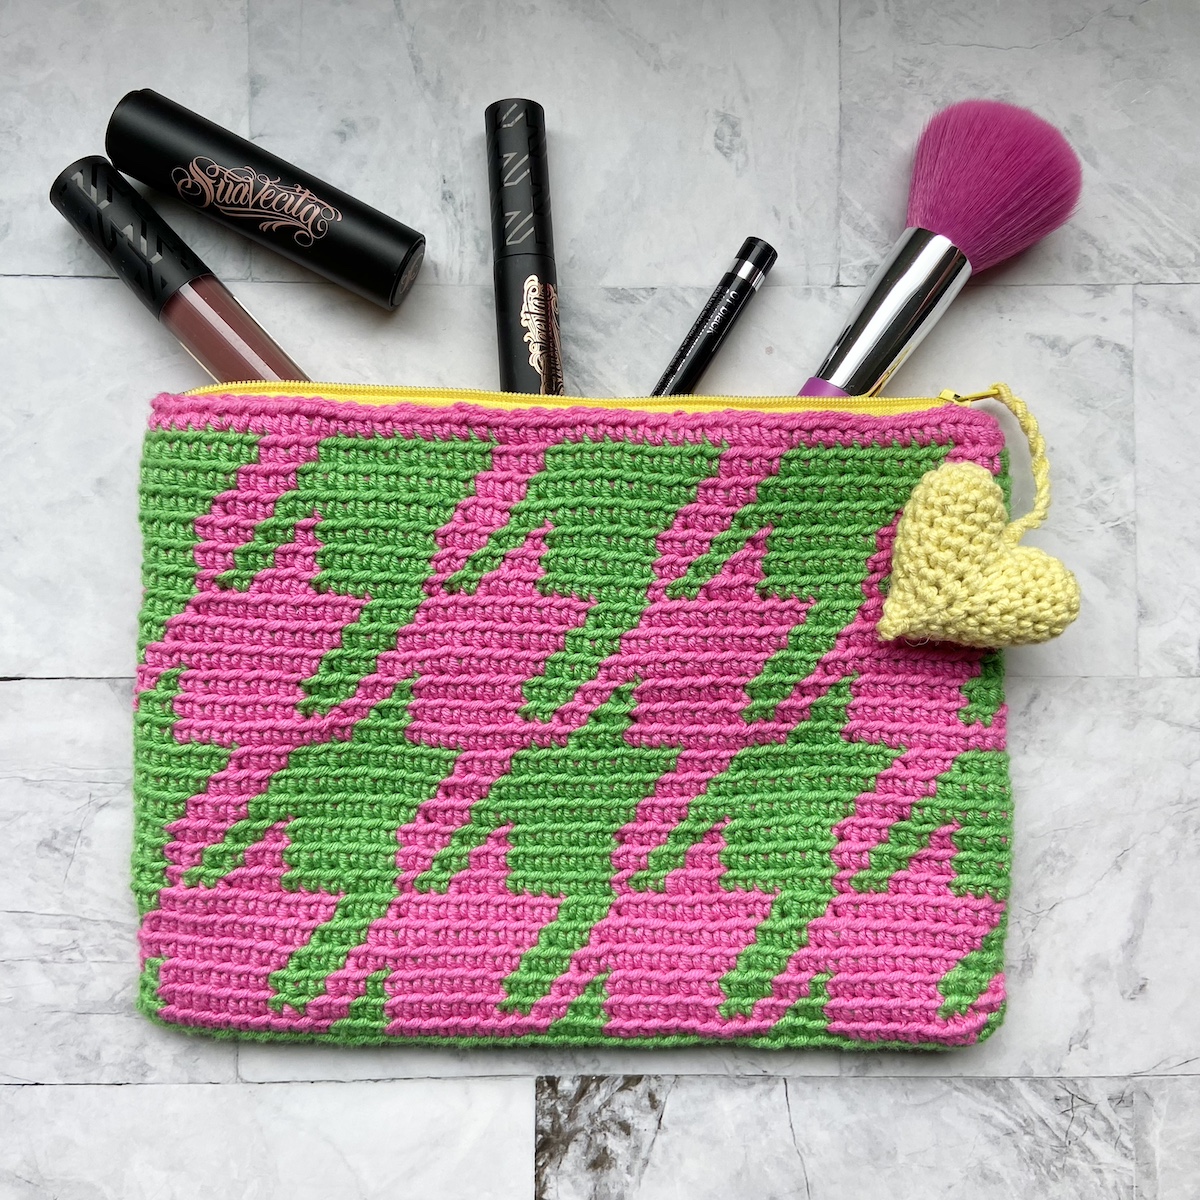
For a free tapestry crochet pattern that is available for everyone, check out the “All That Zipper Pouch” full tutorial and pattern!
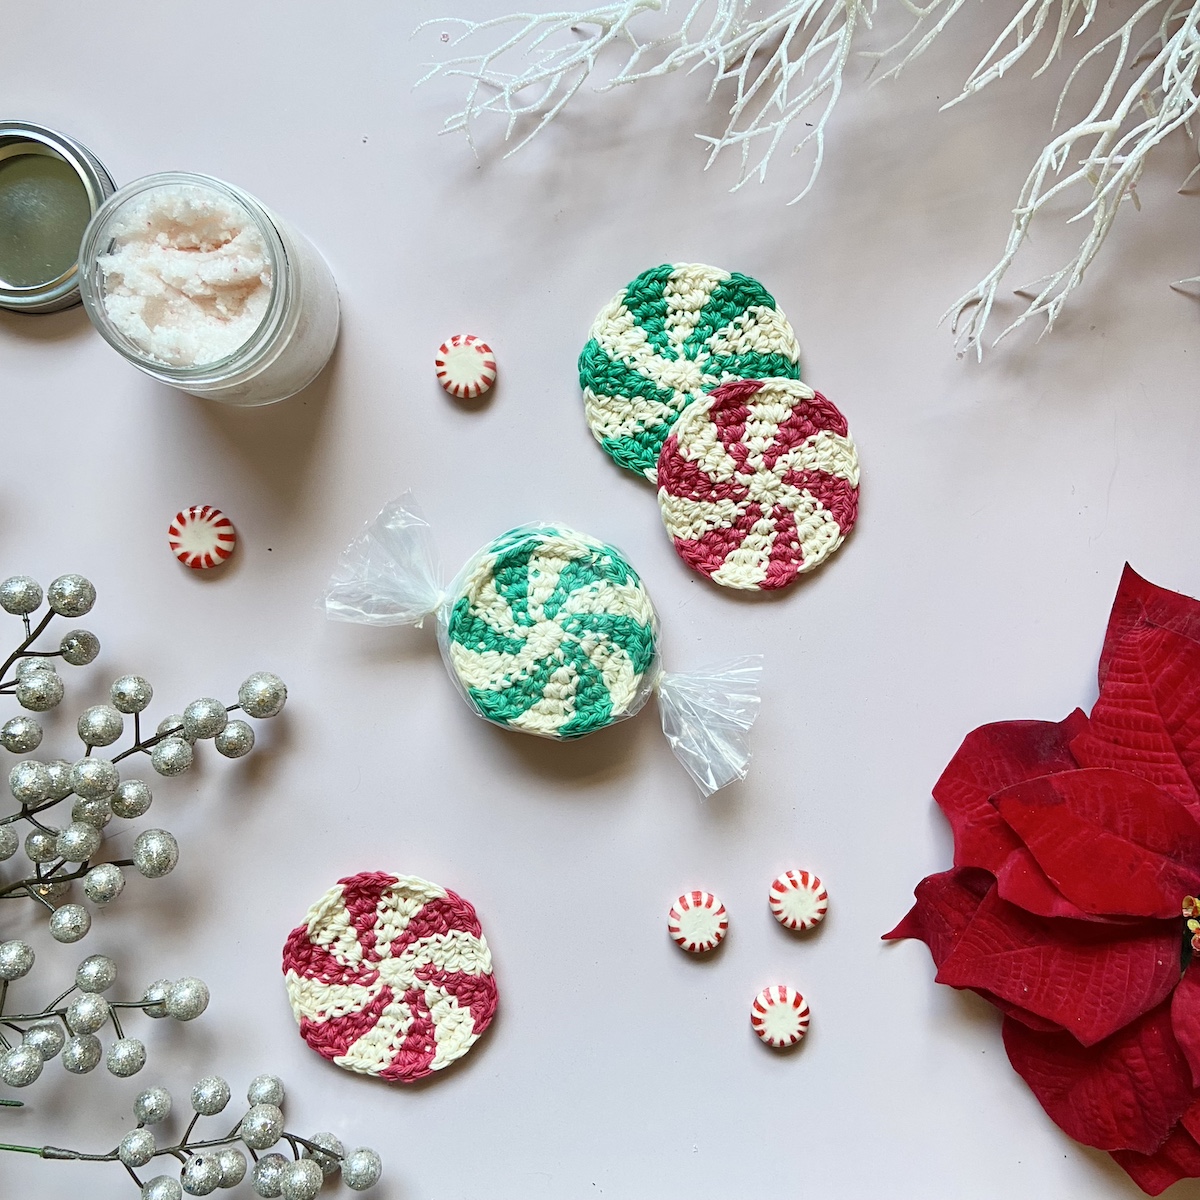
Watch for our live event and tutorial on the Peppermint Scrubbies for a quick and super easy taste of tapestry crochet. This live event is scheduled for December 3rd, 2024 but you can watch the replay at any time! You can download the free pattern here!
If you are interested in learning more about tapestry crochet, check out my book: The Hooktionary, which is available here on the Creative Crochet Corner website!

Thanks for this! A video someday would be great. . .