Brenda K.B. Anderson

Firedrake Lace Shawl

Brenda K.B. Anderson
Duration:   1  hrs 1  mins

Description

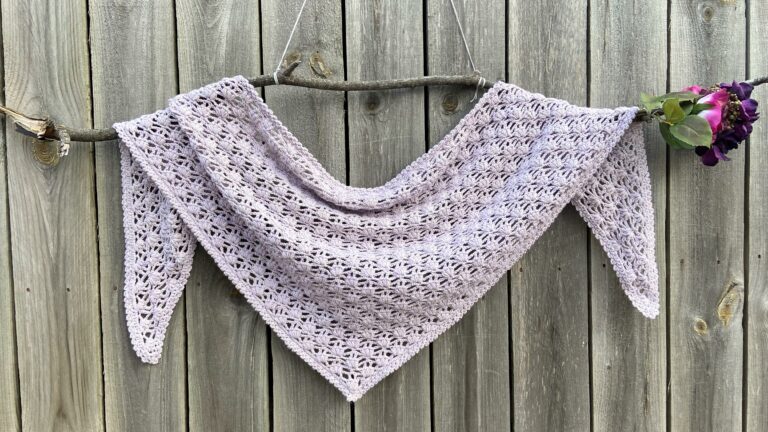
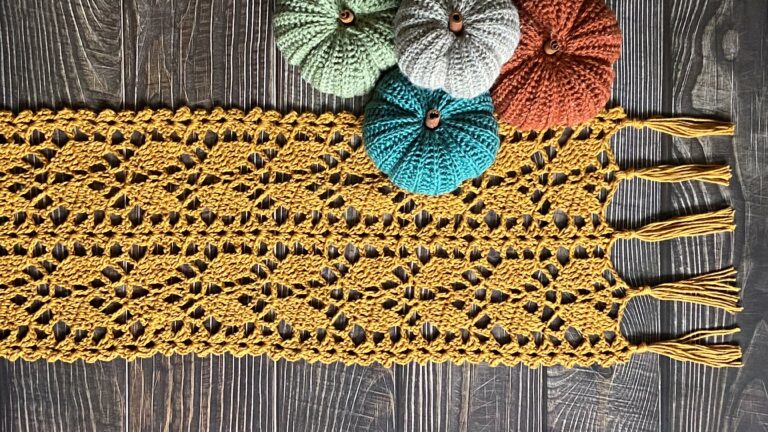
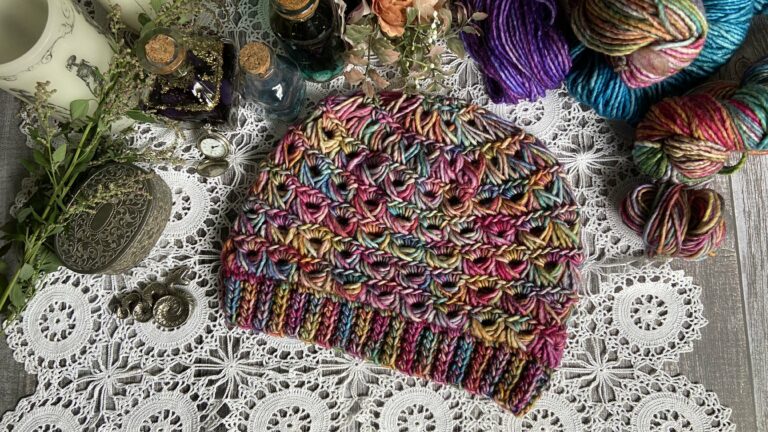
Reminiscent of the scales of a dragon, this lace pattern is bold enough to stand out, even when worked in a self-striping yarn. Tassels and semi-precious stone beads dress up this shawl, adding weight to the ends to create a beautiful drape and keep the shawl in place. Make sure to download the free Firedrake Lace Shawl pattern.

Share tips, start a discussion or ask other students a question. If you have a question for the instructor, please click here.

Make a comment:
characters remaining

3 Responses to “Firedrake Lace Shawl”

  1. Estela Lopez

    It’s looks beautiful can’t wait to Crochett one ❤️

  2. Robin DeBie

    The difference in Stitch Count referred to in my previous comment may be due to the “turning chain” that you count as one stitch and I may have counted it as three. Sorry for the confusion.

  3. Robin DeBie

    In written instructions, I think you may be missing the very last CH 7 before the final TR stitch at the END of ROW 8 (It is correct on row 4) and I’m not sure if the stitch count for that row is correct; I get 136 stitches, not 134 - but I’m not 100% sure. I tend to start out with the written instructions then go to the chart as I get more comfortable with the pattern. I made the shawl with a self-striping cake in purples and pinks and it is gorgeous!! Great for our southern weather. Thank you for this pattern!
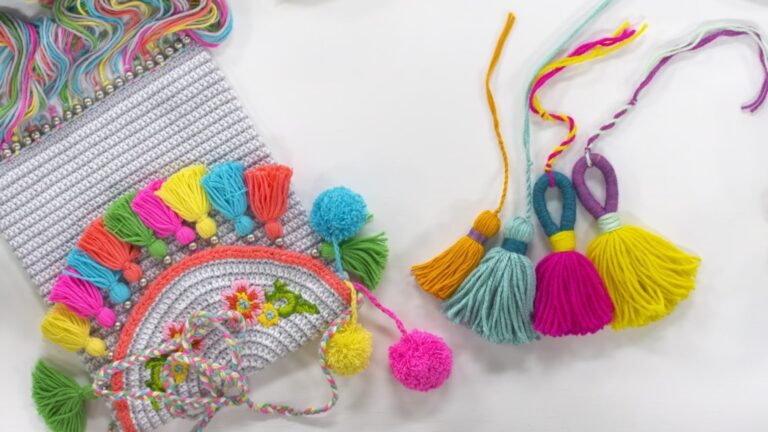
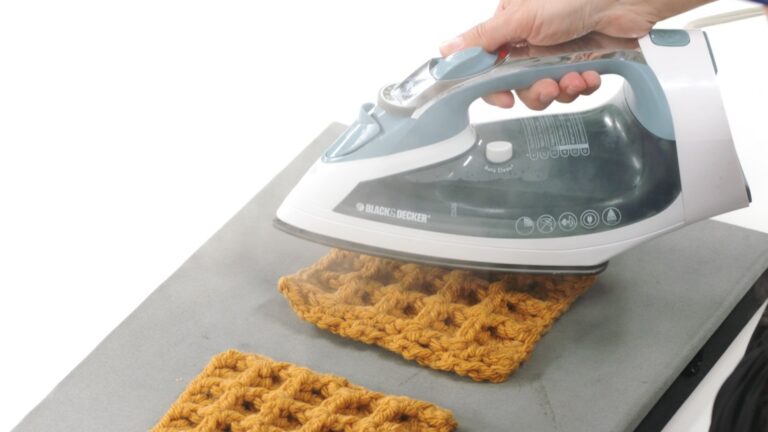
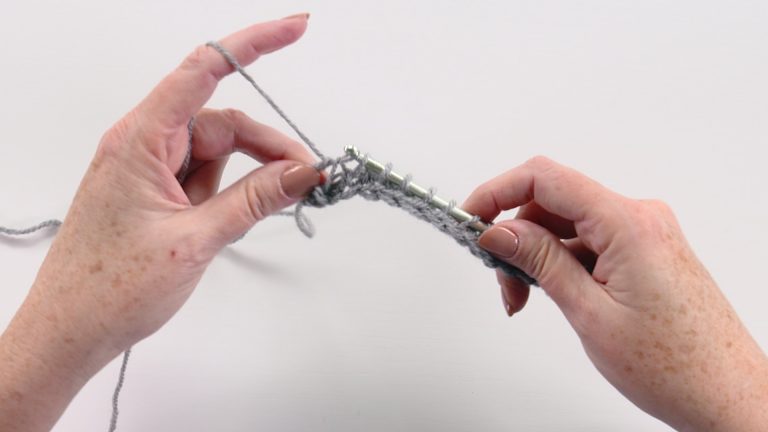
Hi everybody, welcome to our live crochet event. I'm Brenda K.B. Anderson, and today I'm gonna be showing you guys how to work up the Firedrake Lace Shaw. I'll show you what it looks like, here we go. It's a shawl that has lots of open work, but, the cool thing about this stitch pattern is that it is solid enough that you can work in a self striping yarn and you can still see the stitching details. So I'm super excited to show you guys how to do this. We'll be walking through all the steps of things you need to know in order to make the shawl. So I would say this shawl is probably more of an intermediate project, but if you have, if you're comfortable holding a hook and you've worked up some of the basic crochet stitches, like single crochet, double crochet, treble and chains, then if you're adventurous, I would say just go for it. All right, so the materials you will be needing, you'll need a large yarn cake close to 800 yards of yarn. This is a DK weight or like a lighter worsted weight yarn. And you will need a crochet hook that gets you the appropriate gauge, which is listed in your pattern. I used a G hook, which is a four millimeter hook, and of course you're gonna need your pattern. So you can find your pattern in the chat box or in the description and just click on that and that'll bring you to the download, which is a free download for anyone. All right, so this is a live event, so if you have any questions, any comments, if you wanna say hi, tell me what you're working on, tell me where you're working from, or another thing that I really love is when people jump in and say what kind of projects they're interested in making. Because I wanna make things that you guys wanna make. So you can leave that in the chat box as well. And I will be trying to get to all of your questions as I'm demonstrating all the techniques you need to learn. So first we have, oh, it looks like Jen Lucas made a nice compliment about my shawl here. She can't wait to make one. I can't wait to see it Jen, thank you so much for the compliment. We'll get started on the shawl. Let's work from the center out. And actually I wanna show you in the pattern, I made a stitch diagram here. It's towards the end of your pattern. Cause I am a visual learner and it really helps me to teach when I have a visual representation of what I'm making in front of me. So this is partly just for me, but also I know there's lots of visual learners. So I like to make charts for other people too, who like to think about the stitches and how they relate to each other and see it in a picture form. So if you've never worked a chart before, this is a good time to learn. It looks very complicated if you've never looked at this before, there's all these symbols and things, but when you break it down, there is a little legend at the bottom. This tells you what all the symbols mean. So you can look at this and see these little ovals and know there's four of them in a row, they are chains. That's what it says down here, so you know, you do four chains, and the thing I really love about charts is it shows you the position of the stitches. What stitch is worked into another stitch, like for example, all of these are treble crochets, and they're all pointing to this chain right here at the beginning. So you know that they are all worked into that chain and all the directions are written out in the pattern, with the words, you can read. And you know, that may help you to read the words at the same time looking at this chart. So if you don't like charts, that's okay. It's all written out for you. All the information you need is in the words as well. You don't actually need this chart, but this just helps me to orient myself. All right, so let's start by making four chains. There's four chains right at the beginning, and then we're going to work eight treble crochets into the first chain that we made. So we'll start by making a slip knot. So we just draw out a little e, a little cursive e, flip that over onto the strand of yarn that's attached to the ball, and then put your hook underneath that strand and pull on the two strands leading up to it and that will tighten up to your hook. Then we're gonna chain four stitches. So this does not count, 1, 2, 3, 4. And this is gonna count as the first stitch of your row. It's gonna count as a treble stitch, basically. So we have like a here and then this extra chain that we're gonna work everything into. So in order to do a treble stitch, we'll yard over twice, one, two, and then we're gonna insert our hook into that first chain. And you can do it from the front. You can do it from the back. It really doesn't matter where exactly you put your hook in this first chain. So you insert your, sorry, you insert your hook yarn over, pull up a loop, then you're gonna yarn over, pull through, just two, yarn over, pull through two, yarn over, pull through two. So you repeat that section three times, yarn over twice. Insert your hook into the same chain space. Yarn over, pull up a loop. Then we go yarn over, pull through two, yarn over, pull through two, yarn over, pull through two. All right, so now we have three stitches done, including our beginning chain, 1, 2, 3. So we'll do that a few more times a little quickly this time. 1, 2, 3, yarn over twice. Insert, pull up a loop. 1, 2, 3, yarn over twice, insert, pull up a loop, 1, 2, 3, yarn over twice, insert, pull up a loop, 1, 2, 3. All right, let's take a second to count our stitches, including that first chain, we have 1, 2, 3, 4, 5, 6, 7. We're gonna do it two more times. There's stitch number eight, and here's stitch number 9, 1, 2, 3, okay, so we've made it to this treble. And then if you take a look at this chart, you'll notice it goes black, blue, black, blue, black, blue. That's to help distinguish between the rows. It's can be really confusing to see what stitch is worked in which row, especially when for something like this, when for example in row five you have all these stitches worked here and then a single crochet there and then up here. So they're not placed, in an even row across, they're going up and down and over and up and down and over. So I like to alternate between colors just to make it a little bit more clear. So the blue section of stitches are worked on the wrong side, but actually the shawl, the right side and the wrong side, it doesn't really matter. It's pretty much reversible. I mean it does look a little different on the two sides, but both look great. So wrong side, take that with a grain of salt, just the other side. All right, so we have our nine stitches here. So then the next thing we're gonna do is we're gonna chain 1, 2, 3, 4, 5, 5 chains at the beginning of row two. So 1, 2, 3, 4, 5. That counts as a turning chain, and it also counts as a chain too. So here's your turning chain that counts as a treble, and then two chains that count as a chain too. So sometimes you'll see, oftentimes actually you'll see four chains counting as a treble. And I feel like you can use however many chains you need to for your turning chain to get it to the length you want. Don't let anyone tell you it always has to be four, or it always has to be a certain number for your stitch. You should do the same amount on every row, but whatever set of chains works for you to get the length that you want. So for this one, I made the shawl. I started out with four chains here instead of three chains, but then it got too long and stretched out. So I went back and I changed it to just three chains, but it's counting as a treble, so it's a mirror image on both sides. All right, so we've got our five chains, then we have two single crochets worked into this treble crochet. So we're skipping this treble crochet because we already, this chain is considered working into that treble. Then the next one, we're going to work two single crochets into that stitch. So we insert our hook, yarn over, pull up a loop, yarn over, pull through two, and we're gonna repeat that in the same stitch, insert, pull up a loop, yarn over, pull through two, that's two single crochets in that stitch. Now we're gonna do exactly the same thing in the next stitch insert, pull up a loop, yarn over, pull through two, insert, pull up a loop, yarn over, pull through two. So we have four single crochets right there, that's these four. Then we do two chains, and then we will do a series of a double crochet, four chains, double crochet into the next stitch. All right, so we'll do our two chains, one, two, and then we are going to work, oh, and then I should mention we're skipping one treble crochet. And then we're gonna work a double crochet chain, four double crochet into the following stitch. All right, so we're skipping this stitch, and then we're gonna work all that business into this next stitch. So yarn over, insert, yarn over, pull up a loop, yarn over, pull through two, yarn over, pull through two. That is the double crochet. We're gonna do four chains, 1, 2, 3, 4. And then we're gonna do another double crochet here in the same spot, so we yarn over, insert, yarn over, pull up a loop, yarn over, pull through two, yarn over, pull through two, that's the second double crochet. Then we're gonna chain two, 1, 2, skip the next treble, which is right here. And then we're going to work two single crochets into the next stitch. This is just like we did at the beginning of the row and two single crochets into the following stitch. One, two, then we chain two, and then we're gonna finish this row with a treble in the top of that turning chain. So we'll yarn over twice for the treble. And then we can go to the top of that turning chain, which is right here. Insert your hook, yarn over, pull up a loop, yarn over, pull through two, yarn over, pull through two, yarn over, pull through two, okay, so that's your treble right there. Then we're gonna start with row number three. Oh, looks like we have some love for the charts. Thank you so much you guys. I knew I wasn't the only one who likes charts. All right, looks like I missed a few comments here. Thanks for the pattern from New Jersey, Elaine. Hi Elaine, and you're working on two Afghans. Wow, those are big undertakings. All right, and Dara loves charts too. She's making summer scarves as gifts. All right and is this being recorded for future viewing? Yes, you will be able to watch this later at any time. All right, and hello to Elma viewing from Houston, Texas. And Tammy says, good morning from Bakersfield, California. Hi Tammy, all right, so here we are on row number three. We're gonna chain three. That's gonna count as our first treble, 1, 2, 3. And we're gonna turn our work to work in the opposite direction across our row. And then you'll see here there's a double crochet chain one and then two double crochets. And all of that business is worked into this chain two section here. So here's the chain two. I'll just pull this apart so you can see a little bit, right where my finger's going through. That's the chain two section. So we're gonna do a double crochet. So that's yarn over, insert, yarn over, pull up a loop, yarn over, pull through two, yarn over, pull through two, a chain one, and then two more double crochets, one, two, to that same spot. And then the next stitch is worked into the first single crochet that we see here from the last row. So we'll do a double crochet there, one, two. And then you can see here we have these three double crochets. Then we have a chain two space. And that chain two space is always gonna be over these two middle single crochets of the four single crochet section just to help orient you a little. So we'll do two chains, skip those two middle single crochets. And then we're gonna do a double crochet in the last of those single crochets, one, two, there's a double crochet, and then we are going to work two double crochets and then a chain over that double crochet. Okay, so two double crochets here. We're skipping that double crochet and we're just doing a chain above it. So here's first of our two double crochets, one, two, and then a chain one. And now we're going to do this section in the middle, which is three double crochets, four chains, three double crochets, all into this corner, the corner tip of the shawl. So, 1, 2, 3. And then four chains, 1, 2, 3, 4, and then three more double crochets, 1, 2, 3. All right, so we've made it here. We're gonna do a chain and skip over that double crochet. And then in the following space we'll work two double crochets, one, two, which leads us up to that four single crochets in a row section. So the first single crochet gets a double crochet in it. Here we go, double crochet. Then we do chain two just like we did on the first side. And then we do another double crochet in the last of those four single crochets, one, two. So here we are, right here, we are going to, whoops, right there, we're gonna do two chains. Oh, we already did those two chains. So right there. And then the first double crochet, we're gonna do two double crochets into that same chain space, two double crochets, chain one, and then another double crochet all into the end there. So we'll work two double crochets, one, two, a chain one right here, and then another double crochet. And then we end this row by putting a treble crochet into this turning chain. So remember the first three started counted as the turning chain, and then the next two counted as a chain two. So we count up 1, 2, 3 stitches from down here. So 1, 2, 3, and then we're gonna put a treble into that third stitch right there. 1, 2, 3, there's our treble. All right, so now we're on row four, and hello Bev, good morning to you too, from Sioux Center, Iowa. All right, so number four, we're gonna do, we begin this with a lot of chains. So the first three chains are gonna count as your first treble, which is a turning chain right there. Then this little U-shaped set of chains, there's seven chains in there. And those kind of form a place for us to put these arches. So think of this as being your turning chain or a treble stitch. And think of these seven as being a little loop to put all of those extra stitches in. But really when you look at it all together, you're gonna do 10 chains. So 1, 2, 3, and then 1, 2, 3, 4, 5, 6, 7. And then we're gonna do three double crochets into that first double crochet that we get to from row three. So we're gonna turn our work, yarn over, and here is between my thumbs, that is your double crochet that you're working into. So we're gonna do three into that stitch, 1, 2, 3. And then we're gonna chain one, and then we're gonna work three double crochets into the double crochets from the row below. So chain one, here's our three double crochets, we're gonna give each of those one double crochet, 1, 2, 3, and then we will chain seven and then do three more double crochets. So see how we're doing three double crochets, chaining seven, three double crochets. Then we chain one to get to the next section, the next repeat. So we've already worked through here, we're going to be doing our chain seven right there. So 1, 2, 3, 4, 5, 6, 7, and then three more double crochets, 1, 2, 3. And then we do one chain, skip over that chain one, and we do three more double crochets in the next set of three 1, 2, 3. And then we're right here, so we're gonna do seven chains, and then we're gonna do all this stuff in the middle four chain space. So we'll do our 7, 1, 2, 3, 4, 5, 6, 7. See there's our center right there. And we're gonna do two double crochets, chain two, two double crochets, one, double crochet, two, double crochets. Now we're chaining 2, 1, 2, and then we're gonna do two more double crochets, one, two, and then we're gonna do seven more chains. And then we'll work three double crochets into those three double crochets that come up next, so 1, 2, 3, 4, 5, 6, 7. And here's those three double crochets. So we're gonna do one double crochet, two double crochets, three double crochets. And then we chain one and we do three double crochets here, 1, 2, 3. So you'll notice there's a pattern here. There's two blocks of three double crochets that are just separated by one chain. There is a set, there's a set, there's a set. This is going to be repeating throughout the shawl, I'm just showing you so that you can help recognize where the stitches end up going. I feel like when you're making something like this, it can be kind of a daunting thing unless you kind of understand the relationship between where you're putting your stitches, then it makes it a lot easier. And you can memorize this. So 1, 2, 3, 4, 5, 6, 7. And now we're gonna do three double crochets here 1, 2, 3. And then a chain one. And there should be another set of three double crochets, but we only have that one double crochet to work into. So we're gonna put all three into that one double crochet. 1, 2, 3, okay. And then we're gonna do the very last chain, seven right there, so 1, 2, 3, 4, 5, 6, 7. And then a treble stitch that is going to be in the top of that chain three. Okay, so we yarn over twice. Here's the chain three, we're gonna put this in the third of the three stitches. And when you're working into these chains, it may, whoops, I think I lost some of my yarn overs. Sometimes when you're working into these chains, if they're kind of twisted and you're not really sure if you're supposed to put your hook in this way or under these two loops or those who, it honestly doesn't really matter, to me you just look at the stitch and put your hook in the proper stitch. That would be the third one from the bottom. And see if it looks okay. Don't worry about it if it isn't, under the perfect two. You know like when you're taught how to make your crochet chain, usually people are taught to stick their hook underneath those two v's on the top. Here, let me show you like these two v's. So if you're looking for your chain, you could be spending a lot of time looking for the perfect place to put your hook, but on this, it really doesn't matter. It just makes a little cord there, that your stitch is, you're not gonna be able to tell the difference. So put it wherever in that third stitch that it makes sense to you. All right, so we have our last loop and our last treble. So we're gonna start on row five. And you may have noticed that when we're working from this chart, we work all the black rows starting on the right side and working this way, and all the blue rows are working this way, okay? But if you are a left-handed person, you're going to be reading the chart in the same direction, but you're actually going to be working in the opposite direction. All right, so, and if you are a left-handed person, I would say you can just watch your video through a mirror or flip the image, then it'll look exactly like what it'll look like for you as a left-handed crocheter. Okay, so here we've made it to row number four, we're going to be working on row number five. This is my favorite row. When you get to do all these arches, it's a lot less trying to figure out, trying to orient yourself. It's very easy cause you just made all these loops to stitch into. So we're going to do a chain 3, 1, 2, 3, that counts as the first stitch of the row. And then we're gonna be doing 10 double crochets into the first loop. There's 10 here and there's 10 here. But all the rest of these will get 12. So the first and last get 10 because they're kind of, it's like an arch that got the end of it a little bit chopped off. All right, so we'll do 10 here, 1, 2, 3, 4, 5, 6, 7, 8, 9 and 10. So we've worked our 10. And then we do a single crochet into that chain one space that's right between those two sets of double crochets. So right there there's a little window. So we're gonna do a single crochet right into that space and that kind of pulls the arch over so that the side of your stitch is lining up at the tops of those. It's kind of fun. So Eric Mann has a question, where can I find some information on single crochet? If you take a look at the creative crochet corner website, there are videos that you can watch that will teach you how to make the single crochet stitch. And then after you've done the first archway and done your single crochet, basically you're just gonna make arches, single crochets arches, single crochets all the way across the row. So we're gonna be doing 12, like I said, 12 double crochets in all the rest of those little chain spaces, not little, they're kind of large chain seven spaces. So we yarn over once for double crochet, and we're doing 12 into this giant loop, all right? 1, 2, 3, 4, 5, 6, 7, 8, 9, 10, 11, 12. There we go, nice archway there. And then we're gonna do a single crochet, like I said before, in between those two sections of the double crochets. So single crochet right there. And we're gonna repeat this. And you may be looking at this piece and thinking it's kind of a strange shape and it doesn't quite look like the wide triangle that I have in this, you know, in the picture or in this chart. But that's because we haven't really worked enough rows yet to give this the proper shape. And also another thing that I really wanna stress is blocking your shawl. That'll make a really, really huge difference in how your shawl looks. It just gives it so much more drape. And we'll talk about that a little bit more at the end. So 1, 2, 3, 4, 5, 6, 7, 8, 9, 10, 11, 12, okay. And that brings us to the center section and we just put a single crochet into that chain two space right there. And then we're just gonna continue making 12 here, single crochet, 12 here, single crochet. And then when we get to this last loop, we're going to only be doing 10, just like at the beginning here I'll show you. This is, look, our swatch changed color magically. So this is what we had just worked through. We've done all of these. I just added a couple more here at my hook, and I'll show you just that last loop that we get to here. Okay, so we've already done our last single crochet right there. And then we're going to do 10 this time, 10 double crochets into that last loop, 1, 2, 3, 4, 5, 6, 7, 8, 9, and 10, so we've done our 10. And then we are gonna be working a treble crochet in the top of this chain three. So you're gonna count up from the bottom 1, 2, 3. I'm gonna slide this over just a little, and then we're gonna do a treble into that third stitch. 1, 2, 3, 1, 2, 3, there's our treble. So like I was saying before, you know this, it's gonna widen out, it's gonna change shape a little as we do some more rows. It's not gonna be such a big dip right here, so you have to be patient. All right, so we are on row number, we just finished row number five, we're gonna be working row number six. So 1, 2, 3 stitches for a turning chain plus a chain 2, 1, 2, we're gonna turn our work. And then we are skipping the first two double crochets, and we're gonna be working a single crochet into each of the next four stitches. So this is your treble, and we're skipping two double crochets, one, two. So now we're gonna be working single crochets into the next four stitches. One, and Eric, here's how you do your single crochet. You insert your hook yarn over, pull up a loop, yarn over, pull through two. So now we have two single crochets, one more and there we go. So we have a set of four, then we are going to chain two, chain two, we're skipping all the rest of these in the archway, and then we're gonna put a treble into the single crochet. Okay, so we've chain two, yarn over twice for a treble. There's that single crochet that we had made between those arches sitting right at the bottom of the arch. So insert out hook there, pull up a loop, yarn over, pull through two, pull through two, pull through two, okay. And then we're gonna do another chain two. And this time we're going to be, instead of just skipping two, we're gonna be skipping 4, 1, 2, 3, 4. So because this has 12 double crochets in it, we're skipping the first four single crocheting in the next four and skipping the the last four basically. So every time you work across these in this row, you're gonna be working in that center four single crochets each time. So you'll have a chain two, single crochet, and then those four, chain two, and then a treble that reaches all the way down to that single crochet. That's what this row is all about. All right, so 1, 2, 3, 4, we're skipping those. And then we're gonna do four single crochets, 1, 2, 3, 4, chain two, and now we're going to do, we're skipping those last four double crochets. And we're gonna do a treble down in that single crochet, 1, 2, 3, chain two, skipping 4, 1, 2, 3, 4, single crochet in the next 4, 1, 2, 3, 4. Then we chain two. And here we are right here. We've just chained those two. Oops, we're coming from the blue row. So we're over on this side. So we've chained these two. We're gonna do a treble chain, four treble, all into that center, single crochet of the point of the shawl. Okay, so there's our treble, 1, 2, 3, chain 4, 1, 2, 3, 4, and then another treble in that same stitch, 1, 2, 3, and then two chains. And then we're gonna continue working in the same pattern across skipping 4, 1, 2, 3, 4, single crocheting into the next 4, 1, 2, 3, 4, two chains, treble in that single crochet down below. Chain two, skipping 4, 1, 2, 3, 4, single crochet in the next 4, 1, 2, 3, 4, chain two, here's your treble down below. 1, 2, 3, chain two, skipping 4, 1, 2, 3, 4. So even on this last one where we only had six double crochets, we are still skipping the first four stitches. And that is because on the way here at the beginning, we only skipped two, but that's because this is a mirror image of what we're doing over here. So we skipped four, worked four single crochets in the top, then we're skipping these two, and then we're going to create a treble into the top of this turning chain right here. So that's right there, that treble is going into the top of the turning chain, 1, 2, 3. Okay, so then row number seven, that's where we're at. Oh, hello Don from Washington, and hello, Maxine from Kentucky. Oh, Don has a compliment about my shawl. Thank you so much, Don. So nice to hear you like it. All right, so row number seven begins with a chain 3, 1, 2, 3, and we're gonna turn our work and then we're gonna work double crochet chain one, two double crochets into that chain two space. So there's our double crochet chain one, two double crochets, one, two. And this might look familiar to you because row seven is extremely similar to row number three, and we have already moved into our repeat section. So in the pattern it'll tell you you're going to be repeating row's number 6, 7, 8, and nine over and over. So once we get through row number nine, you'll know how to basically make the whole rest of the shawl. So we've got our two double crochets, let's see right here, our double crochet in the first of these four single crochet stitches, one double crochet right there. And then we're gonna do a chain two and skip two single crochets, double crochet in the last of that set of four single crochets. Okay, so we've got double chain chain, skipping those, double crochet in the last, and then we're going to do two more double crochets into this chain two space. One, two, chain one, we always do a chain one when we're going over the treble stitches, those tall treble stitches, we'll just do a chain one and skip over it and then do two double crochets in the next space. And then here's another set of four single crochets. So we're gonna do a double in the first one, chain two, skip the next two, and then a double in the last of those set of four single crochets. Then we're gonna do two more double crochets in the chain two space. And we have come to another treble. Remember how I said we skip over those and do a chain one and then we're gonna do two double crochets here, and then we've made it to our next set of single crochets. There's a double in the first, chain two, skip two, and then then a double in the last of those single crochets. All right, now we're gonna do two double crochets here, and we have made it to this section right here. We have worked those two double crochets, we got to a treble crochet, so we're gonna do a chain one and skip the treble, chain one, skipping the treble. And then we're gonna do three double crochets chain four, three double crochets all into this, the tip of the shawl here. So 1, 2, 3, chain 4, 1, 2, 3, 4, and then three more double crochets. One, two, three. Then we're gonna work our way back across. So we skip the treble and we'll do two double crochets. And then the third of the double crochets goes into that first single crochet, we chain two, skip two, this is a little bit of review here, double crochet in the last of the single crochet. And then we're gonna do two double crochets into that chain space, chain one, two double crochets in the next chain space. And a double crochet into that first of the four single crochets, chain two, skip two, double crochet in the fourth of the single crochets. And then we're gonna do two double crochets here in that chain two space. We're gonna skip that treble, do a chain on top of it, and then we're gonna work two double crochets in there in that chain two space. And here's another section of four single crochets. So double crochet, chain two, skip two, double crochet. And now we've made it to this last loop here. Well, let's see, where are we now, we're doing this section, we've made it to that last loop. So we're gonna do two double crochets, chain one, another double crochet into that space. So two double crochets, one, two, chain one another double crochet. And then we're gonna end with this treble in the top of that three chains turning chain. Okay, so remember there were five there, but we were just gonna count up from the bottom 1, 2, 3, and put our treble into the third, so 1, 2, 3. There it is. One, two, three, okay, so we've just completed this row right here and then we're gonna be working on row eight. So that's gonna begin by making out all those loops across like we did before. I'll start that out and then we'll skip ahead a little bit with my next sample. So we're gonna do the first chain 10. So it's three chains plus seven chains for the loop. So, one, two, three, and then 1, 2, 3, 4, 5, 6, 7. We'll turn our work and we're gonna do those three double crochets into this double crochet right here. So there's the double crochet. So that was their treble. There's their first double crochet on this to work into. So we're gonna do a three double crochets in that same spot. One, two, three, chain one. And then we're gonna do two double crochets in the chain space, one double crochet into the first of those. Oops, we're up here. I'm on the wrong row here. Okay, so we did our three double crochets, chain one over that chain space. So we'll do that, now we're gonna do three double crochets, chain seven. Okay, there was that chain space, it's kind of hard to see right there. So we're skipping that. And then we're gonna do three double crochets. One, two, three, and then we're gonna change 7, 1, 2, 3, 4, 5, 6, 7. And then we're gonna do three double crochets into these three double crochets. One, two, three, okay. So you can see the theory here is that every time you get to one of these chain two spaces, see they they're a little longer, that double crochet needs to move over a little bit. These chain two spaces are a little bit bigger than the chain one spaces. When you get to those chain two spaces, you're making a chain seven above it. And then every time you get to those sets of three double crochets, you're working your three double crochets into those stitches, okay? And then when you get to move on to our next sample here, let's see, okay, so I've moved a little further along that row, we're still in the same row. We've done three double crochets chain, one, three double crochets. So this is, let me find it on the chart here, working in the blue row, There's those three double crochets and then this chain seven space. So the three double crochets chain seven space. Then we have two double crochets chain two, two double crochets, that's what's right here. Two double crochets chain two, two double crochets. And then we're gonna continue working across making those chain seven spaces above the chain twos and working three double crochets into the three double crochets. And you can see there's a chain one space right here, right above that chain, one space from right there. So you end up with this kind of funky looking thing with the two loops up here at the top. So we'll be able to work the archway into that section there. Okay, so I'm just gonna show you the very end of row number eight. So we're right here. We've worked this section here. Then we're gonna chain 7, 1, 2, 3, 4, 5, 6, 7. And then we'll do, there's three double crochets there. So we do three double crochets into those one. Whoops, try that again. One, ooh, this is a stubborn one. There we go. Okay, here's a double crochet, another double crochet, third double crochet. Then we have a chain one. And you can see this is gonna be easy to miss. There's only one double crochet. And then that turning chain left. So we're gonna work three double crochets into that last double crochet one, two, all in the same stitch. One, two, three. And then don't forget, we have to do one more chain 7, 1, 2, 3, 4, 5, 6, 7. And then we're gonna finish with a treble into the top of that three chain turning chain, which is right here, one, two, three, I feel like that little section at the very end where you're doing those three double crochets, chain seven, and then the treble that might end up getting missed on, sometimes it's easy to forget 'cause it looks like you're at the end of your triangle and you've made it to the edge. But really you have to remember to put those three double crochets in another chain seven and the treble, just like it is on the chart. So then you're gonna continue making your archways just like we did before in row nine. That's exactly the same as row five. And when you come across, just to show you on this chart, these little red sections that says denotes repeat, this section, you repeat it over and over and over until what you have is left before you get to the center point is looks just like this. So however many times, 'cause as you work back and forth you're adding more archways and more archways. So it's gonna get longer and longer. So you're gonna end up repeating the section more and more with each time you repeat rows six through nine. So you just do that as many times as you need to until what's left to get to the center point Looks just like this. But the instructions will help you, you know the written instructions if that doesn't make sense with the whole repeat thing, but I think as as you are working on it and you can see how your shawl is taking shape and how the stitches relate to each other, that it'll be a little bit more clear. I do wanna point out that this little section here, this is not a complete chart, this is just like the tip of your shawl. It changes for the last three rows. You repeat these, six through nine over and over and over and over until you have only three rows left to work. Then I just wanna point out the difference between this and this, they're worked almost the same except if you look in row number 39, that would be very similar to row seven here, we have three double crochets chain four, three double crochets. We're missing the four chains here. That is because I wanted the tip of the shawl to only have one archway and not to have two. 'Cause I felt like that looked weird. This is what it would look like if you didn't do this. I just didn't really like having those two there. I wanted it to look, you know, to have a central point that came down. So I changed the bottom just a little bit. So that one is missing the chain four. And then when you do the next, you'll see this was two double crochets chain two, two double crochets. And all this stuff is different. So we only have double crochets in the double crochets and then your chain seven here. And then when you work that last row, row number 41, you're just repeating the single crochets in your chain one spaces and your archways of 12, that's all the same all the way across. You just end up having one fewer of these chain seven loops to work into. So, not that you even need to pay attention to that when you're working row number 41, you just do 12 double crochets to make the archways, and then a single crochet in those chain one spaces in between. So that's pretty simple. I just wanted to show you what the difference was, what this little chart was all about. It's just to help you visualize what's happening at the tip. But that's all in the written instructions as well. So once you do that, you're gonna finish off and block yours shawl, weave in your ends. And please don't skip the blocking of the shawl part. I know you know, a lot of people don't think that blocking is super important and for some projects it really isn't. But this is one of those projects that it actually really is. You can kind of see here, this has not been blocked, it's a little bit wobbly, it's not, you know, it doesn't have the kind of drape that it will end up having once you block it, wet blocking, this is an acrylic yarn that I used here and if you're using the same yarn that I used or another acrylic yarn, I would highly recommend blocking with steam instead of with water. Because just getting it wet and letting it dry doesn't really help it block very much. It just, it does help it a little bit, but when you steam it, it's like you are making all those fibers relax into the shape that you want them to be in. So here's the block shawl and you can tell the difference compared with this, it doesn't have as crisp of a look to it. It's kind of bumpy and wobbly and it just doesn't hang quite as nicely. And this, once you block it, steam it into place. And by steaming it, I just mean like you'll use a regular iron putting on a high steam setting and you'll put your iron just above your fabric, start out with maybe an inch or two above. And if that's not making it relax, then you can go a little closer. But don't touch your iron to your fabric cause I don't want you to melt it, that would be super sad. So yeah, you just wanna make sure it gets a lot of steam and then you can move the iron away and you can pat it into the shape that you want. Don't do that with your iron there 'cause you'll burn your hand. But give it a little steam, pat it into the shape that you want it to be in. So we're gonna talk about the tassels just a little bit before we finish up. If you guys have any more questions, please get them in, 'cause this will be the last thing that I show you in this session. The tassels are optional, of course you don't have to do the tassels, but I really was pleasantly surprised. This is the first shawl that I ever made with tassels and I liked how they looked, but I didn't realize until I actually put it on that it helps keep your shawl in place. It add a little bit of extra weight to the tips, the ends that hang down. And so it kind of just holds it there a little bit better, which I loved because that's one thing I love making shawls, but I don't wear shawls that often because I feel like I have to keep readjusting things and I don't really like, I don't have the patience for that, but maybe this will inspire me to make some more shawls. I don't know, 'cause now that I know this secret about the tassels, that's a game changer. All right, so you're gonna use your piece of cardboard, the dimensions are in your pattern and you're just gonna wind your yarn around it 60 times. So I don't know if I'm really gonna wind it 60 times, and it doesn't have to be exact, you can just kind of eyeball it or guess, but I gave you the number that I used, I think it was between 60 and 70 for my tassels, just so that you would know if you want them to look like mine. If you want them to be a little bit less poofy, you just wind it less, or if you're running outta yarn, you can wind it less. But you should have, if your gauge matches mine, for this shawl, the gauge does not need to be perfect. You can just stop working the repeats of rows six through nine, wherever you need to to alter the size of your shawl if you want. And then you continue with the next row to get the point. So you don't have to make it the same size as mine, but it is kind of important to at least see if you're in the ballpark with the size, because you might run out of yarn, it's possible that you might run outta yarn. There is a little bit of a buffer usually in my patterns, I like to add about 5% and say you need 5% more than what I actually used because people's gauges differ just a little bit. And especially if you're substituting with a different yarn, I just would really hate to know that somebody ran out of yarn in their project. That would be very frustrating. All right, so let's just pretend I wrapped it 60 times. I probably didn't quite wrap it that many, but, we'll say it's 60, cut it off. And then you should have, this is per tassel, you're gonna need two lengths of 30, about 30 inches long. You can just eyeball that doesn't need to be perfect, per tassel of a matching color to your tassel. Or you can do this however you like. It can be, if you want it to look like mine, this part is the matching part, so I just left it one piece folded in half. And you can definitely do that or you can cut this end too. But basically we need 30 inches doubled. That's what I'm running through here. So I just pulled it underneath all my strands and I'm pulling it up to the top edge of the cardboard and I'm gonna tie it into a tight knot here. Whoops, my scissors wanted to get in on an action there. All right, so we're tying this in a tight knot here. Oops, I got a little tangle. All right, when I'm tying tight knots, I like to yank on it, but I also do this thing where I twist it upside down. That seems to help it not come loose as I'm tying the second half of it. I mean, if you have a buddy who can put their finger there even better, but that seems to work pretty well. So this needs to be on the top edge of your cardboard. And then you can release it here, by cutting along that bottom like that. And then we're going to take our yarn needle, thread two of the strands held together through the yarn needle. And then, let's see, we'll use this for my, pretend this is my shawl, This is what the bottom row will look like. And you are going to put your needle, whoops, we gotta get our beads here. If you're using beads, which you don't have to, but I liked that they gave it a little extra weight and just a little extra, a little extra pizzazz. But you are gonna have to find beads that have a fairly large hole. This is about a quarter of an inch, this hole in here. And also another thing to think about with the tassels and the beads, if you are planning to wash this in the washing machine, because this is an acrylic yarn, you could wash it in the washing machine if you wanted to. It might not, the tassels might not hold up very well, they might get kind of frayed or little bit tangled. And I'm not sure how the beads would do. I mean, you could definitely hand wash this, but I don't know about, that's just something to think about if you, if hand washing is not your thing, I totally get it. But just think about, just think about whether you wanna do that before you add the tassels. All right, so I chose three beads in two different colors, and what you'll do is you'll thread, let's see, oh actually we need to have all four of these go through our bead all at once. All right, I'm gonna trim these ends to make it a little easier. I need to get them through my needle. So we're gonna put, we're gonna go dark bead, light bead, dark bead, up through there. And then we're gonna put, send all of your yarn tails through that space between your double crochets and your treble crochet or that chain. That counts as a treble crochet, that's where I put mine. You can kind of see right here where that little gap is. And then you are going to use your arm needle to send them back through all the beads like this, all of the strands like that, and then divide those in half. And we're gonna open up our tassel like that. So you can see where we had tied before, that's where you open it up to. And then you're just going to tie your two ends together underneath there. And when you do this, don't tie it super tight because I mean the knot should be tight, but if you really pull on that, it's going to start pulling this fabric down into your beads. It's gonna start pulling the tip of your shawl down into your beads, so just watch for that. I had that problem the first time 'cause I was kind of cranking on it a little bit too enthusiastically there. Okay, so once you get the first knot, then you can tie the second knot really tight like that, make it really tight so it can't come undone. Then you can fold that all back down. See how you have beads and your tassel. And then I used contrasting yarn, two pieces of contrasting yarn to hold together. The reason I'm using yarn doubled is just to make it stronger and make it look a little nicer. Then you will, you don't have to do this with a contrasting yarn if you don't like how that looks. So you're just going to tie a knot around your tassel, just decide on how much of the little bump at the top of the tassel you want. I think I stayed maybe like an inch below, something like that. But you know, just have to kind of eyeball it, make it nice and tight. I'm gonna twist this to make it hold a little bit better. Okay, I'll tie it really tight and then I wrapped my contrasting yarn around a couple of times, just for fun to make it look nice. You don't have to do that. It should be plenty stable without wrapping it a bunch of times. But I just liked how it looked. So wrap it around a couple of times and then you're gonna tie a knot again right there like this, nice and tight. And then to hide this, if you do this in the same color, you can just trim it off down here and that's no big deal. But I did not, I did it in a contrasting color. And so I wanna hide these inside this part of the tassel. So I will just thread all of these through my needle at once. You could do this separately if you're having trouble getting 'em all through there at the same time. And then I'm gonna go in from underneath where I tied the all that stuff together and I'm gonna push my needle up next to where those threads go through. Like the yarn from that goes all the way up through here. So it doesn't really have to be in this specific spot, I just find it easier than instead if you came through here and then you tried to get back your needle back in the same spot, it would be hard to see. So I kind of just go back and forth inside this blob of yarn couple times until it feels like it's pretty secure. And then I send it back down into the middle here. There it comes. Okay, make sure that we pull that in enough, we don't see it. And then you can just trim this off and it'll be hidden inside there. Underneath all the tassely bits, and then the last thing that you would wanna do is you just wanna trim the bottom so that it looks, give it a little bit of a haircut. We've got some random wispy bits sticking out. You know, even if you're really careful, it's still hard to make it perfect the first time, right? So you just trim off the bottom so that it's even, and that's what the bottom of your tassel will look like. Just like that, cute. All right, let me just check in here. Looks like we don't have any more questions. And Don commented out on the big difference after the blocking. Yes, there is a very big difference. And just take it from me, somebody who doesn't always block their stuff, like this is an actually important step of this particular project. It just will make a really big difference. It makes it look so much more tidy and professional and just gives it a lot more fluid look to it. It's just a lot prettier. So yeah, I really enjoy teaching you guys how to work on the shawl and I hope that you make your own shawls and I will be back next week for another tutorial. So please look for that coming up at the creative crochet corner, thank you, bye.
Get exclusive premium content! Sign up for a membership now!